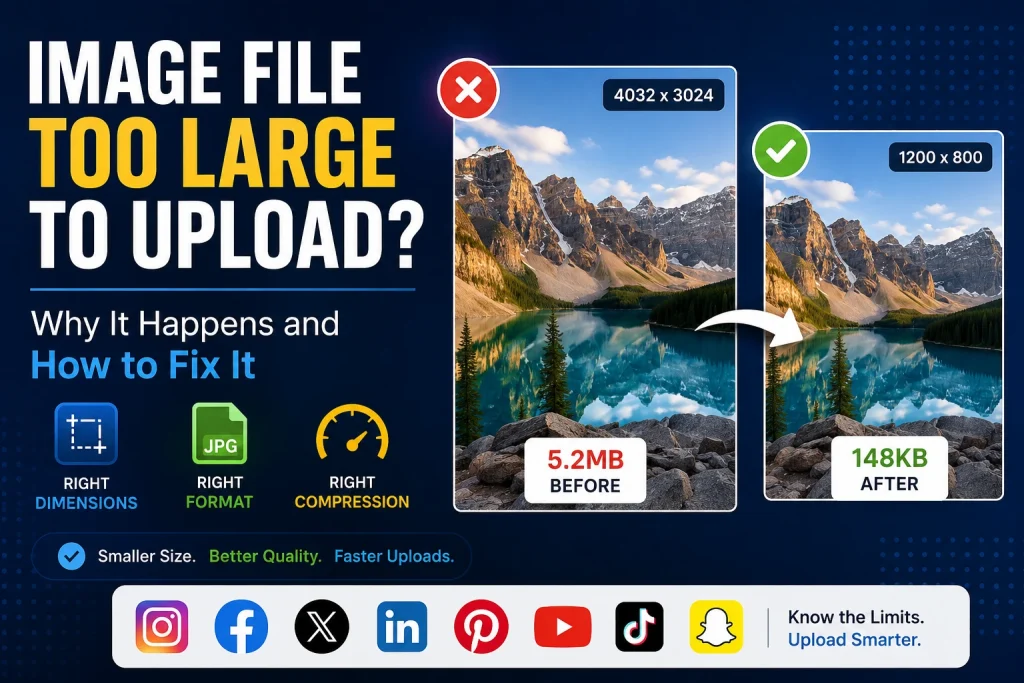
When an online platform says that your image file is too big to upload, there’s a 99% chance that it falls into one of these categories – you have an incorrect resolution of the image, its format is not suitable for the particular case, or it has no compression at all. It doesn’t matter how much a 5 MB image taken by a smartphone would be compressed to – 200 KB with no quality being lost while viewing. The current article provides detailed information on the issue in question.
Why Is Your Image File Too Large? — The Core Causes
Understanding why an image is too large tells you exactly how to fix it. There are three main causes — and most oversized images suffer from all three simultaneously.
Cause 1 — Wrong Pixel Dimensions
The most frequent reason why images become too big in size is that pixel dimensions are too large compared to the usage case. An average smartphone shot at the size of 4032 × 3024 pixels (12MP) has more than 12 millions of pixels. If the same image needs to be displayed on some website in the size of 800 × 600 pixels, then it contains 25 times more data compared to the display size.
Each pixel contains data, namely the three channels: red, green and blue at least 3 bytes each. Thus, a 4032 × 3024 pixel image contains about 36 MB of pixel data without any kind of compression. A properly sized 800 × 6024 pixel version contains about 1.4 MB of data, which is 25 times less.
The mathematical relationship: Doubling both pixel dimensions quadruples the file size. A 2000 × 1500 image has 4× the pixels of a 1000 × 750 image — and roughly 4× the file size. Getting dimensions right before compressing is always more effective than compressing alone.
Cause 2 — Wrong File Format
The decision to save an image in the PNG format rather than JPG or WebP is one of the most widespread reasons for large images. PNG is a lossless format that saves every pixel without any compromises in compression. An image saved in PNG will take up 5-10 times more space than the same image saved in WebP with the 85% quality setting.
Using a different format instead of compressing an image or altering its size may lead to reducing its file size by 70-90%. For instance, a 4 MB PNG product image will weigh only 300 KB when it is saved in the WebP format.
Cause 3 — Insufficient Compression
Despite having the proper format and the correct dimensions, pictures may be too big when there is no compression involved. Most cameras and phones come with the highest image quality setting. But since this is not always necessary when using the picture for something else besides archiving purposes, this means that they will create overly big files.
A 1200 x 800 pixel image in JPG format that is stored at maximum quality level (100%) in the camera may be around 800KB. At 85% quality level, the same picture would be 150KB and look the same as the first one. Compression will cut this down by 80%.
File Size Limits for Every Major Platform
Different platforms have very different file size limits. Knowing the exact limit for each platform tells you exactly what target to aim for.
Social Media File Size Limits
| Platform | Image Size Limit | Recommended Size | Best Format |
|---|---|---|---|
| 8 MB per image | Under 1 MB | JPG or WebP | |
| 4 MB per image | Under 1 MB | JPG or WebP | |
| Twitter / X | 5 MB per image | Under 1 MB | JPG or WebP |
| 5 MB per image | Under 1 MB | JPG or WebP | |
| 20 MB per image | Under 2 MB | JPG or WebP | |
| TikTok | 287 MB (video) / 50 MB (photo) | Under 2 MB | JPG |
| YouTube | 2 MB (thumbnail) | Under 500 KB | JPG or WebP |
| Snapchat | 5 MB per image | Under 1 MB | JPG |
Why platforms compress your images anyway: Though you might think that uploading a photo at or near the limit would keep it at that quality, every single social media site will recompress your images according to their algorithms. This is true even if the image you have is of high-quality. Even on Instagram, for instance, all the images that are uploaded are recompressed.
The practical effect of this is that an upload of a 7.9MB picture on Instagram, which is just under the limit, is not going to be any different from a 500KB image that is optimized properly. In fact, the latter tends to work better because they provide a clearer start point for Instagram’s algorithm.
Email File Size Limits
| Email Service | Attachment Limit | Recommended Image Size |
|---|---|---|
| Gmail | 25 MB total | Under 1 MB per image |
| Outlook | 20 MB total | Under 1 MB per image |
| Yahoo Mail | 25 MB total | Under 1 MB per image |
| Apple Mail | No enforced limit | Under 1 MB per image |
| iCloud Mail | 20 MB total | Under 1 MB per image |
The practical email limit: Even when an email service allows 25MB total attachments, sending large image files causes problems. Large emails take longer to deliver, are more likely to trigger spam filters, fill up recipients’ inboxes quickly, and load slowly on mobile connections. For business emails with multiple image attachments, keep each image under 500KB and total attachments under 5MB.
Website and CMS File Size Limits
| Platform | Default Upload Limit | Adjustable? |
|---|---|---|
| WordPress | 2 MB (typically) | Yes — via php.ini |
| Shopify | 20 MB per image | No |
| Squarespace | 20 MB per image | No |
| Wix | 25 MB per image | No |
| Webflow | 4 MB per image | No |
| BigCommerce | 8 MB per image | No |
WordPress’s 2MB default: The default maximum upload size in WordPress is determined by the PHP settings of the server and it is normally 2MB but many hosting providers allow for much bigger sizes. Once the maximum allowed size for uploads is reached in WordPress, then you can choose to either make the image file size smaller than the limit or increase the PHP memory size via your hosting provider’s control panel or php.ini file. The second choice is most often the optimal one since images above 2MB should be optimized.
Government and Institutional Form Limits
Many government portals, job application systems, visa applications, and university admission forms have very strict image size limits — often 100KB to 500KB for profile photos and document scans.
| Common Use Case | Typical Size Limit | Notes |
|---|---|---|
| Passport photo upload | 100 KB – 500 KB | Usually JPG only |
| Job application photo | 100 KB – 2 MB | JPG or PNG |
| University admission | 100 KB – 1 MB | Usually JPG |
| Visa application | 100 KB – 500 KB | Specific dimension requirements |
| Government ID photo | 50 KB – 200 KB | Very strict requirements |
These limits are often the strictest you’ll encounter — and they’re often accompanied by specific pixel dimension requirements too. A passport photo might need to be exactly 600 × 800 pixels and under 200KB simultaneously.
How to Fix Image File Too Large — Step by Step
The Three-Step Fix
Every “file too large” problem is solved by the same three-step process applied in the right order:
Step 1 — Choose the right format
Step 2 — Resize to the correct pixel dimensions
Step 3 — Compress to the target file size
The order matters. Resizing before compressing is more effective than compressing first. Converting format before compressing gives you a better compression starting point.
How to Fix Image Too Large Online — The Fastest Method
Using a Free Online Compressor
The fastest fix for any device — no software, no account, works in seconds.
- Go to imageconvertertools.com/image-compressor
- Click upload or drag your image into the box
- The tool automatically analyses the image and applies smart compression
- Preview the before and after file sizes
- Download the compressed image
For most everyday “file too large” problems — social media uploads, email attachments, website uploads — this single step is enough. The compressor reduces file sizes by 60 to 90 percent while keeping visual quality indistinguishable from the original at normal viewing sizes.
If the compressed image is still too large for your specific limit, also resize to the correct dimensions using our free Image Resizer and then run through the compressor again.
Converting Format to Reduce File Size
If your image is a PNG photograph, converting to WebP or JPG before compressing gives dramatically better results.
- PNG photograph to WebP: Use our PNG to WebP converter — typically reduces file size by 70 to 90 percent
- PNG photograph to JPG: Use our PNG to JPG converter — typically reduces file size by 60 to 85 percent
- JPG to WebP: Use our JPG to WebP converter — typically reduces file size by 25 to 34 percent
Format conversion alone often solves the “file too large” problem without needing any additional compression.
How to Fix Image Too Large on iPhone
Using Safari and an Online Tool
- Open Safari on your iPhone
- Go to imageconvertertools.com/image-compressor
- Tap the upload area
- Select your image from Photos or Files
- Tap Convert / Compress
- Download the smaller image to your Files app
This works on all iPhone models without any app. The compressed image saves to Files and can be shared or uploaded from there.
Using iPhone’s Built-In Mail Sharing
When sharing a photo through the Mail app on iPhone, iOS offers size options:
- Open Photos on your iPhone
- Select the photo you want to share
- Tap the Share button
- Tap Mail
- Before sending, iOS shows size options — Small, Medium, Large, Actual Size
- Choose Small or Medium to reduce file size
Small typically reduces images to around 200 to 300KB. Medium reduces to around 500KB to 1MB. This is a quick fix for email attachments — but it gives you no control over exact output size or quality. For precise control, use the online compressor.
Changing iPhone Camera Settings for Smaller Photos
If you regularly find iPhone photos are too large for uploads, you can reduce the resolution your camera saves at:
- Go to Settings > Camera > Record Video — reduce video resolution
- For photos, go to Settings > Camera > Formats and select Most Compatible — this saves as JPG instead of HEIC
JPG photos from iPhone are typically 2 to 4MB — significantly smaller than the 4 to 8MB HEIC files iPhones save by default. For converting existing HEIC files to smaller JPG, our guide on how to convert HEIC to JPG covers every method in detail.
How to Fix Image Too Large on Android
Using Chrome and an Online Tool
- Open Chrome on your Android device
- Go to imageconvertertools.com/image-compressor
- Tap upload and select your image from the gallery
- Compress and download the result
This works on all Android devices regardless of brand. The compressed file saves to your Downloads folder.
Using Samsung Gallery
Samsung’s Gallery app has a built-in resize function on some models:
- Open the image in Samsung Gallery
- Tap the pencil/edit icon
- Tap the three-dot menu
- Look for Resize options
- Select a smaller size
The available options vary by Samsung model and One UI version. If this option isn’t available on your device, the online compressor works on all Android devices without any limitations.
How to Fix Image Too Large on Windows
Using Paint — Built Into Windows
Paint can reduce file size by converting PNG to JPG and saving at a compressed quality level.
- Right-click the image and select Open with > Paint
- Go to File > Save As
- Choose JPEG Picture
- Click Save
Converting from PNG to JPG in Paint typically reduces file size by 70 to 85 percent for photographs. Paint doesn’t give you a quality slider — it saves at a fixed quality level. For more control, use the online compressor.
Using the Windows Photos App
- Open the image in the Windows Photos app
- Click the three-dot menu
- Select Resize
- Choose a preset size or enter custom dimensions
- Save the resized version
The Photos app on Windows 11 includes basic resize functionality. For file size reduction through compression rather than just resizing, the online compressor gives better results with more control.
How to Fix Image Too Large on Mac
Using Preview — Best Free Desktop Option
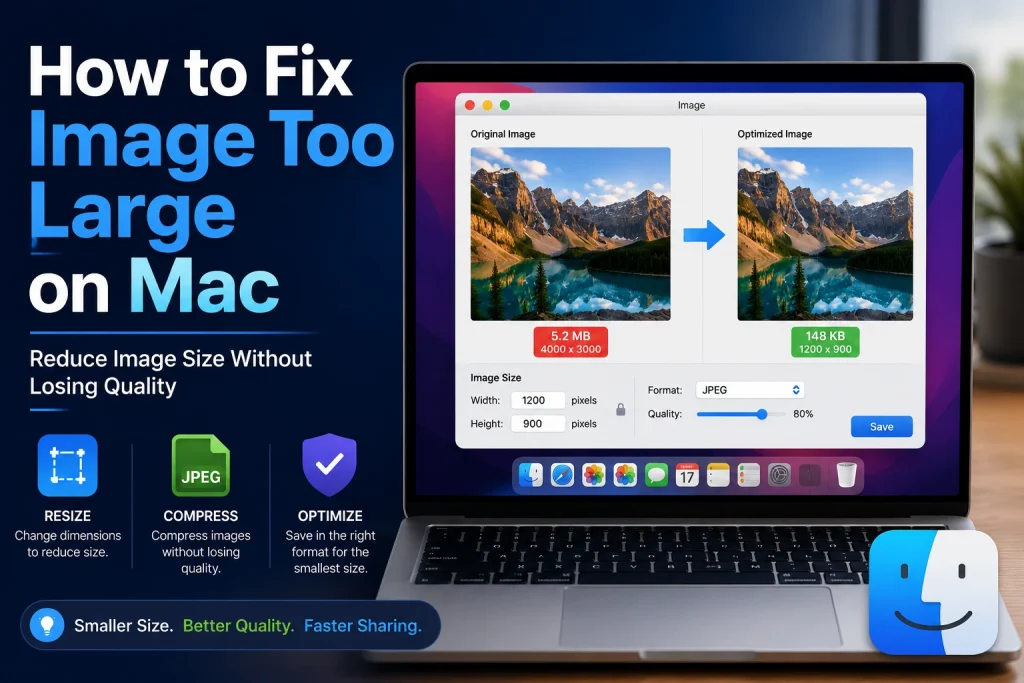
Preview on Mac is the most capable free tool for reducing image file size on any operating system. It gives you a quality slider and real-time file size estimates.
- Open the image in Preview — double-click it
- Go to File > Export
- Select JPEG as the format
- Use the Quality slider — set it between 70 and 85 depending on your target size
- Watch the estimated file size in the dialog — adjust the slider until it’s under your target
- Click Save
The quality slider with real-time file size preview is what makes Preview genuinely useful for hitting specific file size targets. If you need to get under 200KB, keep adjusting the slider down until the estimated size hits your target.
Batch Reducing File Size on Mac
For multiple images that are all too large:
- Select all oversized images in Finder
- Right-click and choose Open With > Preview
- Press Command + A to select all in the sidebar
- Go to File > Export Selected Images
- Select JPEG and set quality
- Choose a destination folder
- Click Choose
All images export simultaneously at the chosen quality level. This is the fastest free batch file size reduction method on Mac.
How to Fix Image Too Large for Specific Platforms
Image Too Large for WordPress
WordPress’s default upload limit is typically 2MB — set by the server’s PHP configuration. When you hit this limit, you have two options.
Option 1 — Reduce the image file size (recommended):
Compress and resize the image before uploading. A properly optimised website image should be under 150KB anyway — far below WordPress’s 2MB limit. Use the online compressor or Preview on Mac to reduce the file size before uploading.
Option 2 — Increase WordPress’s upload limit:
Add this to your wp-config.php file:
php
@ini_set('upload_max_size', '64M');
@ini_set('post_max_size', '64M');
@ini_set('max_execution_time', '300');
Or ask your hosting provider to increase the PHP memory limit. However, increasing the limit without optimising images just means large, slow-loading unoptimised images on your website — fixing the root cause is almost always better.
Image Too Large for Instagram
Instagram’s 8MB limit is rarely the problem — most phone photos are under 8MB. When Instagram rejects an image or compresses it aggressively, the issue is usually dimensions or format.
Fix for Instagram:
- Resize to the correct Instagram dimensions — 1080 × 1080px for square, 1080 × 1350px for portrait
- Save as JPG at 80 to 85 percent quality
- Keep file under 1MB for best results
Instagram’s recompression is less aggressive when you upload at exactly the right dimensions. Our article on how to resize an image covers the correct dimensions for every Instagram post type.
Image Too Large for Email
Email attachment limits range from 10 to 25MB depending on the provider — but individual images should always be much smaller than these limits.
Target sizes for email images:
- Profile photo in email signature: Under 50KB
- Inline email newsletter image: Under 100KB
- Photo attachment (casual sharing): Under 1MB
- Professional photo attachment: Under 2MB
To reduce an email attachment:
- Open the image in Preview (Mac) or use the online compressor
- Resize to a maximum of 1200px wide
- Save as JPG at 75 to 80 percent quality
- Check the file size — should be under 500KB for most photos
Image Too Large for Government or Visa Forms
Government and official forms often require images to be very small — sometimes under 100KB — while also meeting specific pixel dimension requirements.
Example — UK passport photo requirements:
- File size: Between 50KB and 10MB (strict upper limit)
- Dimensions: 600 × 750 pixels minimum, 1800 × 2250 pixels maximum
- Format: JPG
Example — US visa photo requirements:
- File size: Under 240KB
- Dimensions: Minimum 600 × 600 pixels
- Format: JPG
Fix for strict government form requirements:
- Resize to exactly the required pixel dimensions
- Save as JPG (almost always required)
- Start at 85 percent quality and reduce the slider until the file size is under the limit
- Verify both the pixel dimensions and file size before uploading
The online compressor is the most reliable tool for hitting specific file size targets — adjust compression until the preview shows the file is under the required limit.
File Size vs Image Quality — What’s the Right Balance?
Most people assume that reducing file size always means visible quality loss. At the right compression settings, this is simply not true for screen viewing.
Here’s what actually happens at different compression levels for a typical photograph:
| JPG Quality | File Size (1200×800 photo) | Visible on Screen | Visible at Print |
|---|---|---|---|
| 100% | 850 KB | Perfect | Perfect |
| 90% | 320 KB | Identical | Near-perfect |
| 85% | 220 KB | Identical | Excellent |
| 80% | 165 KB | Identical | Very good |
| 75% | 130 KB | Identical | Good |
| 70% | 105 KB | Barely noticeable | Acceptable |
| 60% | 80 KB | Minor artefacts | Poor |
| 50% | 60 KB | Visible artefacts | Bad |
At 80 to 85 percent quality, the file is 75 to 80 percent smaller than maximum quality — and visually identical on any screen at normal viewing sizes. This is why 80 to 85 percent is the professional standard for web image compression. You don’t need to sacrifice quality to reduce file size significantly.
Preventing Images From Being Too Large — Best Practices
Building good habits around image preparation prevents the “file too large” problem before it occurs.
Set Up a Pre-Upload Workflow
Before uploading any image anywhere, run it through this checklist:
- ✅ Correct pixel dimensions for the intended display size
- ✅ Correct format — WebP for web, JPG for email and social, PNG for graphics with transparency
- ✅ Compressed to under the target file size for the platform
- ✅ Verified file size before attempting upload
This takes 2 to 3 minutes per image and eliminates upload failures and slow-loading pages permanently.
Use Correct Camera Settings
Most smartphones offer options to reduce photo resolution or change capture format:
- iPhone: Settings > Camera > Formats > Most Compatible (saves as JPG instead of HEIC)
- Android: Camera app settings > Picture size — reduce from maximum resolution
- DSLR: Shoot in JPEG rather than RAW for images destined for web use — RAW files are 20 to 40MB each
Batch Process Images Before Uploading
For website owners adding multiple images at once, batch processing before upload saves significant time. Our Image Compressor handles multiple files simultaneously — upload all images together, compress them in one batch, download all optimised files at once.
Frequently Asked Questions
1. Why is my image file too large to upload?
The three most common causes are: pixel dimensions much larger than needed for the display context (a 12MP camera photo when you need an 800px wide image), wrong format (a photograph saved as PNG instead of JPG or WebP), and insufficient compression (saved at maximum quality when 80 to 85 percent quality is visually identical). Fix all three — resize, convert format if needed, then compress.
2. How do I reduce image file size without losing quality?
Use lossless compression (PNG or WebP lossless) for logos and graphics — no quality is ever lost. For photographs, use lossy compression at 80 to 85 percent quality — the quality difference from the original is invisible at normal screen viewing sizes. A 5MB photo can compress to under 300KB with zero visible quality difference on screen using WebP at 85 percent quality.
3. What is the maximum image size for Instagram?
Instagram’s technical limit is 8MB per image. But Instagram recompresses all uploaded images regardless — uploading a huge file doesn’t give you better quality in the final post. For best results, upload at 1080 × 1080px (square) or 1080 × 1350px (portrait) as JPG under 1MB. Instagram’s algorithm handles well-optimised uploads better than massive files.
4. How do I make an image smaller for email?
Open the image in Preview on Mac, go to File > Export, select JPEG, set quality to 75 to 80 percent, and save. On any device, use the online compressor. Target under 1MB for casual photo sharing by email, under 500KB for professional correspondence, and under 100KB for email signature images.
5. How do I fix WordPress “uploaded file exceeds the upload_max_filesize”?
Either reduce the image file size to under WordPress’s upload limit (recommended — well-optimised web images should be under 150KB anyway), or increase the PHP upload limit in wp-config.php or through your hosting control panel. Reducing the file size is almost always the better approach — it fixes performance at the same time.
6. What is the maximum file size for a passport photo upload?
This varies by country and system. The UK passport system accepts files between 50KB and 10MB. The US visa photo system requires files under 240KB. Most government systems require JPG format and specific pixel dimensions. Always check the exact requirements for your specific application and use the quality slider in an export tool to hit the exact size limit.
7. How do I compress an image on iPhone without an app?
Open Safari, go to imageconvertertools.com/image-compressor, upload your image from Photos, compress, and download. Alternatively, when sharing a photo through the Mail app, iOS offers Small, Medium, Large, and Actual Size options — choosing Small or Medium reduces the file size significantly for email sharing.
8. What is the best file size for website images?
Under 150KB for most web images — hero images, blog featured images, product photos. Under 30KB for thumbnails and icons. Under 200KB for large hero images and banners. Under 300KB for full-width background images. These targets are achievable with WebP format at 80 to 85 percent quality without any visible quality difference at screen viewing sizes.
9. Does reducing file size affect image dimensions?
Compression alone does not change pixel dimensions. A 1200 × 800 image stays 1200 × 800 pixels after compression — only the file size changes. To change pixel dimensions, you need to resize the image. For the best file size reduction, do both — resize to the correct display dimensions and compress. The combination reduces files far more than either step alone.
10. How do I batch compress multiple images at once?
Use our online Image Compressor — it supports multiple file uploads so you can compress a whole batch in one go. On Mac, Preview’s Export Selected Images feature also handles batch compression — open all images in Preview, select all in the sidebar, go to File > Export Selected Images with JPEG format and your chosen quality setting.
Conclusion
A file image that is too big to upload is usually caused by three problems that are fixable, namely incorrect pixel size, incorrect format, or low compression. These three problems usually take less than two minutes to solve through free applications. The solution to these issues is always the same, which is to have the correct format, correct pixel size, and sufficient compression to reach the desired file size.
Knowing the maximum file size for every platform used, such as Instagram having a maximum file size of 8MB or even government forms having only up to 50KB, will determine the exact goal to reach. And knowing that 80 to 85 percent compression quality is the same as the original at screen size viewing makes uploading oversized files unnecessary.
Build the optimisation habit now and “file too large” errors become something you never see again. Every image you upload is smaller, loads faster, and uses less storage — with no visible quality difference.
Use our free Image Compressor to fix any oversized image in seconds — no sign-up, no watermarks, batch compression supported, completely free on any device.