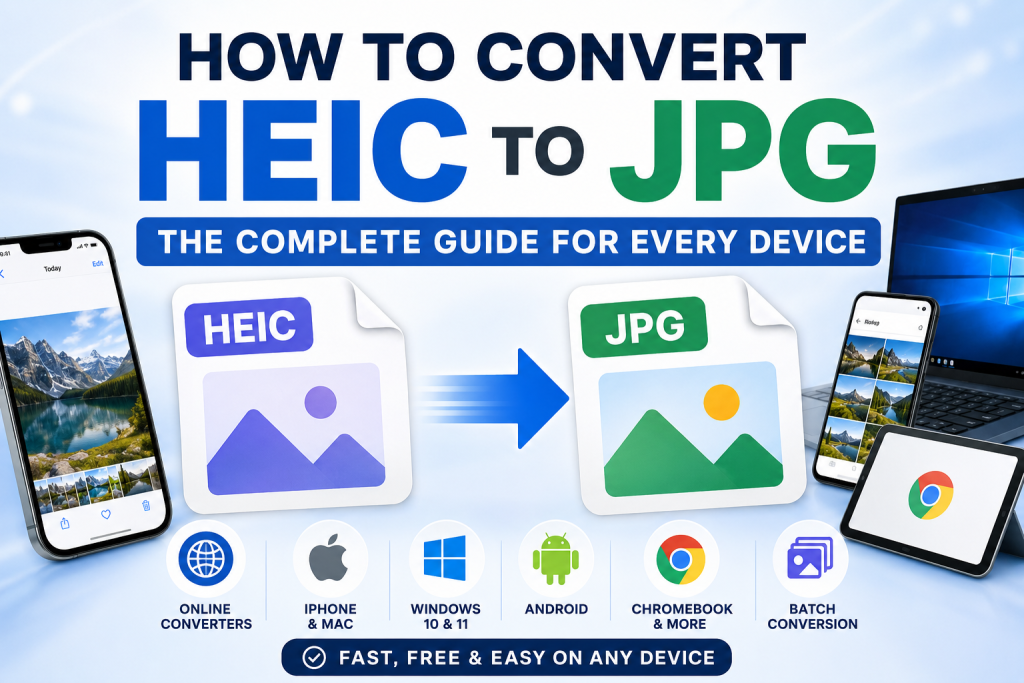
You take a photo on your iPhone, send it to someone, and they cannot open it. Or you try to upload it to a website and get an error saying the format is not supported. Or you move your photos to a Windows PC and none of them open properly. This is the HEIC problem — and it affects millions of iPhone users every single day.
HEIC is the default photo format on iPhones running iOS 11 and later. Apple switched to it because it produces significantly smaller file sizes than JPG while keeping the same or better image quality. From Apple’s perspective, this is a smart move — your phone fills up more slowly and photos look just as good. The problem is that HEIC is not universally supported outside the Apple ecosystem, and the rest of the world largely still runs on JPG.
This guide covers everything you need to know. What HEIC actually is, why iPhones use it, how to convert HEIC to JPG on every device and platform, how to stop your iPhone from saving photos as HEIC in the first place, and practical tips that most conversion guides never mention. By the end you will have a complete solution for every HEIC situation you are likely to encounter.
What Is HEIC and Why Do iPhones Use It?
The Technical Background
HEIC stands for High Efficiency Image Container. It is Apple’s implementation of the HEIF format — High Efficiency Image File Format — which was developed by the Moving Picture Experts Group, the same organisation responsible for the MP4 video format. HEIC uses a modern compression algorithm called HEVC (High Efficiency Video Coding, also known as H.265) to compress image data far more efficiently than the older JPEG standard.
According to the Nokia Technologies HEIF specification overview, HEIF images are typically half the file size of equivalent JPEG images at the same or better visual quality. That is a genuinely significant improvement — it means your iPhone can store roughly twice as many photos in the same storage space without any visible quality difference.
HEIC also supports features that JPG cannot handle at all — multiple images in a single file (used for Live Photos and burst shots), 16-bit colour depth compared to JPG’s 8-bit, transparency, wide colour gamut support, and depth map data used for Portrait Mode. It is a genuinely more capable format than JPG in almost every technical respect.
Why HEIC Causes Problems
The problem is entirely about compatibility. JPG has been the universal image standard since the 1990s and is supported by essentially every device, operating system, application, and online platform on earth. HEIC is newer and adoption outside Apple products has been slow and inconsistent.
Windows 10 and 11 require a paid codec from the Microsoft Store to open HEIC files natively — though many people do not realise this and just see their iPhone photos as unrecognisable files. Android devices do not natively support HEIC. Many websites, online forms, and upload systems only accept JPG or PNG. Many older desktop applications cannot open HEIC at all. This compatibility gap is why converting HEIC to JPG remains one of the most searched image conversion topics globally.
Should You Convert HEIC to JPG or Change iPhone Settings?
Before jumping into conversion methods, it is worth understanding that you have two fundamentally different approaches to the HEIC problem. You can either convert HEIC files to JPG after the fact, or you can change your iPhone settings to stop saving photos as HEIC in the first place. Both have their place depending on your situation.
When to Convert HEIC Files After the Fact
Converting after the fact makes sense when you want to keep shooting in HEIC — to save storage space on your iPhone — and only convert specific photos when you need to share them with non-Apple devices, upload them to a website, or send them to someone who cannot open HEIC. This is the most storage-efficient approach and the one that makes most sense for most iPhone users.
When to Change iPhone Camera Settings
Changing your iPhone to shoot in JPG from the start makes sense if you regularly share photos with people on Windows or Android, frequently upload to platforms that do not support HEIC, or work with photos in software that does not handle HEIC well. The tradeoff is that your photos will take up roughly twice as much storage space on your phone.
We will cover both approaches in detail — conversions first, then the settings change at the end.
How to Convert HEIC to JPG Free Online — The Fastest Method
Why Online Conversion Is the Best Starting Point
For most people in most situations, a free online HEIC to JPG converter is the fastest and most accessible solution. No software installation, no technical knowledge required, works on any device with a browser — Windows, Mac, iPhone, Android, and Chromebook all work equally well.
Here is how to convert HEIC to JPG using our free tool:
- Go to imageconvertertools.com/heic-to-jpg
- Click the upload button or drag and drop your HEIC file into the area
- The tool automatically processes the file and converts it to JPG
- Preview the converted image to make sure it looks correct
- Click Download to save your JPG file
You can upload multiple HEIC files at once and convert them all in a single batch — useful when you have a large set of iPhone photos that all need converting. Files are automatically deleted from the server after conversion to keep your photos private.
Pros of online HEIC to JPG conversion:
- Works on any device — Windows, Mac, iPhone, Android, Chromebook
- No software installation or account required
- Supports multiple file uploads for batch conversion
- Fast — most files convert in under 10 seconds
- Completely free with no watermarks and no file limits
Cons of online HEIC to JPG conversion:
- Requires an internet connection
- Uploading photos to any server carries a small privacy consideration — avoid using online tools for sensitive personal photos if this concerns you
- Very large batches of high-resolution HEIC files may be slower to upload than using a desktop solution
How to Convert HEIC to JPG on iPhone
The Simplest Method — Share as JPG Directly from Photos
Most iPhone users do not realise that iOS has a built-in compatibility feature that automatically converts HEIC to JPG when you share photos with non-Apple systems. When you use the Share sheet to send a photo via email, AirDrop to a non-Apple device, or upload through a browser, iOS can automatically convert the HEIC file to JPG in the background.
To make sure this is working correctly:
- Go to Settings on your iPhone
- Tap Photos
- Scroll down to the Transfer to Mac or PC section
- Make sure Automatic is selected rather than Keep Originals
With Automatic selected, your iPhone will convert HEIC photos to JPG automatically whenever you transfer or share them with a non-Apple device or system. The original HEIC files on your phone remain untouched — only the shared version is converted. This is the most convenient solution for occasional sharing without needing any conversion tool at all.
When the Automatic Method Is Not Enough
The automatic sharing conversion does not work in every situation. If you are uploading a photo directly to a website through Safari on your iPhone, some sites may still receive the HEIC file rather than a converted JPG. If you are AirDropping to another iPhone or Mac, the HEIC file transfers as HEIC. If you need a standalone JPG file saved to your device for a specific purpose, the automatic method does not create that.
For these situations, use the browser-based converter directly on your iPhone:
- Open Safari on your iPhone
- Go to imageconvertertools.com/heic-to-jpg
- Tap the upload area
- Select your HEIC photo from your Photos library
- Tap Convert
- Download the JPG file — it saves to your Files app
The downloaded JPG can then be shared, uploaded, or used exactly like any regular photo. You can move it to your Photos library from the Files app if you want it alongside your other photos.
How to Save HEIC as JPG When Taking Photos on iPhone
If you want photos saved as JPG directly from the camera rather than HEIC, you need to change a camera setting:
- Open Settings
- Tap Camera
- Tap Formats
- Select Most Compatible instead of High Efficiency
Most Compatible saves photos as JPG and videos as H.264. High Efficiency saves as HEIC and HEVC. Switching to Most Compatible means every photo your camera takes from that point forward is saved as a standard JPG file. The tradeoff is that JPG files are roughly twice the size of HEIC files, so your available storage fills up more quickly.
Important tip: This setting only affects new photos taken after the change. Existing HEIC photos in your library remain as HEIC and need to be converted separately if you need JPG versions.
How to Convert HEIC to JPG on Windows 10 and Windows 11
The HEIC Problem on Windows — Why Your Photos Do Not Open
Windows does not natively support HEIC files out of the box on most installations. When you transfer iPhone photos to a Windows PC and try to open them, you typically see an error or a generic file icon because Windows does not have the codec needed to decode HEIC files. This is one of the most confusing and frustrating experiences for iPhone users who also use Windows computers.
There are several ways to solve this on Windows, each with different trade-offs.
Method 1 — Use an Online Converter on Windows (Recommended)
The simplest solution that requires no system changes is using a free online converter in Chrome or Edge.
- Open Chrome or Edge on your Windows PC
- Go to imageconvertertools.com/heic-to-jpg
- Upload your HEIC files — you can select multiple files at once
- Convert and download the JPG files
This works immediately with no installation, no Microsoft Store purchases, and no system configuration. It is the recommended first approach for anyone who only occasionally needs to convert HEIC files.
Method 2 — Install the HEIC Codec on Windows
If you frequently work with HEIC files on Windows and want them to open natively without converting, you can install Apple’s HEIC codec through the Microsoft Store.
- Open the Microsoft Store on your Windows PC
- Search for HEIC Image Extensions
- Install the free HEIC Image Extensions app from Microsoft
- Once installed, Windows Photos and File Explorer can open and display HEIC files natively
After installing the codec, you can open HEIC files directly in Windows Photos and use File > Save As to save them as JPG. You can also right-click HEIC files in File Explorer and use the Print option as a workaround to save as JPG through the print-to-file workflow.
Pros: HEIC files open natively in Windows after installation, no conversion needed just to view files
Cons: Requires Microsoft Store access, only solves the viewing problem — uploading HEIC to websites and other applications still may not work, does not batch convert files
Method 3 — Use Windows Photos to Convert After Installing the Codec
Once the HEIC codec is installed:
- Open the HEIC file in Windows Photos
- Click the three-dot menu at the top right
- Select Save As
- Change the file type to JPG
- Click Save
This works for individual files. For batch converting multiple HEIC files on Windows, the online tool remains the fastest approach.
Batch Converting HEIC to JPG on Windows
For converting large numbers of HEIC files to JPG on Windows at once, the online converter supports multiple file uploads. Select all your HEIC files at once when uploading and download all the converted JPGs together. This is significantly faster than converting them one by one through any desktop method.
How to Convert HEIC to JPG on Mac
Why Mac Handles HEIC Better Than Windows
Mac computers running macOS High Sierra (10.13) or later have native HEIC support built in. Preview can open HEIC files directly, and the Files app displays HEIC thumbnails correctly. This is because Apple designed HEIC and naturally built support for it into macOS at the same time they introduced it on iPhone.
However, native support for viewing HEIC does not automatically solve the problem of converting HEIC files to JPG for use in other contexts. You still need to convert when sharing with Windows users, uploading to platforms that do not accept HEIC, or working in applications that do not support it.
Using Preview on Mac — The Built-In Method
Preview is the easiest built-in solution for converting HEIC to JPG on Mac.
- Open the HEIC file in Preview — double-click or right-click and select Open With > Preview
- Go to File > Export
- Click the Format dropdown
- Select JPEG
- Adjust the quality slider if needed — 85 to 90 percent gives excellent quality at a reasonable file size
- Click Save
The exported JPG file is saved alongside the original HEIC file. The original is untouched — you now have both the HEIC and JPG versions.
Batch Converting HEIC to JPG on Mac Using Preview
Preview on Mac can handle batch HEIC to JPG conversion natively without any additional software — a feature most Mac users never discover.
- Open all the HEIC files you want to convert in Preview at the same time — select them all in Finder and press Space, or right-click and choose Open With > Preview
- Once Preview is open with all files, go to View > Thumbnails to see all images in the sidebar
- Select all thumbnails in the sidebar — press Command + A to select all
- Go to File > Export Selected Images
- Choose a destination folder
- Click Options to expand the format settings
- Select JPEG from the format dropdown and set quality to your preference
- Click Choose
All selected HEIC files convert to JPG simultaneously and save to the chosen folder. This is the fastest free batch conversion method on Mac and requires no additional software or online tools.
Tips for Better HEIC to JPG Conversion on Mac
- Set the quality slider to 85 to 90 percent when exporting — this gives excellent visual quality at a file size significantly smaller than maximum quality
- Check the colour profile on export — for web use, sRGB is the most compatible profile; for print, keep the original colour profile
- The original HEIC files are never modified — Preview always creates a new export file, so your originals are safe
- If you need to convert a very large number of files regularly, consider setting up an Automator workflow on Mac to automate the batch conversion process
How to Convert HEIC to JPG on Android
Android does not natively support HEIC files either, which makes transferring iPhone photos to an Android phone a common source of frustration. Most Android gallery apps cannot open HEIC files and simply display an error or a blank thumbnail.
Using a Browser on Android
The most reliable cross-device method is using a browser-based converter.
- Transfer the HEIC file to your Android phone — via Google Drive, email, or a USB cable from your computer
- Open Chrome on your Android device
- Go to imageconvertertools.com/heic-to-jpg
- Tap the upload area and select the HEIC file from your storage
- Tap Convert
- Download the JPG file to your Downloads folder
The converted JPG will open in any Android gallery app and can be used normally on any Android application or platform.
Transferring iPhone Photos to Android Without HEIC Issues
If you regularly transfer photos from an iPhone to an Android device, the most practical long-term solution is one of these:
- Change your iPhone camera format to Most Compatible (JPG) before shooting if you know the photos are primarily for Android use
- Use Google Photos to sync your iPhone photos — Google Photos automatically converts HEIC to a compatible format when accessed from Android
- Share via email with the Automatic transfer setting enabled on iPhone, which converts to JPG before sending
How to Convert HEIC to JPG on Chromebook
Chromebooks run ChromeOS which, like Android, does not natively support HEIC files. The browser-based approach works perfectly on Chromebook since Chrome is the native browser.
- Open Chrome on your Chromebook
- Go to imageconvertertools.com/heic-to-jpg
- Upload your HEIC file from your Downloads folder or Google Drive
- Convert and download the JPG
If your HEIC files are stored in Google Drive, you can also access them through the online converter by selecting Google Drive in the file picker when uploading. The converted JPG downloads directly to your Chromebook’s Downloads folder.
How to Convert HEIC to JPG in Google Drive
Google Drive has added basic HEIC support in recent updates, meaning you can now view HEIC files directly in Google Drive in a browser. However, Google Drive does not provide a built-in conversion tool to export HEIC files as JPG.
Method 1 — Download and Convert
- Right-click the HEIC file in Google Drive
- Select Download — Google Drive downloads the original HEIC file to your computer
- Upload the downloaded HEIC file to our free HEIC to JPG converter
- Download the converted JPG
Method 2 — Use Google Photos
If your HEIC photos are in Google Photos (synced from your iPhone), Google Photos handles the format compatibility automatically when you download images — it may offer the option to download as JPG depending on your browser and settings. Google Photos on Android always provides compatible versions of HEIC files when accessed from non-Apple devices.
How to Batch Convert HEIC to JPG
When You Have Hundreds of iPhone Photos to Convert
Many people discover the HEIC problem when they try to move their entire iPhone photo library to a new computer or cloud service. Suddenly they have hundreds or thousands of HEIC files that all need converting. Doing this one at a time is not realistic — you need a batch solution.
Best Batch Methods by Platform
On Mac: Use Preview’s Export Selected Images feature as described above. Select all your HEIC files, export as JPEG, and let Preview process them all. This is free, fast, and requires no additional software.
On Windows: The online converter supports multiple file uploads. For very large batches — hundreds of files — consider processing them in groups of 20 to 30 at a time for the most efficient workflow.
On iPhone: If you need to convert a large number of photos on your iPhone itself, the most practical approach is to enable the Automatic transfer setting in iPhone Photos settings. This does not convert files already on your phone but ensures all future shares and transfers send JPG rather than HEIC automatically.
Tips for Batch HEIC Conversion
- Sort your HEIC files into folders before batch converting so the output is organised from the start
- Keep your original HEIC files in a backup location before converting — they take up less storage than the equivalent JPGs and you may want the originals later
- If converting for a website or web use, also run the converted JPGs through an image compressor after conversion to reduce file sizes further. Our Image Compressor handles this quickly with no quality loss
- Check a sample of the converted files before deleting originals to make sure the conversion quality meets your needs
HEIC vs JPG — Which Is Actually Better?
Where HEIC Wins
HEIC is genuinely the superior format in several important ways. File sizes are roughly 40 to 50 percent smaller than equivalent JPG files at the same visual quality — a meaningful advantage for phone storage. HEIC supports 16-bit colour depth versus JPG’s 8-bit, which means more subtle colour gradations and better performance in high-dynamic-range situations. HEIC handles Live Photos, Portrait Mode depth data, and burst photo sequences within a single file. For pure technical capability, HEIC is the better format.
Where JPG Wins
JPG wins entirely on compatibility. Every device, every operating system, every application, every website, and every platform on earth supports JPG without any special handling. JPG has been the universal image standard for over 30 years and that universality is extremely valuable. For sharing, uploading, printing, emailing, and any situation where the image needs to work everywhere without conversion, JPG is simply more practical.
The Practical Answer
For most iPhone users, the best approach is to shoot in HEIC to save storage space, and convert to JPG only when you actually need to share or use the photo somewhere that requires it. This gives you the storage efficiency of HEIC day-to-day and the compatibility of JPG whenever you need it.
If you work extensively with images for web use, you might also consider converting your photos to WebP format after converting from HEIC to JPG. WebP achieves similar file size efficiency to HEIC with much better web compatibility. Our JPG to WebP converter makes this conversion straightforward, and our article on how to convert JPG to WebP explains all the advantages in detail.
Common HEIC Conversion Problems and How to Fix Them
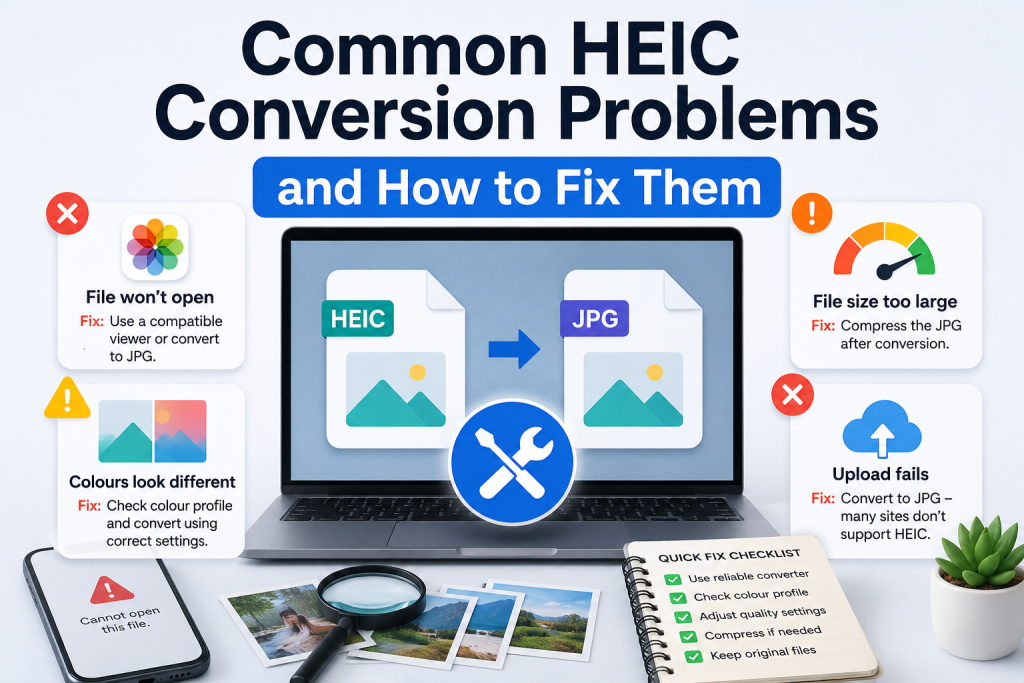
Converted JPG Looks Different in Colour to the Original
This is a colour profile issue. HEIC files often use the Display P3 wide colour gamut that iPhones shoot in, while many applications display JPG in sRGB. The conversion process needs to handle the colour profile correctly — if it does not, colours can look slightly different, typically slightly less vivid, in the converted JPG.
Fix: When converting on Mac using Preview, check the colour profile in the export settings. For web use, convert to sRGB. For print use, keep the original colour profile or convert to Adobe RGB. Good online conversion tools handle colour profiles automatically.
Converted JPG File Is Much Larger Than the Original HEIC
This is completely normal and expected. HEIC is a more efficient format than JPG. A 2MB HEIC file might become a 4 to 5MB JPG at the same quality. This is not a conversion error — it is simply the difference in compression efficiency between the two formats.
Fix: If file size is a concern, compress the JPG after converting. Our Image Compressor can reduce JPG file sizes significantly without any visible quality loss.
HEIC File Will Not Upload to the Converter
Some HEIC files — particularly those from very recent iPhone models — use newer variants of the HEIC format that some converters do not support.
Fix: Try the conversion on Mac using Preview, which always has up-to-date Apple format support. Alternatively, use the iPhone’s built-in share conversion by sending the photo via email to yourself — with the Automatic transfer setting enabled, the email attachment will be a JPG rather than a HEIC.
Live Photos Lose Their Animation After Conversion
Live Photos are stored as HEIC files with both a still image and a short video component. Converting a Live Photo HEIC to JPG converts only the still image component — the motion is lost. This is a fundamental limitation of JPG, which is a still image format.
Fix: If you need to preserve the motion from a Live Photo, export it as a video (MOV) rather than converting to JPG. On iPhone, share the Live Photo and choose Save Video to save the motion component. For static use where you just need the still image, converting to JPG is perfectly fine.
Tips to Get the Best Results When Converting HEIC to JPG
These are the practical tips that make a real difference in your conversion results but that most guides skip over entirely.
Always keep your original HEIC files — HEIC files are roughly half the size of equivalent JPGs. If you convert and delete the originals, you have used twice the storage space for the same photos. Keep HEIC originals as your archive and convert to JPG only as needed for specific uses.
Use 85 to 90 percent quality on conversion — Most conversion tools have a quality setting. Anything above 85 percent produces a JPG that is visually identical to the HEIC original at normal viewing sizes. Going higher than 90 percent gives diminishing returns — the file gets larger but the visual improvement is invisible on screen.
Convert in batches rather than one at a time — Whether you are using Preview on Mac or an online tool, batch processing saves significant time. Group your HEIC files and convert them all at once rather than going through the process for each image individually.
Check colour accuracy on a sample before batch converting — Convert one or two test images first and check them carefully in the application you plan to use the JPGs in. Make sure colours look accurate and the image quality meets your needs before committing to a large batch conversion.
Use the iPhone’s Automatic transfer setting for day-to-day sharing — You do not need to manually convert every photo. With the Automatic setting enabled in iPhone Photos settings, your iPhone handles HEIC to JPG conversion automatically whenever you share or transfer photos to non-Apple devices.
For web use, resize and compress after converting — A converted JPG from an iPhone photo is typically 3 to 6MB and several thousand pixels wide — far larger than needed for any web use. After converting, resize to the appropriate dimensions for your use case and compress the file. Our article on how to resize an image covers the correct dimensions for every platform and type of web use.
If you only occasionally need JPG, do not change your iPhone camera settings — The storage saving from HEIC is real and significant. Only switch to Most Compatible camera mode if you consistently need JPG files and the constant conversion workflow is genuinely inconvenient for you.
Frequently Asked Questions
1. What is a HEIC file and why does my iPhone use it?
HEIC stands for High Efficiency Image Container. It is Apple’s implementation of the HEIF image format, which uses a modern compression algorithm to produce image files that are roughly half the size of equivalent JPG files at the same or better visual quality. iPhones running iOS 11 and later use HEIC by default to save storage space on the device.
2. How do I convert HEIC to JPG on Windows?
The easiest method is using a free online converter in Chrome or Edge — go to imageconvertertools.com/heic-to-jpg, upload your HEIC file, and download the converted JPG. Alternatively, install the free HEIC Image Extensions from the Microsoft Store to enable native HEIC support in Windows, then open and save as JPG through Windows Photos.
3. How do I convert HEIC to JPG on Mac?
Open the HEIC file in Preview, go to File > Export, select JPEG as the format, set quality to 85 to 90 percent, and click Save. For batch converting multiple files, open all HEIC files in Preview, select all in the sidebar, go to File > Export Selected Images, and choose JPEG.
4. How do I stop my iPhone from saving photos as HEIC?
Go to Settings > Camera > Formats and select Most Compatible. This switches your camera to saving photos as JPG instead of HEIC. Note that this only affects new photos — existing HEIC photos in your library remain as HEIC and need to be converted separately.
5. Can I convert HEIC to JPG on Android?
Android does not natively support HEIC. The most reliable method is using a browser-based converter in Chrome on your Android device. Go to the HEIC to JPG converter, upload your HEIC file, and download the converted JPG. Alternatively, use Google Photos to sync iPhone photos — it handles HEIC compatibility automatically when accessed from Android.
6. Why is my converted JPG larger than the original HEIC file?
This is normal. HEIC uses a more efficient compression algorithm than JPG, so the same image takes up less space in HEIC format. Converting to JPG increases the file size because JPG is less efficient. To manage JPG file sizes after conversion, use an image compressor to reduce the file size without any visible quality loss.
7. Does converting HEIC to JPG reduce image quality?
At a high quality setting of 85 to 90 percent, the quality difference is invisible at normal viewing sizes. Some very fine detail may be slightly different when comparing the two formats zoomed in to 200 percent, but for any practical purpose — sharing, printing, uploading — the converted JPG looks identical to the original HEIC.
8. How do I batch convert HEIC to JPG?
On Mac, use Preview’s Export Selected Images feature — open all HEIC files, select all in the sidebar, and export as JPEG simultaneously. On Windows, use an online converter that supports multiple file uploads and process your files in batches. Both methods are free and require no additional paid software.
9. Why do my iPhone photos transfer as HEIC to my Windows PC?
This happens when the transfer method bypasses iOS’s automatic conversion. Go to Settings > Photos > Transfer to Mac or PC and select Automatic instead of Keep Originals. With Automatic selected, iOS converts HEIC to JPG automatically when transferring to Windows via USB or sharing through compatible methods.
10. Can I convert HEIC to other formats besides JPG?
Yes. HEIC can be converted to PNG for lossless quality with transparency support, to WebP for efficient web use, and to other formats depending on your needs. Our HEIC to PNG converter handles HEIC to PNG conversion and our HEIC to WebP converter covers WebP output if you need it for web optimisation purposes.
Conclusion
HEIC is a genuinely better image format than JPG in terms of technology — smaller files, better quality, more features. The only problem it has is compatibility, and that compatibility gap causes real frustration for millions of people every day. Understanding why iPhones use HEIC and knowing exactly how to convert it to JPG on any device removes that frustration completely.
The fastest solution for most situations is a free online converter — no software, no configuration, works on any device. For Mac users, Preview handles both single and batch conversion natively for free. For Windows users, either an online tool or the free HEIC codec from the Microsoft Store solves the problem. For the long term, setting your iPhone to Automatic transfer mode means iOS handles the conversion automatically in most sharing situations without you having to think about it.
Use our free HEIC to JPG Converter to convert any HEIC file to JPG in seconds — single files or batches, no sign-up, no watermarks, completely free on every device.