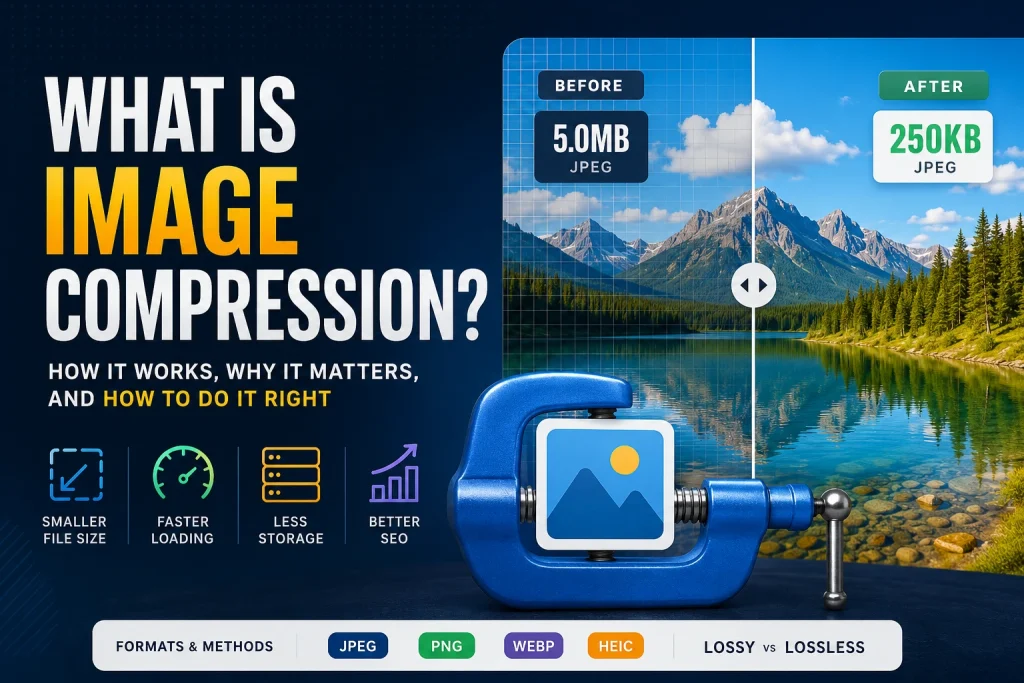
Image compression refers to the technique whereby an image’s file size is minimized through improved coding of the image’s pixel data, or simply by eliminating pixel data that the human eye cannot recognize. An image file weighing 5MB on a smartphone can be compressed to just below 300KB with no perceptible change in image quality on-screen. This massive 94 percent compression influences the speed of webpages, storage of images, speed of delivery of emails, and the rankings of websites on Google.
This article will explore everything related to image compression — the theory behind it, the distinctions between lossy and lossless image compression techniques, what happens in terms of quality when using different compression methods, the various compression methods for particular image formats, and finally the step-by-step process of image compression in 2026.
What Is Image Compression? — Definition and Core Concept
Image compression is a data encoding technique that reduces the number of bytes required to store or transmit a digital image. It works by analysing the pixel data in an image and finding more efficient ways to represent that data — either by eliminating redundant information, removing imperceptible detail, or using mathematical transformations that describe the image with less data.
Why compression exists: An uncompressed digital photograph from a modern 12-megapixel smartphone stores 12 million pixels, each requiring 3 bytes of colour data — a total of 36 megabytes of raw image data. Transmitting 36MB for every photo shared on the internet would make web browsing impossibly slow. Compression reduces that 36MB to 3 to 5MB as JPG, or under 2MB as WebP — making the web functional at modern scale.
The fundamental tradeoff: Compression always involves a tradeoff between file size and quality. Some compression methods make files smaller without any quality loss — these are called lossless. Others make files much smaller by permanently removing some image data — these are called lossy. Understanding this tradeoff is the foundation of making good compression decisions.
The scale of the impact: According to the HTTP Archive Web Almanac, images account for an average of 50 percent of the total page weight of web pages globally. Proper image compression is consistently identified as the single highest-impact optimisation for web page performance.
Lossy Compression — Definition, How It Works, and When to Use It
What Is Lossy Compression?
Lossy compression is an irreversible process by which some information contained in images is removed to reduce their size. The process involves analysing the image and determining what data the human eye can do without; it is therefore stripped away from the image. This data is lost irreversibly. There is no way to retrieve it. Lossy compression is a one-way process.
Lossy compression is common in JPG, WebP lossy and HEIC image files. It is the most common form of compression for pictures posted on the web because of its ability to compress images substantially while retaining high levels of quality.
How Lossy Compression Works — The Technical Process
JPG lossy compression — the most common and well-understood example — uses a mathematical technique called Discrete Cosine Transform (DCT). Here is what actually happens when a JPG is compressed:
Step 1 — Colour space conversion: The image is converted from RGB (red, green, blue) to YCbCr — a colour space that separates brightness (luminance) from colour information (chrominance). The human eye is far more sensitive to brightness differences than to colour differences, so colour information can be reduced more aggressively than brightness.
Step 2 — Downsampling: Colour channels (Cb and Cr) are typically downsampled — their resolution is reduced by half, because human eyes perceive colour at lower resolution than brightness. This step alone reduces colour data significantly with minimal visible impact.
Step 3 — Block division: The image is divided into 8 × 8 pixel blocks. Each block is processed independently.
Step 4 — DCT transformation: Each 8 × 8 block is transformed using the Discrete Cosine Transform — a mathematical operation that converts the spatial pixel data into frequency data. High-frequency components represent fine detail and sharp edges. Low-frequency components represent gradual colour changes and overall tone.
Step 5 — Quantization (where the lossy part happens): High-frequency components — which represent detail the eye is less sensitive to — are divided by a quantization factor and rounded to the nearest integer. High compression (low quality settings) uses larger quantization factors, which rounds away more high-frequency detail. This is where data is permanently removed.
Step 6 — Entropy coding: The remaining data is compressed using lossless Huffman coding — a technique that assigns shorter codes to more common values.
The result: At 85 percent quality, JPG removes approximately 60 to 80 percent of the file data while keeping the visual quality essentially indistinguishable from the original at normal viewing distances. The removed data — mostly fine high-frequency detail in flat colour areas — is genuinely imperceptible to the human eye.
WebP lossy compression uses a more sophisticated version of this process derived from the VP8 video codec — which is why WebP achieves 25 to 34 percent smaller files than JPG at equivalent quality settings. According to Google’s WebP compression study, WebP’s prediction-based encoding is fundamentally more efficient than JPG’s DCT approach for most photographic content.
When to Use Lossy Compression
Use lossy compression when:
- The image is a photograph with complex colour gradients, skin tones, or natural textures
- File size is more important than pixel-perfect accuracy
- The image is being displayed on screen at normal viewing sizes (not zoomed in significantly)
- The image is being used for web, social media, or email — not print archiving
- You are saving the final version of an image — not a working file you’ll edit again
Quality settings guide for lossy compression:
| Quality Setting | Use Case | File Size vs Original | Visible Difference |
|---|---|---|---|
| 90–95% | Professional print, client deliveries | 70–80% smaller | Invisible |
| 80–90% | Website photos, blog images | 80–85% smaller | Invisible at normal size |
| 70–80% | Social media, thumbnails | 85–90% smaller | Barely visible |
| 60–70% | Very size-constrained use | 90–93% smaller | Minor artefacts visible |
| Below 60% | Not recommended for professional use | 93%+ smaller | Clearly visible artefacts |
Lossless Compression — Definition, How It Works, and When to Use It
What Is Lossless Compression?
Lossless compression is an approach that reduces the size of files without deleting any information about the images. All pixels in losslessly compressed images can be restored through the decompression process; the restored image will be identical to the original one. Loss is not possible whatever the number of operations of compression and decompression carried out on the image.
Lossless compression is typical for PNG, lossless WebP, GIF, and TIFF (LZW compression). It is the technique applied in the case of logos, icons, screenshots, graphics containing text, etc.
How Lossless Compression Works — The Technical Process
PNG uses DEFLATE compression — a combination of LZ77 algorithm and Huffman coding. Here is what happens:
Step 1 — Filtering: Each row of pixels is pre-processed using one of five prediction filters. The filter predicts each pixel’s value based on its neighbours and stores only the difference between the prediction and the actual value. Differences tend to be small numbers — much more compressible than the full pixel values.
Step 2 — LZ77 compression: The filtered data is scanned for repeated patterns. When a sequence of bytes appears more than once, the second occurrence is replaced with a reference to the first — storing its position and length instead of the actual bytes. This exploits the high degree of repetition in typical image data.
Step 3 — Huffman coding: The compressed data is further reduced using Huffman coding — assigning shorter binary codes to more frequently occurring values. Common values get short codes; rare values get longer codes. This reduces the average number of bits needed per value.
The result: A logo with large areas of identical colour — like a flat blue background — compresses dramatically because the LZ77 step stores “1000 blue pixels” as a single reference instruction rather than 1000 individual pixel values. A photograph with millions of subtly different colours compresses much less efficiently because there are fewer repetitive patterns for LZ77 to exploit.
WebP lossless uses a more sophisticated algorithm — WebP Lossless encoding — that adds additional techniques including colour transform, subtract green transform, and backward reference coding. These improvements explain why WebP lossless images are consistently 26 percent smaller than PNG images of the same content.
When to Use Lossless Compression
Use lossless compression when:
- The image has sharp edges, hard lines, or text — JPG creates visible blurring at these boundaries; PNG and WebP lossless do not
- The image has a transparent background — only lossless formats preserve transparency perfectly
- You will edit and re-save the image multiple times — lossless compression never degrades quality across save cycles
- The image is a logo, icon, or brand graphic — pixel-perfect accuracy preserves professional appearance
- The image is a screenshot of software, code, or interface elements
- You need the working master file to archive for future use
Lossless compression file size expectations:
| Image Type | PNG Size | WebP Lossless Size | Saving |
|---|---|---|---|
| Logo — flat colours | 45 KB | 28 KB | 38% |
| Icon with transparency | 18 KB | 11 KB | 39% |
| Screenshot with text | 820 KB | 510 KB | 38% |
| Simple illustration | 240 KB | 150 KB | 38% |
| Photograph (lossless) | 3.8 MB | 2.4 MB | 37% |
Lossy vs Lossless — The Complete Comparison
Understanding which to use in each situation is the most practical compression decision you’ll make.
| Factor | Lossy Compression | Lossless Compression |
|---|---|---|
| Quality loss | Yes — permanent | No — zero |
| File size reduction | 60–95% | 20–40% |
| Re-save degradation | Yes — compounds each save | No — stays identical |
| Transparency support | No (JPG) / Yes (WebP lossy) | Yes |
| Best image types | Photographs, complex images | Graphics, logos, screenshots |
| Best use cases | Web delivery, sharing, email | Editing, archiving, print prep |
| Formats | JPG, lossy WebP, HEIC | PNG, lossless WebP, GIF, TIFF |
| Reversibility | No — data is permanently removed | Yes — original perfectly recoverable |
The practical rule: Use lossy for photographs going anywhere except a working file archive. Use lossless for anything with hard edges, text, transparency, or that you’ll edit again. When in doubt — use lossless for masters, lossy for delivery.
How Image Compression Affects Different File Formats
JPG Compression
JPG uses lossy compression exclusively. There is no lossless JPG option. Every JPG file has had some data permanently removed — the amount depends on the quality setting used when the file was saved.
Generation loss in JPG: Opening a JPG, making a change, and saving it applies another round of lossy compression. Each cycle removes more data. After 5 to 10 save cycles, visible quality degradation appears — especially around sharp edges and in areas of subtle colour gradation. This is why professionals always work from lossless master files (PNG, TIFF, RAW) and only export to JPG as the final delivery step.
Optimal JPG quality settings:
- Web photos: 80–85 percent — invisible quality difference, 75–85 percent smaller than original
- Client delivery photos: 90–95 percent — maximum quality for professional use
- Social media: 75–80 percent — good quality at smallest practical file size
PNG Compression
PNG uses lossless compression exclusively. There is no lossy PNG option — PNG always preserves every pixel exactly. PNG compression levels (0 to 9 in most software) control the computational effort applied to find efficient compression — not quality. A PNG at compression level 9 looks identical to a PNG at compression level 0 — it’s just a smaller file because more processing was applied to find better compression.
PNG is not always larger than JPG: For simple graphics with flat colours and few unique values, PNG can sometimes produce smaller files than JPG. A 100 × 100 pixel icon with only 5 colours might be 3KB as PNG and 6KB as JPG — because PNG’s LZ77 compression finds enormous redundancy in the limited colour data while JPG’s DCT transform is less efficient for simple colour patterns.
WebP Compression
WebP uniquely supports both lossy and lossless compression in the same format. This makes it the most versatile format for web use — one format handles photographs (lossy mode), logos and graphics (lossless mode), and transparent images (both modes with alpha channel support).
WebP achieves its file size advantages through:
- More sophisticated prediction algorithms than JPG’s DCT
- Better entropy coding than PNG’s Huffman-only approach
- A unified format that avoids format-switching overhead
According to Google’s comparative testing, WebP lossless is 26 percent smaller than PNG on average, and WebP lossy is 25 to 34 percent smaller than JPG on average — both at equivalent visual quality.
HEIC Compression
HEIC — the format iPhones use by default — uses HEVC (High Efficiency Video Coding) compression. Like WebP, HEIC supports both lossy and lossless modes. HEIC achieves similar or better compression efficiency to WebP for photographs — iPhones use it specifically because it stores photos at half the file size of JPG while maintaining better visual quality.
HEIC’s main limitation is compatibility — it’s primarily an Apple ecosystem format and requires conversion for use outside Apple devices. Our guide on how to convert HEIC to JPG covers the full conversion process for every platform.
The Human Visual System — Why Lossy Compression Works
Understanding why lossy compression achieves such dramatic file size reductions without visible quality loss requires understanding how human vision actually works.
Luminance vs Chrominance Sensitivity
The human eye has about 120 million rod cells that are responsible for perceiving brightness and motion, while there are only 6 to 7 million cone cells that perceive colors. As a result, humans distinguish changes in brightness better than changes in color. Lossy compression uses this fact, lowering the resolution of color components more than that of the brightness component; in fact, 4:2:0 subsampling of JPEG images halves the resolution of colors.
Frequency Sensitivity
Human vision is more responsive to slow gradations of light intensity (low spatial frequencies) compared to fast gradations of light intensity (high spatial frequencies). The human eye is capable of seeing large gradations of the sky rather than any small textures of a brick wall. In lossy compression, the information of high spatial frequencies is removed first.
Masking Effects
Human vision has reduced sensitivity to image features in areas of high contrast or complex texture. A compression artefact visible on a plain white background might be invisible in a complex textured area. Sophisticated compression algorithms exploit this by applying heavier compression in areas where the masking effect hides artefacts.
According to research published by the International Journal of Computer Vision, the human visual system’s limitations mean that properly implemented lossy compression at quality settings above 75 percent is genuinely imperceptible to most observers under normal viewing conditions.
Compression and Web Performance — The Direct Connection
Images and Page Weight
Images are the largest component of most webpages. According to the HTTP Archive Web Almanac 2023, the median webpage transfers 1.0MB of images on desktop and 850KB on mobile. For image-heavy sites — eCommerce, photography, news — images can account for 70 to 80 percent of total page weight.
Every kilobyte of image data saved through compression is a kilobyte less data that visitors must download. On a slow mobile connection (which still represents a significant portion of global web traffic), reducing image weight from 2MB to 500KB can cut page loading time by several seconds.
Core Web Vitals and Compression
Google’s Core Web Vitals — the performance metrics used as ranking signals — are directly affected by image compression:
Largest Contentful Paint (LCP): The time for the largest visible element to load. For most pages, this is a hero image or featured image. Better-compressed images load faster, directly improving LCP scores. Google’s target is LCP under 2.5 seconds. A 1MB hero image loading on a 10Mbps connection takes 800ms — a 300KB WebP version takes 240ms. That 560ms difference can push a failing LCP score into the Good range.
First Contentful Paint (FCP): How quickly any content appears. Heavily compressed page images reduce the total data the browser must process before rendering begins.
Time to First Byte (TTFB): Indirectly affected — servers delivering smaller image files respond faster when bandwidth is limited.
According to Google’s PageSpeed research, image optimisation — including proper compression — accounts for a significant portion of the potential performance improvement available to most websites. PageSpeed Insights consistently identifies uncompressed images as one of the highest-priority fixes.
Compression in WordPress and CMS Platforms
WordPress (which powers 43 percent of all websites) has built-in basic image compression since version 3.5 — it automatically compresses uploaded JPG images to 82 percent quality. This is a reasonable default but not optimal for all situations.
Many WordPress performance plugins offer better compression control — Smush, ShortPixel, and Imagify all provide more sophisticated compression than WordPress’s default. Our article on WebP images for WordPress covers the complete WordPress image optimisation workflow including compression settings.
How to Compress Images Correctly — Practical Guide
Step 1 — Choose the Right Format First
Format choice affects file size as much as compression level. A photograph saved as PNG can be 5 to 10 times larger than the same photo as WebP. Getting the format right before thinking about compression level gives you a much better starting point.
- Photographs going on a website: Convert to WebP lossy — best compression efficiency for photographic content
- Logos and graphics for web: Convert to WebP lossless — same quality as PNG, 26 percent smaller
- Photographs for email or print: Use JPG at appropriate quality level
- Working files you’ll edit again: Keep as PNG — no quality loss on repeated saves
Use our JPG to WebP converter for photographs and our PNG to WebP converter for graphics to convert to the most efficient web format before compressing.
Step 2 — Resize to the Correct Dimensions
Compression alone doesn’t fix oversized images. A 4000 × 3000 pixel image displayed at 800 × 600 on a website is loading 25 times more pixel data than needed — no amount of compression makes that efficient. Resize to the correct display dimensions first. Our free Image Resizer handles precise pixel dimension targeting on any device.
Step 3 — Compress to the Target File Size
After choosing the right format and correct dimensions, compress to your target file size. Use our free Image Compressor — it uses smart compression algorithms to reduce file size to the optimal point without visible quality degradation. Upload your image and download a properly compressed version in seconds.
Target file sizes for web images:
| Image Type | Target Size | Format |
|---|---|---|
| Hero / banner image | Under 200 KB | WebP |
| Blog featured image | Under 150 KB | WebP |
| Product image | Under 150 KB | WebP |
| Blog inline image | Under 100 KB | WebP |
| Thumbnail | Under 30 KB | WebP |
| Logo (web) | Under 20 KB | WebP or SVG |
| Email image | Under 100 KB | JPG |
Step 4 — Verify Quality at 100 Percent Zoom
After compressing, open the image at 100 percent zoom and check:
- Are there visible block-like artefacts in flat colour areas?
- Are sharp edges blurry or showing colour fringing?
- Is text sharp and readable?
- Do skin tones look natural without banding?
If you see visible problems, re-compress from the original at a higher quality setting. If everything looks clean, the compression level is appropriate.
Step 5 — Test Performance Impact
After uploading compressed images to your website, run a test through Google PageSpeed Insights. Check whether the “Efficiently encode images” and “Serve images in next-gen formats” recommendations have been resolved. A properly compressed image should not appear in either warning. Our full guide on how to optimise images for SEO covers the complete performance testing workflow.
Common Image Compression Mistakes
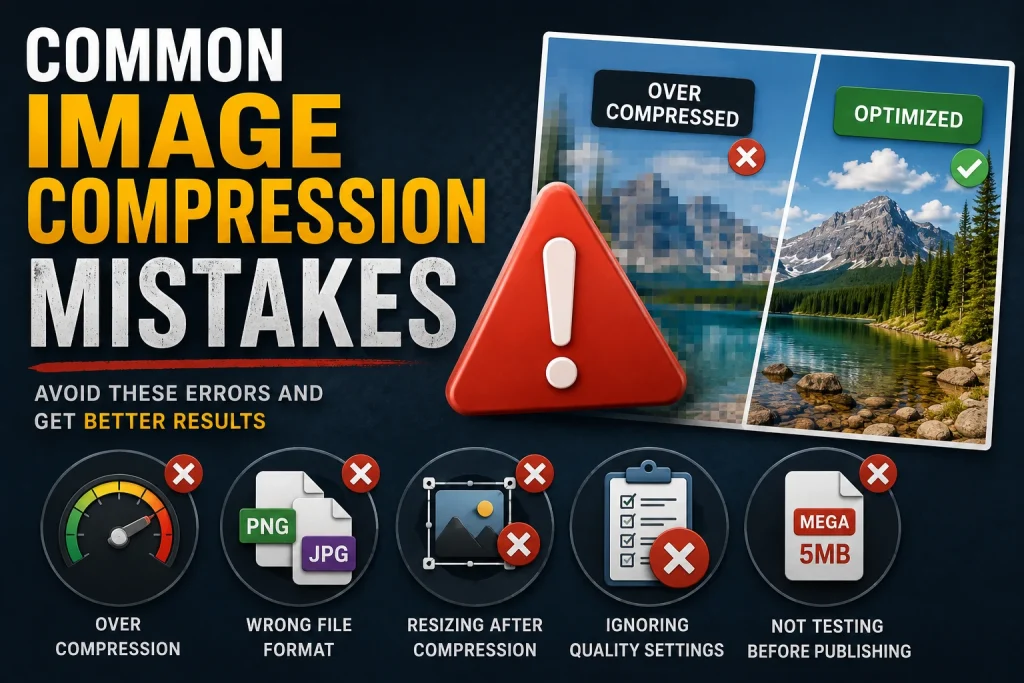
Mistake 1 — Compressing the Original File and Overwriting It
The most costly compression mistake. Once you apply lossy compression and overwrite the original file, the removed data is permanently gone. Always export compressed versions as new files and keep the original lossless master untouched.
Mistake 2 — Compressing an Already-Compressed File
Opening a JPG, making a change, saving as JPG — this applies another round of lossy compression on top of the previous compression. Each cycle compounds quality loss. After several cycles, visible degradation appears even in flat colour areas. Always go back to the original lossless source for any re-compression.
Mistake 3 — Over-Compressing Text and Logos
Text and logos have hard, sharp edges that are very sensitive to lossy compression. At moderate quality settings, JPG compression creates visible blurring and colour fringing around text characters and logo edges. For these image types, use lossless compression (PNG or WebP lossless) — the file size reduction from lossy compression isn’t worth the visible quality degradation.
Mistake 4 — Ignoring Format Choice
Using PNG for photographs is a common mistake that creates unnecessarily large files before any compression is applied. A photograph saved as PNG is 5 to 10 times larger than the same photo as WebP. Converting to the right format first gives you a much better starting point than trying to compress a PNG photograph with lossless compression.
Mistake 5 — Compressing Without Resizing
Applying compression to an oversized image reduces its file size but not as much as it could be. A 4000 pixel wide image compressed to 85 percent is still much larger than it needs to be for an 800 pixel wide display area. Resize first — then compress. The combination reduces file sizes by 90 percent or more compared to compressing an oversized image alone.
Mistake 6 — Using Too Low a Quality Setting to Save Space
The file size difference between 75 percent quality and 60 percent quality is typically less than 20 percent. But the visible quality difference is significant at 60 percent — JPEG artefacts appear clearly in flat colour areas and around edges. The sweet spot of 75 to 85 percent gives you most of the file size benefit with none of the visible quality cost.
Image Compression for Different Use Cases
For Website Images
Website images need to balance visual quality with loading speed. The goal is the smallest file size that looks indistinguishable from the original at normal screen viewing sizes and at the display dimensions used.
Best practice workflow:
- Start from the highest quality original available
- Resize to the correct display dimensions
- Convert to WebP (lossy for photos, lossless for graphics)
- Compress to under 150KB for most images
- Verify quality at 100 percent zoom
- Test with PageSpeed Insights
For Email Attachments
Email images need to be small enough to send reliably and open quickly on mobile. Most email services have 10 to 25MB attachment limits. Individual image attachments should stay under 1MB — ideally under 500KB.
Best practice:
- Use JPG at 75 to 85 percent quality for photographs
- Keep email images under 600px wide — the standard email content width
- Target under 100KB per image for inline email graphics
- Test how images display in Gmail and Outlook before sending to clients
For Social Media
Social media platforms recompress all uploaded images using their own algorithms — which means your upload quality sets the ceiling for what’s possible after platform compression. Uploading a heavily pre-compressed image gives the platform’s algorithm less quality to work with, resulting in noticeably worse output.
Best practice:
- Upload at the platform’s recommended dimensions
- Use JPG at 80 to 90 percent quality for photographs
- Avoid heavy pre-compression — let the platform handle one round of compression from a good starting point
- For graphics and text-heavy images, upload as PNG — platform compression handles PNG better than pre-compressed JPG for these types
For Print
Print compression has different priorities than web compression. Print files need enough pixel data to reproduce at 300 DPI at the intended print size. Quality loss from lossy compression is more visible in print than on screen — the higher viewing resolution of a physical print exposes artefacts that are invisible on a 72 to 96 PPI monitor.
Best practice:
- Use lossless PNG or TIFF for print master files
- If using JPG for print, use 90 to 95 percent quality minimum
- Never use heavy compression (below 80 percent) for print files
- Calculate required pixel dimensions before compressing — ensure enough pixels for the print size at 300 DPI
Measuring Compression Effectiveness
File Size Reduction
The most straightforward measure — how much smaller is the compressed file compared to the original? Target 70 to 90 percent size reduction for web images at high quality settings.
SSIM (Structural Similarity Index)
SSIM is a mathematical measurement of how similar a compressed image looks to its original — ranging from 0 (completely different) to 1.0 (identical). A SSIM above 0.95 indicates quality that is virtually indistinguishable from the original to human observers. Most professional-grade compression tools target SSIM above 0.95.
PSNR (Peak Signal-to-Noise Ratio)
PSNR measures compression quality in decibels — higher values indicate better quality. A PSNR above 40 dB is generally considered excellent quality. Above 35 dB is good quality. Below 30 dB shows visible compression degradation. PSNR is widely used in academic and engineering contexts but SSIM is generally considered a better predictor of perceptual quality for human viewers.
PageSpeed Insights Score
For web images, Google PageSpeed Insights provides the most practically relevant compression assessment — it identifies specific images that aren’t efficiently compressed and estimates how much data could be saved. A fully optimised website should have no images flagged under “Efficiently encode images” or “Serve images in next-gen formats.”
Frequently Asked Questions
1. What is image compression in simple terms?
Image compression is making image files smaller. It works either by finding smarter ways to store the same pixel data (lossless — no quality loss) or by permanently removing pixel data the eye doesn’t notice (lossy — smaller file, slight quality reduction). A 5MB photo can compress to under 300KB as a WebP file with no visible quality difference on screen.
2. What is the difference between lossy and lossless compression?
Lossy compression permanently removes some image data to create very small files — the removed data cannot be recovered. JPG and lossy WebP use lossy compression. Lossless compression reduces file size without removing any data — the image can be perfectly reconstructed from the compressed file. PNG and lossless WebP use lossless compression. Use lossy for photographs going to web or email. Use lossless for logos, graphics, screenshots, and working files.
3. Does image compression reduce quality?
Lossy compression reduces quality — permanently removes some data. But at quality settings of 75 to 90 percent, the reduction is invisible at normal screen viewing sizes. Lossless compression never reduces quality — it’s mathematically guaranteed to produce a perfect reconstruction of the original image.
4. How much can image compression reduce file size?
Lossy compression at 80 to 85 percent quality typically reduces JPEG file sizes by 75 to 85 percent compared to uncompressed images — a 5MB file becomes 500KB to 750KB. Lossless PNG compression reduces file sizes by 30 to 50 percent compared to uncompressed. WebP achieves 26 percent better compression than PNG (lossless) and 25 to 34 percent better than JPG (lossy) at equivalent quality.
5. What is the best image compression for websites?
WebP with lossy compression at 80 to 85 percent quality for photographs — it achieves the smallest file sizes at equivalent visual quality. WebP lossless for logos and graphics — preserves pixel-perfect quality while being 26 percent smaller than PNG. Target under 150KB per image for most web use cases.
6. Does compressing an image reduce its dimensions?
No. Compression only affects how image data is stored — not the pixel dimensions. A 1200 × 800 image stays 1200 × 800 pixels after compression. The file is smaller because the pixel data is encoded more efficiently (lossless) or because some data is removed (lossy). Changing pixel dimensions is resizing — a separate process from compression.
7. Can I compress an image without losing quality?
Yes — using lossless compression. PNG and WebP lossless produce smaller files while preserving every pixel exactly. The file size reduction is smaller than lossy compression (typically 20 to 40 percent rather than 70 to 90 percent) but quality is mathematically guaranteed to be identical to the original.
8. What happens if I compress a JPG multiple times?
Each round of JPG compression permanently removes more data — quality degrades cumulatively. This is called generation loss. After 5 to 10 save cycles, visible artefacts appear — especially in flat colour areas and around sharp edges. Always work from lossless master files and apply JPG compression only at the final delivery step. Never re-save a JPG if a lossless original exists.
9. How do I know if my images are properly compressed?
Run your website through Google PageSpeed Insights at pagespeed.web.dev. It flags images that aren’t properly compressed under “Efficiently encode images” and “Serve images in next-gen formats.” You can also check individual image file sizes — most web images should be under 150KB. Images above 500KB almost always need compression.
10. What compression format should I use in 2026?
WebP is the best compression format for web images in 2026. It supports both lossy and lossless compression, achieves better compression than JPG and PNG, supports transparency, and has 96 percent global browser support. Use lossy WebP for photographs and complex images. Use lossless WebP for logos, graphics, and images requiring transparency. Keep PNG as the master format for print, email, and cross-platform compatibility.
Conclusion
Compression of the images is not a technical matter; rather, it is the most important aspect when it comes to image optimization and web performance. Knowing what is lossy and lossless compression, when to use one or the other format of compression and compression quality settings help in getting the images that have high quality, good looks, and also improve the search engine ranking.
The basic facts about the process are known to everyone. The lossy formats (WebP, JPG) should be used for photos; this means that the quality loss will go unnoticed even at high levels of compression, while the loss in terms of file sizes will be extremely high. The lossless formats (PNG, WebP lossless) should be used for logos, graphics and work files. The compression must always be done using the original image; i.e. the file must not be re-compressed. Also, resizing should always precede the compression process.
Apply these principles consistently and your images will be as small as they can be without looking any worse — which is exactly the goal of good image compression.
Use our free Image Compressor to compress any image in seconds — lossy and lossless options, no watermarks, no sign-up, batch compression supported, completely free on every device.