A transparent background will strip away all objects lying behind the primary object in the image, leaving just the primary object in a transparent form which can sit on top of anything without a white box or coloured border around it. All logos that you might have seen sitting on a colored website banner, all images used in the website that are standing freely on the website page, and all cutout images in presentations all have a transparent background. This guide talks about all the ways you could turn a background of an image into a transparent one.
What Is a Transparent Background? — Definition, How It Works, and Why It Matters
The meaning of a transparent background is that the background pixels of an image are erased and made invisible instead of being made up of some colored pixel. If any image with transparent background is placed on top of anything else, then only the object within the image will be seen and the background of that image will show through whatever is behind it.
How transparency works technically: The transparency values of digital images are stored in what is known as the alpha channel. The alpha channel represents the fourth data channel, which exists along with red, green, and blue colour channels. The alpha value of each pixel lies between 0 (completely transparent) to 255 (completely opaque). All other values between represent partially transparent pixels, used for creating shadows, anti-aliasing, and blending the image with the background.
According to the W3C PNG specification, the alpha channel was one of PNG’s defining innovations when it was introduced in 1996 — providing a standardised way to store per-pixel transparency that older formats like GIF handled poorly.
Why transparent backgrounds matter: Without a transparent background, every image sits inside a rectangular bounding box. Place a logo with a white background on a dark-coloured website header and you get an obvious white rectangle around the logo — immediately looking unprofessional. Remove the background and the logo sits naturally on the dark header as if it belongs there. This is why transparent backgrounds are essential for logos, icons, product cutouts, watermarks, and any graphic element that needs to integrate cleanly into different design contexts.
Which formats support transparency:
| Format | Transparency Support | Type |
|---|---|---|
| PNG | Full alpha channel | Raster |
| WebP | Full alpha channel (lossy and lossless) | Raster |
| SVG | Full transparency | Vector |
| GIF | Basic (on/off only, no partial) | Raster |
| JPG | None — transparent areas become white | Raster |
| BMP | Limited | Raster |
| TIFF | Supported | Raster |
The critical rule: JPG does not support transparency under any circumstances. If you need a transparent background, you must save your image as PNG, WebP, or SVG. Saving a transparent image as JPG fills every transparent pixel with white — permanently destroying the transparency.
How to Make an Image Background Transparent Free Online
The Fastest Method — AI Background Removal
One can remove image backgrounds the quickest using an online tool powered by artificial intelligence for free. The modern AI background remover examines the whole image to find out what the main object is and then separates it from the background and makes the background invisible, resulting in a transparent PNG image.
Such a process works much more effectively compared to any colour selection technique because AI is able to understand the context of the image. Therefore, it is able to separate a white cat from the white background and deal with fur.
- Go to imageconvertertools.com/image-background-remover
- Click upload or drag your image into the box
- The AI automatically detects the subject and removes the background
- Preview the result — transparent areas appear as a checkerboard pattern
- Download as PNG to preserve the transparency
You can upload multiple images at once for batch processing. Files are deleted from the server automatically after download.
Pros:
- Works on any device with a browser — Windows, Mac, iPhone, Android
- AI produces much cleaner results than manual colour selection
- Handles complex edges including hair, fur, and fine details
- Preserves semi-transparent edges for natural-looking cutouts
- Free — no watermarks, no sign-up, no file limits
- Results in under 10 seconds for most images
Cons:
- Requires internet connection
- Very complex images with similar foreground and background colours may need manual touch-up
- Not suitable for confidential or sensitive images
- Results vary by image complexity — simple product photos on plain backgrounds give the cleanest results
Best image types for online AI removal:
- Product photos on white or solid colour backgrounds
- Portrait photos with clear subject separation
- Logos on white backgrounds
- Simple clipart and graphics
Harder images for AI removal:
- Transparent or glass objects
- Subjects that closely match the background colour
- Very detailed hair or fur against complex backgrounds
- Images with motion blur at the edges
Understanding Transparent Background File Formats
PNG — The Standard for Transparent Images
PNG is the most universally used format for transparent images. It supports full alpha channel transparency — every pixel can be fully transparent, partially transparent, or fully opaque. PNG uses lossless compression which means quality never degrades regardless of how many times the file is saved.
When to use transparent PNG:
- Logos for web and print use
- Icons and interface elements
- Product cutout images for eCommerce
- Watermarks and overlays
- Graphics for presentations and documents
- Any image where the transparent version needs to work across many different platforms and software
PNG file size consideration: PNG files with transparency can be large — especially for detailed photographic cutouts. A 1000 × 1000 pixel product cutout as PNG might be 500KB to 1MB. For web use where loading speed matters, converting to transparent WebP reduces this significantly.
WebP — The Best Transparent Format for Web
WebP supports full alpha channel transparency in both lossy and lossless modes. A transparent WebP file is typically 26 percent smaller than an equivalent transparent PNG in lossless mode — and dramatically smaller in lossy mode while still maintaining good visual quality.
For websites where loading speed affects user experience and search rankings, using transparent WebP instead of transparent PNG is a meaningful performance improvement. Every modern browser supports WebP transparency — Chrome, Firefox, Safari, Edge, and Opera all handle it correctly.
After removing a background and saving as transparent PNG, convert to transparent WebP using our PNG to WebP converter to get a smaller file for web use. The transparency is fully preserved in the WebP output.
SVG — Transparent Vector Graphics
SVG (Scalable Vector Graphics) is inherently transparent by default — SVG files have no background unless you specifically add one. A logo saved as SVG with no background rectangle sits cleanly on any background at any size without any background removal process needed.
SVG is the ideal format for logos and simple graphics because it combines native transparency with infinite scalability — the logo looks perfectly sharp at any size from a tiny favicon to a massive banner. Our guide on how to convert JPG to SVG covers the conversion process from raster to SVG for logos and graphics.
How to Make Image Background Transparent on iPhone
Using iOS 16+ Built-In Subject Lift
Apple added a built-in background removal feature in iOS 16 called Subject Lift. It works directly from the Photos app without needing any third-party tools.
- Open the image in the Photos app
- Press and hold on the main subject of the image
- A glowing animated outline appears around the subject
- A pop-up menu appears with Copy and Share options
- Tap Copy to copy the subject with a transparent background
- Paste into any compatible app — Notes, Messages, Keynote, Pages
Pros:
- No internet needed — works completely offline
- Built into every iPhone running iOS 16 or later
- Instant — takes 1 to 2 seconds
- Works directly from Photos
Cons:
- Only available on iOS 16 and later
- Copies to clipboard — doesn’t save as a standalone transparent PNG file directly
- Results are less accurate than AI tools for complex backgrounds
- Doesn’t handle fine hair and detailed edges as cleanly as dedicated AI tools
- Can’t process multiple images at once
How to save the transparent image as a PNG from iOS Subject Lift:
After copying the subject, open the Files app, create a new note in Notes, paste the copied subject, then use Share from Notes to save as an image. Alternatively, use the Shortcuts app to create a workflow that saves clipboard images as PNG files.
Using Safari on iPhone
For the highest quality transparent background removal on iPhone:
- Open Safari on your iPhone
- Go to imageconvertertools.com/image-background-remover
- Tap the upload area
- Select your image from Photos or Files
- Tap Remove Background
- Download the transparent PNG to your Files app
The AI tool produces significantly cleaner results than iOS Subject Lift for complex images — better edge handling, more accurate subject detection, and cleaner semi-transparent edges. The downloaded PNG saves to your Files app and can be shared to any app from there.
Tips for iPhone Users
- For product photos and logos, the online AI tool gives better results than Subject Lift
- The transparent PNG downloads to Files — to use it in Photos, open the file in Files and tap Share > Save Image
- For social media cutouts where exact precision isn’t critical, Subject Lift is convenient
- Images with fine hair or detailed edges benefit most from the online AI tool’s superior edge detection
How to Make Image Background Transparent on Android
Android doesn’t have a universal built-in background removal feature across all devices. Samsung phones running One UI 5.1 and later have an Object Eraser feature. Google Pixel phones running Android 14 have Magic Eraser. But these are manufacturer-specific and not available on all Android devices.
Using Chrome on Android — Universal Method
This works on every Android phone regardless of brand or Android version:
- Open Chrome on your Android device
- Go to imageconvertertools.com/image-background-remover
- Tap upload and select your image from the gallery
- The AI removes the background automatically
- Download the transparent PNG to your Downloads folder
Samsung Object Eraser
On Samsung phones running One UI 5.1 or later:
- Open the image in Samsung Gallery
- Tap the pencil/edit icon
- Tap the three-dot menu or look for Object Eraser
- Select the background areas to erase
- Samsung’s AI removes the selected areas
- Save the result
Limitation: Samsung’s Object Eraser doesn’t always produce PNG output with proper alpha channel transparency — results vary by model and One UI version. For guaranteed transparent PNG output with clean edges, the online tool is more reliable.
Google Pixel Magic Eraser
On Google Pixel phones running Android 14:
- Open the image in Google Photos
- Tap Edit
- Select Tools > Magic Eraser
- Circle or brush over the background elements you want to remove
- Google’s AI removes the selected areas
- Save the result
Magic Eraser is designed more for removing unwanted objects from photos than for complete background removal — it works better for erasing specific distracting elements than for clean subject cutouts.
How to Make Image Background Transparent on Windows
Using Paint 3D — Built Into Windows 10 and 11
Paint 3D has a Magic Select feature for background removal. It’s free and already installed on Windows.
- Open Paint 3D from the Start menu
- Click Open and select your image
- Click Magic Select in the top toolbar
- Drag the selection handles to tightly frame your subject
- Click Next
- Paint 3D highlights what it thinks is the background in blue
- Use Add and Remove brushes to correct any errors
- Click Done
- Click outside the selection to deselect
- Press Ctrl + A to select all, then Delete to remove the background
- Go to Menu > Save As
- Choose PNG format to preserve transparency
- Click Save
Pros: Free, offline, already installed on Windows 10 and 11
Cons: Results are noticeably rougher than AI tools. Hair, fur, and detailed edges don’t separate cleanly. Requires manual correction with Add/Remove brushes for most images. The process is time-consuming for complex images.
Using the Windows 11 Photos App
Windows 11’s Photos app added a background removal feature in recent updates:
- Open your image in the Windows 11 Photos app
- Click Edit in the top right
- Look for Background in the editing options
- Click Remove Background
- The app automatically removes the background
- Click Save a copy to save the transparent version as PNG
Pros: Simple, built into Windows 11, works offline
Cons: Only available on Windows 11 with recent updates, not available on Windows 10, less accurate than dedicated AI tools for complex images
Using an Online Tool on Windows
For the best results on Windows — especially for complex images like product photos, portraits with detailed hair, or images with similar foreground and background colours — use the online AI background remover in Chrome or Edge. The AI produces significantly cleaner results than Paint 3D or the Photos app.
How to Make Image Background Transparent on Mac
Using Preview on Mac — Quick Background Removal
Preview on Mac has an Instant Alpha tool for removing solid colour backgrounds. It works well for simple solid-colour backgrounds but struggles with complex scenes.
- Open your image in Preview — double-click it
- Go to Tools > Instant Alpha (or press Shift + Command + F)
- Click on the background colour you want to remove
- Drag slowly — the pink highlighted area expands to cover similar colours
- Press Delete to remove the selected background area
- Repeat for any remaining background areas
- Go to File > Export and save as PNG to preserve transparency
When Preview Instant Alpha works well:
- White backgrounds with clear subject separation
- Solid colour backgrounds that don’t overlap with the subject’s colours
- Simple graphics and logos on flat backgrounds
When Preview Instant Alpha fails:
- Complex backgrounds with many colours
- Subjects that share colours with the background
- Hair, fur, or detailed transparent edges
- Any image requiring precise edge detection
The key limitation: Instant Alpha selects by colour similarity — it removes all pixels similar to the colour you click on. If your white-background product has white elements (white packaging, white shirt, white flowers), Instant Alpha removes those too. For these images, the AI online tool is the right choice.
Using the Online Tool on Mac
Open imageconvertertools.com/image-background-remover in Safari or Chrome on Mac. Upload your image, download the transparent PNG. For complex images, this always produces better results than Preview’s Instant Alpha.
How to Make Image Background Transparent in Professional Software
Adobe Photoshop — The Professional Standard
Photoshop is the industry standard for precise background removal. It offers multiple methods depending on the image complexity.
Method 1 — Remove Background Button (Photoshop 2021+)
Photoshop added a one-click Remove Background button powered by Adobe’s AI (Adobe Sensei) in 2021.
- Open your image in Photoshop
- In the Properties panel, look for Quick Actions
- Click Remove Background
- Adobe Sensei automatically removes the background and creates a layer mask
- Refine the mask edges using Select > Select and Mask if needed
- Go to File > Export As > PNG to save with transparency
This is the fastest Photoshop method and produces excellent results for most images.
Method 2 — Select Subject + Delete Background
- Go to Select > Subject — Photoshop uses AI to select the main subject
- Go to Select > Inverse to invert the selection (now the background is selected)
- Press Delete to remove the background
- Flatten any remaining artefacts
- Export as PNG
Method 3 — Pen Tool for Precise Edges
For the highest precision — product photography, studio shots requiring clean edges for professional eCommerce use:
- Select the Pen Tool (P)
- Carefully draw a path around the subject
- Right-click the path and select Make Selection
- Set feathering to 0.5px for natural edges
- Go to Select > Inverse
- Press Delete
- Export as PNG
The Pen Tool method is the most time-consuming but produces the sharpest, most professional results — used by eCommerce studios and professional retouchers.
Refining Edges — Select and Mask
For images with hair, fur, or complex edges where automatic selection leaves rough results:
- After making your selection (by any method)
- Go to Select > Select and Mask
- Use the Refine Edge Brush to paint over hair and fur areas
- Photoshop intelligently separates fine strands from the background
- Adjust Edge Detection radius, Smooth, Feather, and Contrast settings
- Output to Layer Mask or New Layer with Layer Mask
Select and Mask produces the most natural-looking hair and fur edges of any tool — even better than most AI online tools for highly detailed images.
GIMP — Free Alternative to Photoshop
GIMP is a free, open-source image editor with strong background removal capabilities.
Using Fuzzy Select (Magic Wand) in GIMP
- Open your image in GIMP
- Select the Fuzzy Select Tool (Shift + O)
- Click on the background area to select it
- Adjust the Threshold slider — higher values select more similar colours
- Hold Shift and click additional background areas to add to the selection
- Press Delete to remove the selected background
- Go to File > Export As and save as PNG
Using Foreground Select in GIMP
GIMP’s Foreground Select tool provides AI-assisted selection similar to Photoshop’s Select Subject:
- Go to Tools > Selection Tools > Foreground Select
- Draw a rough outline around your subject
- Paint over the subject in blue to mark the foreground
- GIMP calculates the precise selection boundary
- Apply and delete the background
- Export as PNG
How to Make Background Transparent in CSS
Sometimes you don’t need to edit the image file at all — you can achieve transparency effects using CSS on your website.
CSS opacity Property
Making an entire image partially transparent:
css
.transparent-image {
  opacity: 0.5; /* 0 = fully transparent, 1 = fully opaque */
}
Limitation: This makes the entire image semi-transparent — including the subject. Not useful for removing a specific background colour.
CSS mix-blend-mode
For images with white backgrounds, CSS mix-blend-mode can make white pixels transparent in the browser without editing the image:
css
.logo-white-bg {
  mix-blend-mode: multiply;
}
With multiply blend mode, white pixels (value 255) multiply with the background colour and become invisible. Dark pixels remain dark and visible. This effectively makes white backgrounds transparent in CSS.
Important limitation: This is a visual effect in the browser — the image file itself still has a white background. It doesn’t work for all background colours and has inconsistent results on complex backgrounds.
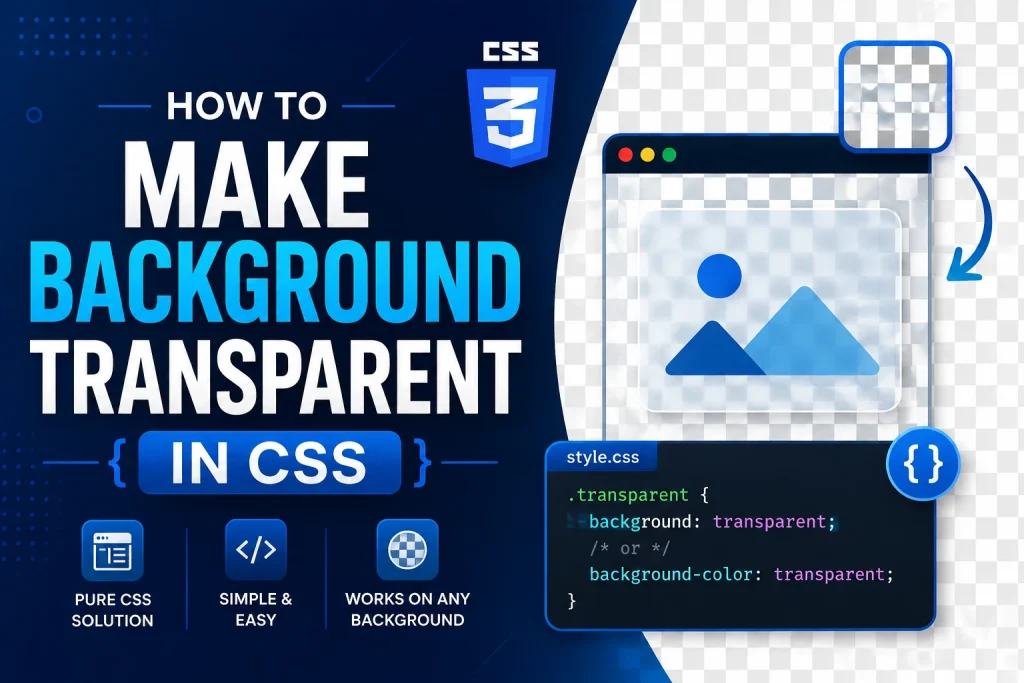
CSS background-color transparent
When building website elements:
css
.element {
  background-color: transparent;
  /* or */
  background-color: rgba(255, 255, 255, 0);
}
This makes the element’s own background transparent — not the background of an image file. Useful for overlaying elements but doesn’t affect uploaded image files.
Common Transparent Background Problems and Fixes
Problem 1 — White Fringe Around Edges After Background Removal
White fringe (also called a halo or matte) appears when the AI or selection tool doesn’t cleanly separate the subject edge from a white background. Semi-transparent pixels at the edge still contain white colour data even after transparency is applied.
Fix in Photoshop: After removing the background, go to Layer > Matting > Defringe and enter 1 to 2 pixels. This removes the white colour data from semi-transparent edge pixels while keeping their transparency values intact.
Fix in GIMP: Go to Colors > Spill Suppression and adjust the colour to remove from semi-transparent edge pixels.
Fix by re-shooting: Photograph subjects against a coloured background that contrasts with the subject — not white against white. A green or blue background (green screen / chroma key) gives AI tools much more to work with for clean edge separation.
Problem 2 — Checkerboard Pattern Saved in Final Image
The checkerboard pattern you see in image editors and preview tools is not part of the image — it’s a visual representation of transparency used by software to show transparent areas. The actual file data for those pixels is transparent — not grey-and-white.
If your saved PNG shows a checkerboard: The file is correct — the checkerboard is just how your image viewer or software indicates transparency. When placed on a coloured background in any design tool or web browser, the transparency will show the background correctly.
If the checkerboard is baked into the image: You accidentally exported or flattened with the checkerboard visible. Re-export from the original, making sure the transparency option is enabled in the export settings.
Problem 3 — Transparent Background Becomes White After Saving
This happens when you save a transparent image as JPG. JPG doesn’t support transparency — it fills all transparent pixels with white.
Fix: Always save transparent images as PNG or WebP. Never save a transparent image as JPG. If you need a JPG version, flatten the image onto the background colour you want first, then save as JPG.
Problem 4 — Image Looks Rough and Jagged at Edges
Jagged edges mean the background removal process was too aggressive or didn’t account for anti-aliasing. Anti-aliasing is the slight colour blending at edges that makes them look smooth rather than pixelated.
Fix: In Photoshop’s Select and Mask, adjust the Feather setting (typically 0.5 to 1px) and increase the Smooth slider slightly. In online tools, look for edge refinement options. Re-running the removal with a higher quality image also helps — the AI has more pixel data to work with and produces cleaner edges.
Problem 5 — Background Partly Removed but Subject Has Holes
This happens when the subject and background share similar colours — the AI or selection tool confuses subject pixels with background pixels.
Fix: Use Photoshop’s Refine Edge or the online tool’s restore brush to paint back the incorrectly removed subject areas. For images where this problem is severe — such as a blonde subject on a beige background — manual selection with the Pen Tool in Photoshop gives the best results.
Transparent Backgrounds for Specific Use Cases
For Logos — Best Practices
Logos with transparent backgrounds are one of the most common use cases. A logo needs to work on light backgrounds, dark backgrounds, coloured backgrounds, photographic backgrounds, and everything in between.
Best format for transparent logos:
- SVG — best for web logos: native transparency, infinite scalability, tiny file size
- PNG — best for logos used in documents, presentations, and print
- WebP — best for web logos where SVG isn’t suitable and loading speed matters
Key tips for logo transparency:
- Export at the highest resolution you’ll need — you can scale down but not up without quality loss
- Test the transparent logo on both white and dark backgrounds to check for any white fringe or edge artefacts
- Keep the original vector source file (AI, EPS, or SVG) — raster transparent versions should be derived from this
For Product Images — eCommerce Use
Product images on white or transparent backgrounds are the standard for online stores. Clean product cutouts increase purchase confidence and allow products to be displayed consistently across all product pages.
Professional eCommerce transparent product workflow:
- Photograph the product against a white background with consistent lighting
- Remove the background using AI tool or Photoshop
- Clean up any white fringe or edge artefacts
- Export as PNG at 1000 × 1000 to 2000 × 2000 pixels
- Convert to transparent WebP using our PNG to WebP converter for web use
- Keep the PNG version for print catalogues and document use
Our Image Background Remover handles product photos efficiently — upload multiple product images at once for batch processing.
For Profile Pictures and Headshots
Transparent background headshots and profile pictures are increasingly used for business websites, LinkedIn, presentations, and marketing materials where the photo is placed on a coloured or branded background.
Tips for transparent profile pictures:
- Use a photo with clear separation between the person and the background
- Plain coloured backgrounds (not white — slight colour contrast helps AI tools)
- Good, even lighting that doesn’t cast shadows blending into the background
- After removing the background, save at 500 × 500 pixels minimum for profile pictures
For Social Media Graphics
Transparent graphics are used to create overlays, branded frames, and composite social media posts where a graphic element needs to sit on top of a photo or coloured background.
Many social media tools and apps accept PNG files with transparency. Canva, Adobe Express, and similar tools all support transparent PNG uploads that you can layer over other design elements.
How to Check if an Image Has a Transparent Background
The Checkerboard Test
Open the image in any image editor or viewer that supports transparency display. If the background shows as a grey-and-white checkerboard pattern, the image has a transparent background. If the background shows as a solid colour — white, black, or any other colour — the image does not have transparency.
Check in a Browser
Drag the PNG file into a Chrome or Firefox browser window. If the background is white on a white browser background, you can’t tell. Right-click the browser tab area and open the browser inspector — the image background will show as transparent if the checkerboard appears in the inspector’s image preview.
Check File Format
JPG files can never have transparent backgrounds. If your image is a JPG, it definitely doesn’t have transparency. PNG, WebP, and SVG files may or may not have transparent backgrounds — check using the methods above.
Frequently Asked Questions
1. How do I make an image background transparent for free?
Go to imageconvertertools.com/image-background-remover, upload your image, and download the transparent PNG. Completely free — no sign-up, no watermarks, no file limits. The AI automatically detects the subject and removes the background in under 10 seconds. Works on any device with a browser.
2. What file format do I need for a transparent background?
PNG is the most universally compatible format for transparent images. WebP also supports full transparency and is 26 percent smaller than PNG — ideal for web use. SVG is best for logos and simple graphics. JPG cannot store transparency under any circumstances — transparent areas become white when saved as JPG.
3. How do I make a white background transparent?
Upload the image to the tool for removing the background — the algorithm will recognize that the background is white and remove it without damaging the object in the picture. For pictures with the object that includes white areas (such as a white shirt or white packaging), you should use the AI tool, not the color selection method.
4. How do I make a background transparent on iPhone?
On iOS 16 or later, press and hold the subject in the Photos app to use Subject Lift — quick but less accurate. For better results, open Safari, go to imageconvertertools.com/image-background-remover, upload your image, and download the transparent PNG. Works on all iPhone models.
5. Can I make a JPG background transparent?
JPG doesn’t support transparency. You can remove the background from a JPG image — the process works fine — but you must save the result as PNG or WebP, not back as JPG. If you save a transparent image as JPG, all transparent pixels become white. Always save transparent images as PNG or WebP.
6. How do I make a logo background transparent?
Upload the logo to the background remover tool and download the transparent PNG. For logos that will be used primarily on websites, also convert to SVG using our JPG to SVG converter for a format that scales to any size perfectly. For web use, transparent WebP is smaller than PNG while maintaining the same quality.
7. What is the checkerboard pattern I see after removing a background?
The grey-and-white checkerboard is how image editors and browsers visually represent transparent areas — it’s not part of the actual image. When you place the transparent image on any background in a design tool or web page, the background shows through where the checkerboard was. The final result looks natural with no checkerboard visible.
8. How do I make multiple images background transparent at once?
Upload all images at once to our Image Background Remover — it processes multiple files simultaneously and lets you download all transparent PNGs in one batch. This is especially useful for eCommerce product images where many photos need the same background treatment.
9. Why does my transparent image have a white outline after I use it?
White fringe or halos around subjects after background removal happen when edge pixels contain white colour data from the original background. In Photoshop, use Layer > Matting > Defringe to remove this. For online tools, re-process the image — some tools have edge refinement settings that reduce fringe. Photographing subjects against a coloured (not white) background prevents this problem at the source.
10. Does removing the background reduce image quality?
Background removal itself doesn’t reduce image quality — the subject pixels are unchanged. The quality of the result depends on the quality of the source image. Higher-resolution source images give the AI more pixel data to work with, producing cleaner edges. Always start from the highest quality source image available.
Conclusion
Creating a transparent background for an image is the most common task that people need to perform for logos, product shots, profile pictures, social media images, presentations, and websites. The method varies according to the device you use and also depends on the complexity of the picture as well as the required precision.
For most common photographs – product shots on a white background, logos, or simple illustrations – the free online image background remover tool powered by AI performs really well without requiring any software. For professional eCommerce photographs that have hair or detailed edges, Select and Mask from Photoshop provides the best precision. On iPhones running iOS 16 or higher, Subject Lift will create quick cutouts on-the-go.
The golden rule – always save transparent images in PNG or WebP format, and never in JPG. In case the image will be used on a website, convert the PNG to WebP after background removal to reduce the size of the image by 26%.
Use our free Image Background Remover to remove any image background in seconds — no sign-up, no watermarks, batch processing supported, completely free on every device.