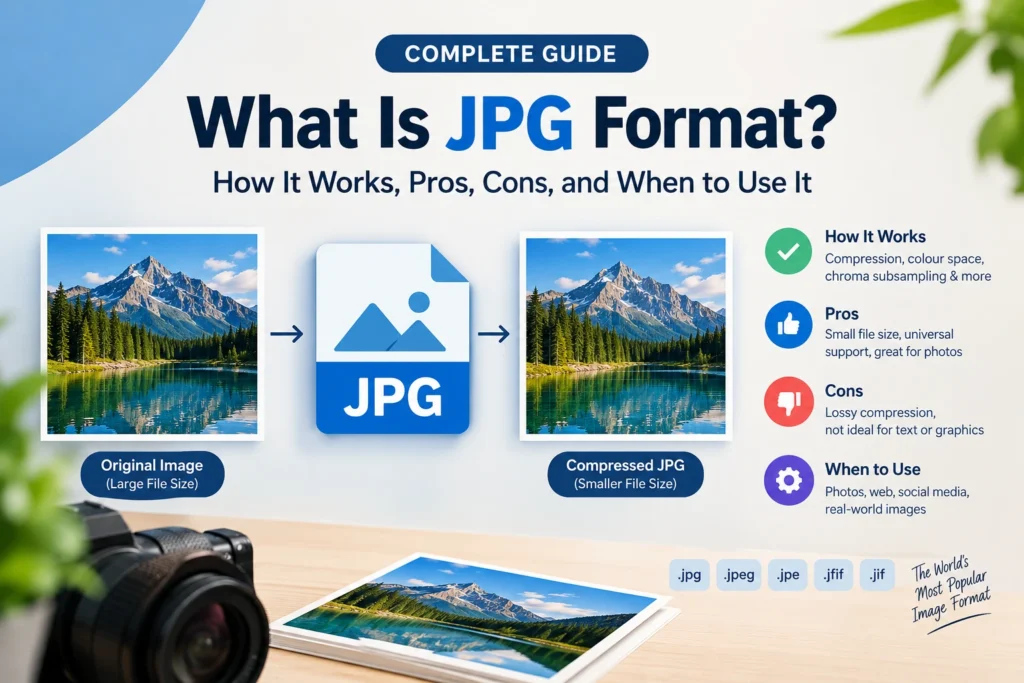
JPG — also known as JPEG — is the world’s most widely used image format, storing over one trillion photographs across devices and platforms globally. It achieves this dominance through a single defining advantage — lossy compression that reduces photograph file sizes by 75 to 95 percent with no visible quality difference at normal screen viewing sizes. Created in 1992, JPG remains the universal standard for photographic images in 2026 because it works on every device, every platform, every browser, every printer, and every application ever made — without exception.
The following guide will help you learn everything about JPG, including the essence of the format, the process of its compression from the technical side, the quality effects depending on the compression rate, its advantages and disadvantages, the cases for usage and non-usage, and JPG vs. PNG/WebP.
What Is JPG? — Definition, History, and Origin
JPG stands for Joint Photographic Experts Group — the name of the committee that created the format, not a description of the format itself. The committee was a joint working group formed in 1986 under two international standards organisations — the International Organisation for Standardisation (ISO) and the International Electrotechnical Commission (IEC). Their goal was to create a standardised method for compressing continuous-tone photographic images — the kind with complex colour gradients, subtle tonal variations, and natural textures that characterise real-world photography.
The JPEG standard was formally published in 1992 as ISO/IEC 10918-1. It quickly became the dominant format for digital photography — adopted by camera manufacturers, software developers, and web browsers as the default way to store and transmit photographic images. By the mid-1990s, JPG was already the de facto standard for photographs on the internet and in consumer digital cameras.
Why JPEG and JPG refer to the same thing: The format is officially called JPEG (Joint Photographic Experts Group). The file extension is .jpg because early Windows operating systems only allowed three-letter file extensions — so the four-letter .jpeg extension was shortened to .jpg. Both extensions refer to exactly the same format with exactly the same technical specification. The terms JPEG and JPG are completely interchangeable.
Other file extensions for the same format: Beyond .jpg and .jpeg, the same format appears as .jpe (rare), .jfif (JPEG File Interchange Format — a specific variant), and .jif (also rare). All store the same type of compressed photographic data using the JPEG standard.
According to JPEG.org, the Joint Photographic Experts Group estimates there are approximately one trillion JPEG images stored across all devices and systems globally — making it by far the most numerically dominant image format in existence.
How JPG Compression Works — The Technical Process
JPG’s compression is the most important thing to understand about the format. Everything else — its strengths, its limitations, its appropriate uses — flows from understanding what happens when an image is saved as JPG.
Step 1 — Colour Space Conversion
When an image is saved as JPG, the first step converts the colour data from RGB (Red, Green, Blue — the colour model used by screens) to YCbCr — a colour model that separates luminance (brightness, represented by Y) from chrominance (colour information, represented by Cb and Cr).
This conversion is significant because the human visual system perceives brightness differences much more precisely than colour differences. The eye has approximately 120 million rod cells sensitive to brightness and only 6 to 7 million cone cells sensitive to colour. JPG compression exploits this biological reality by treating brightness and colour information differently — preserving brightness more carefully and compressing colour more aggressively.
Step 2 — Chroma Subsampling
The color space conversion is followed by downsampling of the color channels (Cb and Cr) — halving their resolution in the horizontal and vertical directions. This is known as 4:2:0 chroma subsampling . This means that one set of color values represents a 2 × 2 block of pixels , rather than each pixel having their own color value .
Because the human eye perceives color less sharply than brightness, cutting the color resolution in half is effectively invisible in normal photographic content. In flat color areas and photographs with natural gradients no visible difference is observed. Chroma subsampling only becomes noticeable in very saturated graphics or images with very fine color detail at sharp edges.
This single step reduces the colour data by 75 percent — a major contribution to JPG’s overall compression efficiency before any other processing occurs.
Step 3 — Block Division
The image is divided into non-overlapping 8 × 8 pixel blocks. Each block is processed independently by the compression algorithm. This block-based approach is why JPG compression artefacts look like rectangular patches — at high compression levels, the boundaries between adjacent 8 × 8 blocks become visible as discontinuities in colour and brightness.
Step 4 — Discrete Cosine Transform (DCT)
Each 8 × 8 pixel block is transformed using the Discrete Cosine Transform — a mathematical operation borrowed from signal processing. The DCT converts the spatial pixel data (colour values at specific positions) into frequency data (representing how much visual variation exists across the block).
The result of the DCT is a set of 64 frequency coefficients for each 8 × 8 block. The first coefficient (DC coefficient) represents the average brightness of the entire block. The remaining 63 coefficients (AC coefficients) represent increasingly fine detail — from gradual gradients across the block to rapid pixel-to-pixel variations at the finest scale.
This frequency representation is crucial to understanding what JPG compression throws away. High-frequency coefficients represent fine texture detail and sharp edge transitions — detail that human eyes perceive less accurately than broad tonal relationships. Low-frequency coefficients represent the overall brightness and colour of the block — detail that eyes perceive most acutely.
Step 5 — Quantization — Where Data Is Permanently Removed
Quantization is the step where data is permanently and irreversibly removed. Each of the 64 frequency coefficients is divided by a corresponding value from a quantization table, then rounded to the nearest integer.
High-frequency coefficients — representing fine detail — are divided by larger quantization values, which rounds away more of their precision. Low-frequency coefficients are divided by smaller values, preserving more precision. At high quality settings (small quantization values), the rounding discards little data. At low quality settings (large quantization values), extensive rounding discards significant detail.
This is the moment quality is lost. The rounded coefficient values cannot be perfectly reversed — the rounding introduces permanent error in the frequency domain, which translates to visible degradation in the spatial image domain when the image is decompressed. Higher quality settings use smaller quantization divisors — less rounding, less data loss, but also less compression.
Step 6 — Entropy Coding
The quantized coefficient values — now small integers — are compressed using lossless entropy coding (specifically Huffman coding in most implementations). This step assigns shorter binary codes to more frequently occurring values, reducing the total number of bits needed without any further quality loss.
Step 7 — File Assembly
The compressed coefficient data is assembled into the final JPEG file format along with headers containing metadata — image dimensions, colour space information, quantization tables used, and optionally EXIF metadata (camera model, shooting settings, GPS location, date and time).
The Full Cycle — Decompression
When a JPG image is displayed, the entire process runs in reverse — Huffman decoding, dequantization, inverse DCT, inverse chroma subsampling, YCbCr to RGB conversion — producing the pixel grid displayed on screen. The decompressed image is not identical to the original — the quantization step introduced permanent changes — but at high quality settings, the differences are imperceptible.
Generation Loss — Why You Should Never Re-Save a JPG
One of the most important practical concepts about JPG is generation loss. Every time you open a JPG image, change it and save it again as a JPG, the quantization step happens again – permanently deleting even more data on top of what was already deleted in the previous save.
Even when you save a JPG with no visible differences, there will be generation loss. After opening the file, decompressed pixel values are a little different than original because of the first compression. Quantization again of those slightly-different values leads to an accumulation of further error. Repeat this ten times and the accumulated quality degradation is clearly visible – flat color areas develop visible banding, sharp edges develop color fringing and fine texture detail is progressively smeared away.
The practical implication: Always work from lossless source files. If you’re editing photographs for professional use, keep the original RAW or TIFF file as your master. Edit from the lossless original. Export to JPG only as the final delivery step — never as an intermediate step that you’ll open and re-save later.
If you only have a JPG and need to edit it, convert it to PNG first. The PNG conversion preserves the current JPG quality losslessly — subsequent saves of the PNG don’t degrade quality further. Re-export to JPG only when you’ve finished all editing. Our guide on how to convert JPG to PNG covers this conversion in detail including what happens to quality in each direction.
JPG Quality Settings — What the Numbers Actually Mean
Most image software provides a quality setting when saving JPG files — typically expressed as a percentage from 0 to 100, or sometimes as a scale from 1 to 12. Understanding what these numbers actually mean helps you choose the right setting for every use case.
What the Quality Setting Controls
The quality setting directly controls the quantization table values. Higher quality settings use smaller quantization divisors — less rounding, more data preserved, larger files. Lower quality settings use larger quantization divisors — more rounding, more data discarded, smaller files.
The relationship between quality setting and file size is not linear. Moving from 100 percent to 80 percent quality reduces file size dramatically — by 75 to 85 percent — because the first significant data removals at high quality settings affect imperceptible high-frequency detail. Moving from 70 percent to 50 percent quality reduces file size by a much smaller proportion — because the data most easily discarded has already been removed, and further compression starts removing perceptible detail.
Quality Setting Reference Guide
| Quality Setting | Visual Result | File Size vs Original | Best Use Case |
|---|---|---|---|
| 95–100% | Perfect — no visible difference | 10–25% smaller | Professional archiving, print masters |
| 85–95% | Excellent — invisible at any size | 40–60% smaller | Professional client deliveries |
| 80–85% | Excellent — invisible at screen sizes | 65–80% smaller | Websites, blogs, product images |
| 75–80% | Very good — invisible at screen sizes | 78–85% smaller | Social media, casual sharing |
| 70–75% | Good — barely visible on close inspection | 83–88% smaller | Size-constrained contexts |
| 60–70% | Acceptable — minor artefacts visible | 87–92% smaller | Thumbnails, low-priority images |
| 50–60% | Poor — artefacts clearly visible | 90–94% smaller | Not recommended for most uses |
| Below 50% | Bad — severe block artefacts | 93%+ smaller | Avoid — quality unacceptable |
The professional sweet spot: 80 to 85 percent quality is where most professional web image work happens. At these settings, JPG images are visually indistinguishable from the original at normal screen viewing sizes and distances — even under moderately close inspection. The file size reduction of 65 to 80 percent compared to maximum quality is substantial and practically significant.
JPG Technical Specifications
Understanding JPG’s technical capabilities and limitations helps you know exactly what the format can and cannot do.
Colour Depth
By default, JPG stores 8 bits per color channel (red, green and blue), so 24 bits per pixel. This gives 256 possible values for each channel and 16,777,216 possible colors in total. For photographic content with continuous color gradients and natural tonal variations, 24-bit color depth is sufficient since the human visual system cannot distinguish individual colors from the 16.7 million available.
There is a less common variant called JPEG 2000 (a separate standard, not the same as standard JPG) that supports higher bit depths — but standard JPG files universally use 24-bit colour.
Colour Spaces
JPG supports multiple colour spaces for different use contexts:
sRGB: The standard colour space for screen display and web use. Every web browser, most consumer monitors, and all major social platforms use sRGB. Web images should always be saved in sRGB — other colour spaces can appear washed out or incorrectly saturated in web browsers.
Adobe RGB: A wider colour space capturing more colours than sRGB — particularly in the green-cyan range. Used in professional photography workflows where colour accuracy across different devices is critical. Requires colour-managed viewing software to display correctly.
CMYK: JPG supports CMYK colour mode for print production contexts where cyan, magenta, yellow, and black ink values need to be specified directly. Most web applications don’t support CMYK JPG — it’s primarily used in professional print workflows.
Transparency
JPG has no transparency support whatsoever. This is a fundamental, unchangeable characteristic of the format — not a limitation that can be worked around with settings or variants. Every pixel in a JPG image is fully opaque. Any transparent areas in a source image are filled with a solid colour (typically white) when saved as JPG.
If an image requires a transparent background — a logo sitting on different coloured backgrounds, a product cutout, a watermark — JPG is the wrong format. Use PNG for universal transparency support or WebP for web-optimised transparency. Our Image Background Remover creates transparent PNG files from any image — but the result must be saved as PNG or WebP, never JPG.
Animation
JPG does not support animation. It stores a single static image. For animated content, use GIF (limited, legacy), animated WebP (modern, efficient), or video formats.
Maximum Dimensions
The JPEG standard supports images up to 65,535 × 65,535 pixels — approximately 4.3 gigapixels. In practice, software and memory constraints create lower practical limits, but for any real-world photographic use, the dimension limit is never a concern.
EXIF Metadata
JPG files commonly contain EXIF (Exchangeable Image File Format) metadata — information about the image embedded in the file alongside the visual data. Standard EXIF data includes:
- Camera make and model
- Lens information
- Shooting settings (aperture, shutter speed, ISO, focal length)
- Date and time of capture
- GPS coordinates (if location services were enabled)
- Copyright and author information
- Colour profile information
EXIF metadata is valuable for photography workflows — it preserves the technical record of how each image was captured. For web use, EXIF data adds unnecessary file size (typically 10 to 100KB per image) with no benefit to website visitors. Stripping EXIF data before web upload reduces file size without any visual impact. Our Image Compressor removes unnecessary metadata during compression — producing smaller files without any visible quality change.
JPG Strengths — What It Does Better Than Any Alternative
Universal Compatibility
JPG’s most powerful advantage in 2026 is its absolute universal compatibility. Every device ever manufactured that can display digital images supports JPG. Every browser — including every version ever released. Every operating system — Windows, macOS, Linux, iOS, Android, ChromeOS. Every image editing application. Every print service. Every social media platform. Every email client. Every document application.
This universal support — built up over 34 years — is simply irreplaceable for any image that needs to work everywhere without special handling or conversion. No other image format comes close to JPG’s compatibility footprint.
Excellent File Size for Photographs
For photographic content with complex colour gradients and natural textures, JPG’s compression is extremely efficient. At 80 to 85 percent quality, JPG typically achieves 75 to 85 percent file size reduction compared to uncompressed images — with no visible quality difference on screen. A 12-megapixel photograph at 3MB uncompressed becomes a 300 to 500KB JPG that looks identical on any screen.
This combination of small file size and excellent visual quality for photographs is why JPG remained the dominant format for decades despite the development of technically superior alternatives.
Broad Software Ecosystem
JPG has 34 years of software support behind it. Every image editor, every RAW processor, every batch conversion tool, every media manager, every photo printing service, and every platform that handles images supports JPG natively. This breadth of ecosystem support means JPG files are future-proof in a way that newer formats are not — a JPG file created in 1995 opens perfectly in 2026 software, and a JPG created today will open in any software developed in the foreseeable future.
Well-Understood Quality Characteristics
Because JPG has been in universal use for over 30 years, its quality characteristics at different compression settings are extremely well understood. Professional photographers, designers, and developers know exactly what to expect from JPG at specific quality settings. Printing services know how to handle JPG files for specific output sizes. This established knowledge base reduces uncertainty and error in professional workflows.
JPG Limitations — Where It Falls Short
Lossy Compression — Quality Loss Is Permanent
Every JPG save permanently removes image data. At high quality settings, this loss is invisible — but it is real and irreversible. The original data cannot be recovered from the compressed file. This makes JPG unsuitable as a working format for images that will be edited repeatedly.
Generation loss — the cumulative degradation from multiple open-edit-save cycles — is JPG’s most significant practical limitation for professional image work. Working from lossless sources and exporting to JPG only at the final delivery step is standard professional practice for exactly this reason.
No Transparency Support
The complete absence of transparency support is a hard limitation with no workarounds within the JPG format. Logos, icons, cutout graphics, and any image requiring a transparent background cannot use JPG. This forces the use of alternative formats — PNG for universal transparency, WebP for web-optimised transparency — in these use cases.
Poor Compression for Graphics and Text
JPG’s DCT compression is optimised for photographic content — images with smooth, continuous colour gradients and natural textures. For images with hard edges, flat colours, and text — logos, icons, screenshots, interface graphics, infographics — JPG compression creates visible artefacts at virtually any quality setting.
The block-based DCT processing creates discontinuities at 8 × 8 block boundaries that are highly visible in areas of flat colour adjacent to hard edges. Text characters develop colour fringing — coloured halos around each letter — even at quality settings of 90 percent or above. This makes JPG genuinely unsuitable for screenshots, logos, interface graphics, and any image with sharp geometric edges.
Less Efficient Than WebP
WebP — Google’s modern image format released in 2010 — achieves 25 to 34 percent smaller file sizes than JPG at equivalent visual quality. For websites where loading speed affects rankings and user experience, this file size difference is practically significant. A hero image at 400KB as JPG becomes approximately 270KB as WebP — with identical visual quality. Across a website with hundreds of images, the cumulative size difference is substantial.
WebP’s advantage over JPG is consistent across image types and quality settings — not a marginal improvement in specific cases. For web delivery specifically, WebP is the objectively better format. JPG’s advantage over WebP is only universal compatibility — in contexts where compatibility matters more than efficiency, JPG remains the right choice. Our detailed comparison in JPG vs WebP covers every practical difference between the two formats.
Limited Colour Depth
JPG’s 8 bits per channel (24-bit total) is sufficient for standard dynamic range photography and normal screen display. However, it cannot accurately represent HDR (High Dynamic Range) content or the wider colour gamuts available on modern displays. HEIC and AVIF both support higher bit depths — HEIC up to 16 bits per channel — making them more capable formats for the expanding HDR content landscape.
When to Use JPG — Specific Use Cases
Photographs for Web Publishing
JPG is a solid choice for photographs on websites — though WebP is better when supported. At 80 to 85 percent quality, JPG photographs look excellent on screen at dramatically smaller file sizes than uncompressed originals. For websites that can’t yet serve WebP consistently, JPG at correct dimensions and appropriate compression is the practical standard.
Always resize photographs to the correct display dimensions before saving as JPG for web use. A full-resolution camera JPG is vastly larger than needed for most web contexts. Our Image Resizer handles precise dimension targeting — resize to the correct pixel dimensions, then compress to the appropriate quality level.
Email Attachments
For photographs sent as email attachments, JPG is the correct format — universally. Email clients support JPG reliably across every platform and version. WebP is not supported in most email clients. PNG photographs create unnecessarily large attachments. JPG at 75 to 80 percent quality keeps attachment sizes manageable while maintaining acceptable visual quality.
Keep email images under 1MB per image for casual sharing. For professional correspondence with multiple image attachments, target under 500KB per image. Compress using our free Image Compressor before attaching.
Social Media Photographs
For photographs on Instagram, Facebook, Twitter, LinkedIn, and most social platforms, JPG is the recommended upload format. Social platforms recompress all uploaded images — JPG at 80 to 90 percent quality at the platform’s recommended dimensions gives their compression algorithm good source material to work with, minimising visible quality loss after platform recompression.
Print Orders
JPG is universally accepted by print services — professional photo labs, online printing services, and print shops all accept high-quality JPG. For print, use quality settings of 90 to 95 percent to minimise compression artefacts that are more visible in print than on screen. Calculate that your image has sufficient pixel resolution for the print size — multiply print dimensions in inches by 300 to get the minimum pixels needed at professional print quality.
Final Delivery of Completed Images
JPG is the standard delivery format for completed photographs shared with clients, used in documents, or distributed for general use. When you’ve finished all editing (from a lossless working file) and need to deliver the final version, JPG at appropriate quality is the universally compatible choice that works for recipients on any platform or device.
When NOT to Use JPG — Critical Situations
Images With Transparent Backgrounds
Never use JPG for any image requiring transparency. The transparent areas will be filled with white, destroying the transparency permanently. Use PNG for universal compatibility or WebP for web use. Our guide on how to make image background transparent explains the full process including which formats correctly preserve transparency.
Logos and Brand Graphics
JPG compression creates visible artefacts around the sharp edges of logos — blurry edge transitions, colour fringing, and block-like patterns in flat colour areas. Even at quality settings of 95 percent, logo edges show visible degradation compared to PNG or WebP lossless. Use PNG or SVG for logos in all contexts. Use SVG for web logos — infinite scalability, tiny file size.
Screenshots Containing Text
JPG compression handles text very poorly. The sharp edges of text characters create significant compression artefacts — colour halos around each character that make text look blurry and unprofessional even at quality settings of 85 to 90 percent. Screenshots should always be saved as PNG or lossless WebP to maintain perfectly sharp text.
Working Files Being Edited Repeatedly
Never use JPG as a working format for images being edited. Each save cycle degrades quality through generation loss. Keep working files as PNG or TIFF — lossless formats that preserve quality through unlimited save cycles. Export to JPG only at the final delivery step.
Images for Professional Print Archiving
For archiving images intended for potential large-format print use, JPG’s lossy compression is not ideal for long-term archiving. TIFF or PNG preserve lossless quality indefinitely — ensuring the maximum possible detail is available for any future print use at any size.
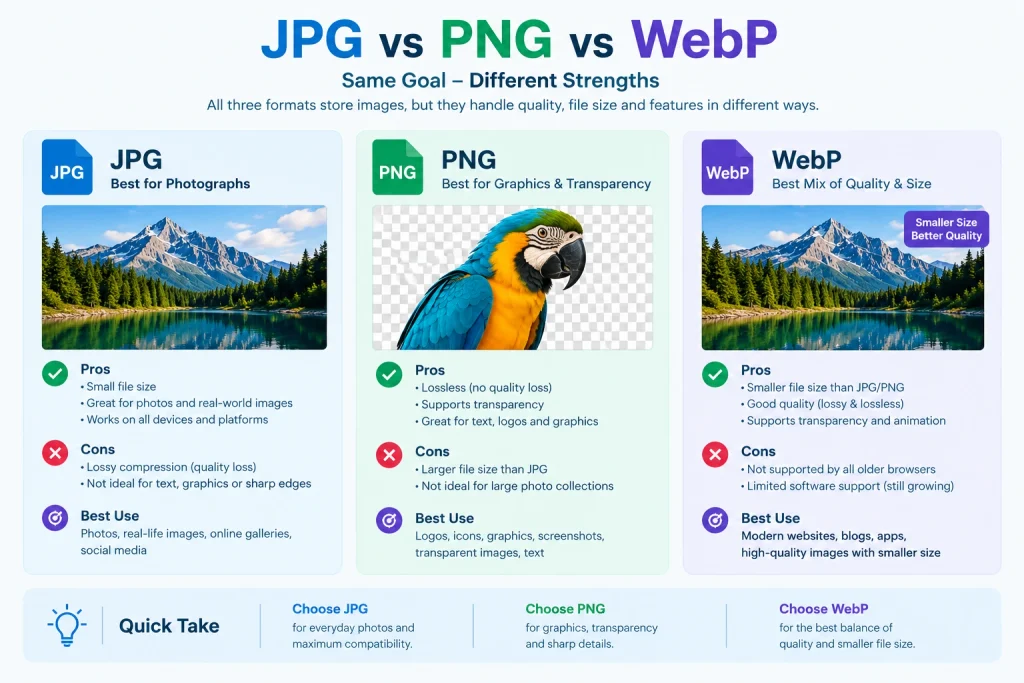
JPG vs PNG vs WebP — Quick Comparison
| Feature | JPG | PNG | WebP |
|---|---|---|---|
| Compression | Lossy | Lossless | Lossy and Lossless |
| File Size (photos) | Small | Large | Smallest |
| Quality Loss | Yes — permanent | No | Lossy: yes / Lossless: no |
| Transparency | No | Full alpha | Full alpha |
| Animation | No | No (APNG: yes) | Yes |
| Browser Support | Universal | Universal | 96%+ |
| Print Support | Universal | Wide | Rare |
| Email Support | Universal | Generally works | Inconsistent |
| Best For | Photos, universal use | Graphics, transparency, editing | All web images |
| Year Created | 1992 | 1996 | 2010 |
Our dedicated comparisons cover these differences in depth — JPG vs PNG and JPG vs WebP both explain every practical difference with specific use case guidance.
JPG File Size — Realistic Expectations
Understanding what file sizes to expect at different quality settings helps you plan image workflows and set appropriate targets.
Typical JPG File Sizes by Image Type
| Image Type | Dimensions | JPG Quality 85% | JPG Quality 75% | JPG Quality 95% |
|---|---|---|---|---|
| Smartphone photo | 4032 × 3024 | 2.8 MB | 1.6 MB | 5.2 MB |
| Website hero image | 1920 × 1080 | 420 KB | 240 KB | 780 KB |
| Blog featured image | 1200 × 628 | 165 KB | 95 KB | 310 KB |
| Product photo | 800 × 800 | 95 KB | 55 KB | 175 KB |
| Thumbnail | 400 × 300 | 28 KB | 16 KB | 52 KB |
| Profile picture | 400 × 400 | 35 KB | 20 KB | 65 KB |
These are typical ranges — actual sizes vary considerably based on image content. High-detail images with complex textures compress less efficiently than simple images with smooth colour areas. Images with large areas of similar colour compress more efficiently than images with complex, varied content throughout.
Target File Sizes for Web JPG Images
For web performance, these targets keep pages loading fast while maintaining acceptable quality:
- Hero images: Under 300KB (ideally under 200KB)
- Blog featured images: Under 150KB
- Product images: Under 120KB
- Blog inline images: Under 100KB
- Thumbnails: Under 30KB
If your JPG images consistently exceed these targets at 80 to 85 percent quality, the image dimensions are likely too large for the display context — resize to the correct display dimensions first, then compress.
How to Convert JPG to Other Formats
JPG is often the starting point for conversions to other formats depending on the use case.
JPG to PNG: When you need to add a transparent background, edit the image losslessly, or use it in a context requiring PNG. Our JPG to PNG converter handles this conversion with full quality preservation — the PNG captures the JPG’s current quality losslessly.
JPG to WebP: When optimising images for web use. WebP achieves 25 to 34 percent smaller files than JPG at equivalent visual quality — the highest-impact format conversion for website performance. Use our JPG to WebP converter to convert single files or entire batches simultaneously.
JPG to SVG: When a JPG logo or simple graphic needs to scale to any size without quality loss. SVG is a vector format — infinitely scalable. The conversion involves tracing the JPG’s pixel shapes into vector paths, which works well for simple logos and graphics but not for complex photographs. Our guide on how to convert JPG to SVG covers the conversion process and what results to expect.
JPG in 2026 — Is It Still Relevant?
JPG has been predicted to be replaced by superior formats for over a decade. WebP arrived in 2010. HEIC arrived on iPhones in 2017. AVIF is gaining traction. Yet JPG remains the dominant image format by usage volume — and for good reason.
Why JPG remains relevant in 2026:
Universal compatibility cannot be replaced overnight. The 34-year ecosystem of JPG support — in every camera, every printer, every application, every platform — represents enormous infrastructure that newer formats simply don’t have. For any image that needs to work everywhere without compatibility concerns, JPG remains the only format that guarantees this absolutely.
For web use specifically, WebP has largely superseded JPG as the recommended format among performance-conscious developers and website owners. But for email, print, document use, general sharing, and any context where the recipient’s software is unknown, JPG remains the safe and practical choice.
The realistic future of JPG: JPG will not disappear. It will continue to be the universal compatibility layer — the format you fall back to when you need guaranteed compatibility. WebP will continue to grow as the standard for web delivery. AVIF will eventually push WebP’s adoption aside for performance-critical web use. But JPG will remain relevant for universal compatibility purposes for at least another decade — probably longer.
Frequently Asked Questions
1. What does JPG stand for?
JPG stands for Joint Photographic Experts Group — the name of the international committee that created the format, not a description of the format itself. The committee was formed in 1986 as a joint working group under ISO and IEC. The JPEG standard was published in 1992. The file extension .jpg is a shortened version of .jpeg — required because early Windows only allowed three-letter file extensions.
2. Is JPG lossy or lossless?
JPG is exclusively lossy. It permanently removes image data during compression — data that cannot be recovered. At high quality settings (80 to 95 percent), the removed data is invisible at normal screen viewing sizes. At low quality settings (below 70 percent), compression artefacts become clearly visible. There is no lossless mode in standard JPG — for lossless compression, use PNG or lossless WebP.
3. Why does JPG lose quality every time you save it?
Each JPG save applies quantization — a mathematical rounding process that permanently removes high-frequency image detail. The decompressed image from opening a JPG is slightly different from the original due to this rounding. When that slightly-different image goes through quantization again on the next save, additional error accumulates. This cumulative degradation — called generation loss — is why JPG should only be used for final delivery, not as a working format for images being edited repeatedly.
4. What is the best JPG quality setting for web images?
80 to 85 percent quality is the professional standard for web images. At these settings, JPG images are visually indistinguishable from the original at normal screen viewing sizes — the quality difference requires zooming in significantly to detect. File sizes at 80 to 85 percent are 65 to 80 percent smaller than maximum quality, which meaningfully improves web loading performance.
5. Can JPG have a transparent background?
No. JPG has no transparency support under any circumstances. Transparent areas in source images are filled with solid colour (typically white) when saved as JPG. For transparent backgrounds, use PNG (universal compatibility) or WebP (smaller files for web use). There are no settings or variants that add transparency to standard JPG.
6. What is the difference between JPG and JPEG?
There is no difference — JPG and JPEG are exactly the same format. JPEG is the full name (Joint Photographic Experts Group). JPG is the shortened file extension used because early Windows operating systems only allowed three-letter extensions. Both .jpg and .jpeg files use the identical technical specification and are completely interchangeable.
7. Is JPG or PNG better for websites?
For photographs — JPG or WebP. PNG photographs are 5 to 10 times larger than equivalent JPGs, creating slow-loading pages. For logos, icons, and graphics — PNG or SVG. JPG compression creates visible artefacts around sharp edges. For the best overall web performance in 2026, WebP beats both — 25 to 34 percent smaller than JPG with equivalent quality. Our JPG vs PNG comparison covers every practical difference in detail.
8. Should I use JPG or WebP for my website?
WebP for all web images — it’s 25 to 34 percent smaller than JPG at equivalent quality with 96 percent global browser support. JPG for email, print, and any context requiring universal compatibility. For websites, implement WebP with JPG fallback using the HTML picture element — this serves WebP to modern browsers (96 percent of users) and falls back to JPG for older browsers automatically.
9. Why do iPhone photos sometimes come out as HEIC instead of JPG?
iPhones running iOS 11 and later default to HEIC format because it stores photographs at approximately half the file size of JPG at equivalent quality — allowing more photos in the same storage space. To make iPhones save as JPG instead, go to Settings > Camera > Formats and select Most Compatible. For converting existing HEIC files to JPG, our guide on how to convert HEIC to JPG covers every method on every device.
10. What is EXIF data in JPG files and should I remove it?
EXIF data is metadata embedded in JPG files — camera model, shooting settings, GPS location, date and time of capture. For professional photography workflows, EXIF data preserves important records of how images were captured. For web images, EXIF data adds unnecessary file size (10 to 100KB) with no benefit to website visitors. Stripping EXIF data before web upload reduces file size without any visual impact — our Image Compressor removes unnecessary metadata during compression automatically.
Conclusion
JPG is the format that made digital photography practical — reducing photograph file sizes by 75 to 95 percent with compression quality that is genuinely invisible at normal viewing settings. Developed in 1992 and refined over three decades, it remains the universal standard for photographic images because nothing matches its combination of good compression, excellent visual quality, and absolute universal compatibility.
Understanding JPG means understanding its core tradeoff — lossy compression that produces excellent results for photographs at the cost of permanent data removal on each save. This tradeoff makes JPG ideal for final delivery of photographic content and unsuitable for working files, transparent graphics, logos, and text-heavy screenshots.
In 2026, JPG’s role is clearly defined. For photographs going to email, print, or any context requiring universal compatibility — JPG at 80 to 85 percent quality is the correct, practical choice. For photographs going on websites — WebP at equivalent quality is 25 to 34 percent smaller with identical visual results. For logos, screenshots, and graphics — PNG or WebP lossless preserves quality without compression artefacts. For logos on websites — SVG provides infinite scalability at tiny file sizes.
Use the right format for each context — and when JPG is the right format, use it at the right quality setting. Convert your images between formats using our free image converter tools — every major format conversion supported, batch processing included, no sign-up required.