Removing a background from an image used to be something only professional designers could do. You needed expensive software, hours of practice, and a steady hand with selection tools. Today, anyone can remove an image background in seconds — on their phone, laptop, or desktop — without installing anything or paying a monthly subscription fee.
This guide covers everything honestly. How to remove background from image free online, how to remove white background from image, how to deal with black backgrounds, and how to do it properly on Windows, Mac, iPhone, Android, Google Slides, PowerPoint, and Word. Every method is explained with its pros, cons, and limitations so you can pick the right approach for your situation.
What Does Removing an Image Background Actually Mean?
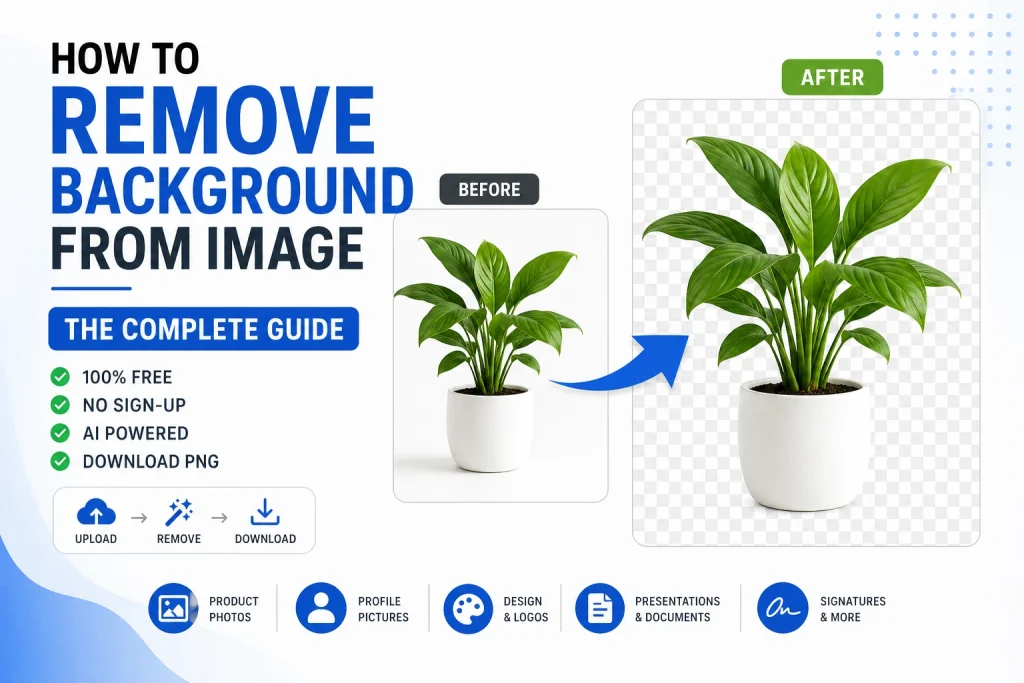
When you remove a background from an image, you are separating the main subject — a person, a product, a logo — from everything behind it. The background is deleted and replaced with either a transparent layer, a solid colour, or a completely different image altogether.
The result is a clean cutout of the subject that you can place on any background you want. This is widely used for product photography, logo design, profile pictures, presentations, social media content, and print materials. The output is almost always saved as a PNG file because PNG natively supports transparent backgrounds — JPG does not support transparency at all. According to the W3C PNG specification, PNG was specifically designed to support full alpha channel transparency, which is exactly what makes it the right format for background-removed images. If you want to understand the full difference between JPG and PNG and when to use each one, our article on how to convert JPG to PNG covers it in complete detail.
Why Would You Need to Remove an Image Background?
There are many practical reasons people need background removal, and they go far beyond professional design work. Understanding the use case helps you choose the right method and get the best possible result for your specific situation.
Product Photography and eCommerce
Online stores almost always display products on a clean white or transparent background. When you photograph a product at home or in a basic setup, you usually end up with a cluttered background — a messy desk, uneven lighting, or a distracting wall colour behind the item. Removing the background and replacing it with plain white gives your product a professional, consistent appearance that builds buyer trust and matches the standards expected on platforms like Amazon, eBay, and Etsy.
Poor product images directly hurt conversion rates. Shoppers associate image quality with product quality and seller credibility. A clean, properly cut-out product image can make the difference between a sale and a bounce. If you are managing a large catalogue of product images, look for a tool that supports multiple file uploads so you can process everything in one go rather than one image at a time.
Logo and Graphic Design
Logos almost always need a transparent background. If someone sends you a logo as a JPG with a white background and you place it on a dark-coloured slide, banner, or website header, you get a white box sitting awkwardly around the logo. Removing that white background so the logo sits cleanly on any surface is one of the most frequently needed tasks in everyday design work. The same applies to watermarks, brand icons, stamps, and any graphic element that needs to sit on top of other content.
Profile Pictures and Social Media
Many people remove backgrounds from their photos to create a clean professional headshot on a neutral background, place themselves in front of a different scene, or create visually striking social media posts. Content with clean cutouts consistently looks more polished and tends to perform better on visual platforms. It also gives you flexibility — one good photo of yourself or your product can be repurposed across multiple different backgrounds and contexts.
Presentations and Documents
When you insert an image into PowerPoint, Google Slides, or Word, any white or coloured background around the image clashes with your slide design and immediately makes the presentation look amateurish. Removing the background before inserting the image — or using the built-in removal tools — makes everything look intentional and professionally designed rather than thrown together.
Signature Images
Scanned or photographed signatures almost always have a white or off-white background from the paper. When you insert that into a document, PDF, or email footer without removing the background, it appears in an obvious white rectangle that looks out of place on any non-white surface. Removing the background leaves only the ink strokes on transparency, which sits naturally on any document colour or design.
How Does AI Background Removal Work?
Understanding how the technology works helps you get better results and know what to expect from different tools. Modern background removal uses artificial intelligence — specifically deep learning models trained on millions of images to recognise subjects and backgrounds.
Rather than selecting pixels by colour like older tools did, AI looks at the entire image contextually and figures out what is the main subject and what is the surrounding background. This is why AI tools handle complex situations so much better than manual selection methods. They can deal with fine hair, transparent objects, complex edges, and subjects that share colours with their background — all things that trip up colour-selection tools completely.
According to Mozilla’s image format documentation, the ability to handle transparency correctly in image files is one of the most important factors for web graphics, which is why AI-based tools that output proper transparent PNGs have become so essential for web workflows.
The quality of the AI result depends heavily on the quality of the input image. High-resolution images with good contrast between the subject and background produce the cleanest results. Low-resolution, blurry, or very busy images with no clear subject boundary are genuinely harder to process accurately — this is a limitation of the technology, not a flaw in any specific tool.
How to Remove Background from Image Free Online
The Fastest Method — No Software Needed
Using a free online AI tool is the fastest and most accessible way to remove a background from any image. You do not need to install anything, create an account, or enter payment details. The whole process takes under 10 seconds for most standard images.
- Go to imageconvertertools.com/image-background-remover
- Click the upload button or drag and drop your image into the area
- The AI automatically detects the subject and removes the background
- Preview the result — removed areas appear as a transparent checkerboard pattern
- Download your image as a PNG with a transparent background
You can upload multiple images at once for batch processing. Files are automatically deleted from the server after conversion to protect your privacy.
Pros of Online AI Background Removal
- No software installation required — works on any device with a browser
- AI gives dramatically better results than manual tools for most images
- Fast — most images are processed in under 10 seconds
- Supports multiple file uploads for batch processing
- Free with no limits, no watermarks, and no sign-up required
- Works on Windows, Mac, iPhone, Android, and Chromebook equally well
Cons of Online AI Background Removal
- Requires an internet connection — cannot be used offline
- Very complex images with extremely fine details like individual hair strands may need manual touch-up after processing
- You are uploading your image to a server — avoid using online tools for confidential or sensitive images
When to Use It
Use the online tool whenever you need a quick, clean result without any software setup. It covers the vast majority of everyday use cases — product photos, logos, profile pictures, and general images. For very high-end professional work where pixel-level precision and full offline control are required, dedicated desktop software gives you more fine-grained control, though it takes significantly more time.
How to Remove White Background from Image
Why White Backgrounds Are Trickier Than They Look
White background removal has a specific challenge that catches many people off guard — what happens when the subject itself contains white? A white shirt, white product packaging, a white logo, or white text in an image can accidentally get removed along with the background if the tool is working by colour selection alone.
Good AI-based tools handle this correctly because they identify the subject as a complete object rather than selecting by colour. The AI understands that a white shirt is part of the person, not part of the background. Older colour-selection tools struggle badly with this and often produce incomplete or ragged results that require extensive manual fixing.
Step-by-Step: Remove White Background
- Upload your image to the background remover tool
- Let the AI detect and remove the white background automatically
- Zoom in to 100% and check the edges carefully — look especially at white elements within the subject
- Use the restore brush if any white parts of the subject were incorrectly removed along with the background
- Download as PNG — this is essential, as saving as JPG will simply replace the removed background with white and undo your work
Tips for Better White Background Removal
- If your subject contains white elements, always use AI rather than a colour-select tool
- Higher resolution images give sharper, cleaner edges after removal
- Check edges at 100% zoom before downloading — small imperfections are easy to miss at smaller views
- Save exclusively as PNG when you need to preserve transparency — never JPG
How to Remove Black Background from Image
Removing a black background uses exactly the same process as white background removal when you use an AI tool. The AI identifies the subject and removes the surrounding background regardless of its colour — black, white, grey, or patterned.
The specific challenge with black backgrounds mirrors the white background problem — if your subject contains dark or black elements, those areas can be harder to separate from a black background. A dark jacket photographed on a black background, for example, is genuinely difficult for any tool to handle cleanly because there is very little visual contrast to work with at the edges.
For best results with black backgrounds, start with the highest resolution version of the image available. If the edges of the result look rough or small parts of the subject appear to be missing, use the restore brush to bring back any incorrectly removed areas before you download. Post-processing edge refinement makes a significant difference on dark-on-dark situations.
How to Remove Background from Image on iPhone
Using a Browser on iPhone
The easiest and highest-quality method on iPhone is using a browser-based AI tool. It works in Safari and Chrome on any iPhone model without any app download, and it handles complex images much better than the built-in phone options.
- Open Safari on your iPhone
- Go to imageconvertertools.com/image-background-remover
- Tap the upload area and select your image from Photos
- Wait a few seconds for the AI to process
- Tap Download — the transparent PNG saves to your Files app
Pros: Works on all iPhone models, no app or sign-up needed, AI quality results, handles complex images well, completely free
Cons: Requires internet connection, downloaded file goes to Files app rather than the Photos library by default
Using iPhone’s Built-In Background Removal (iOS 16 and Later)
Apple added a built-in background removal feature in iOS 16. It is useful for quick, casual cutouts and works entirely offline.
- Open the image in the Photos app
- Press and hold on the main subject in the photo
- A glowing animated outline appears around the subject
- Tap Copy or Share from the pop-up menu
- The copied version has a transparent background when pasted into a compatible app
Pros: No internet needed, built into every iPhone running iOS 16+, instant for simple images
Cons: Only available on iOS 16 and newer, produces rough edges on complex backgrounds, does not handle fine hair or detailed edges well, cannot save directly as a standalone transparent PNG without extra steps
For everyday quick phone cutouts the built-in iOS feature is convenient. For product images, professional headshots, logos, or anything where edge quality and accuracy matter, the online AI tool delivers noticeably better results.
How to Remove Background from Image on Android
Using a Browser on Android
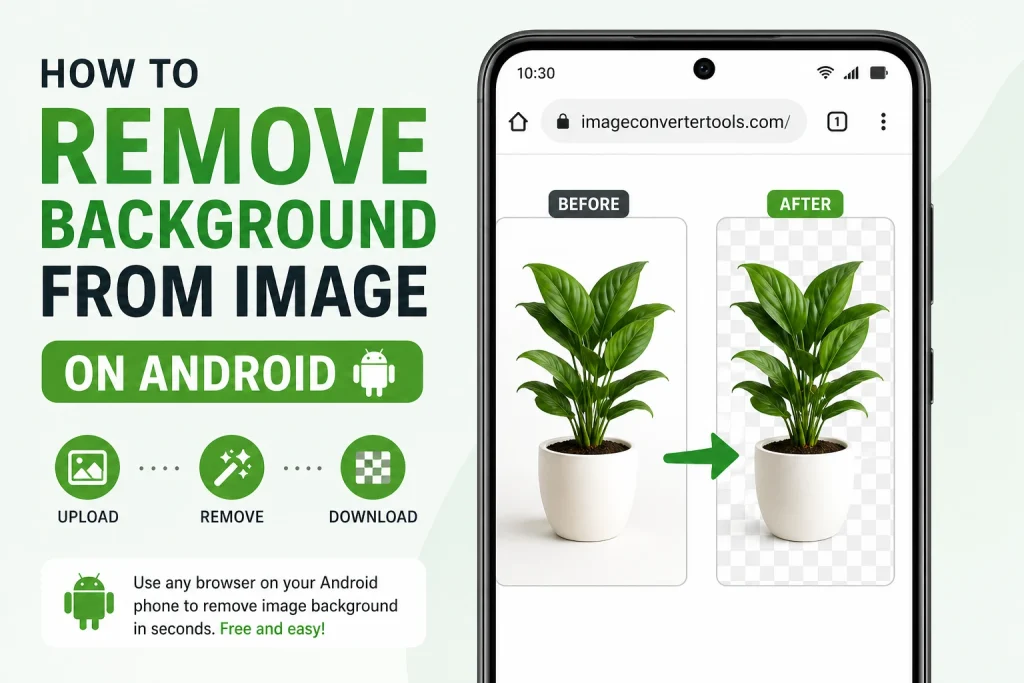
Android does not have a single universal built-in background removal feature — some manufacturers like Samsung and Google have their own versions, but they are not available on all devices. The most reliable method that works on every Android phone is the browser-based approach.
- Open Chrome on your Android phone
- Go to imageconvertertools.com/image-background-remover
- Tap the upload area and choose your image from the gallery
- The AI processes and removes the background
- Tap Download to save the transparent PNG to your Downloads folder
Pros: Works on every Android device regardless of brand or Android version, no app installation, AI-quality results, free
Cons: Requires internet, saved file goes to Downloads folder rather than the Gallery
Samsung and Google Pixel Built-In Options
Some Samsung phones on One UI 5.1 and later include an Object Eraser and subject isolation feature inside the Gallery app. Google Pixel phones on Android 14 have a similar capability. These are genuinely useful for casual, quick separations but produce inferior results compared to dedicated AI tools for anything professional. If you are using these images for business, eCommerce, or client work, the online tool gives significantly better edge quality and accuracy.
How to Remove Background from Image on Windows
Using an Online Tool on Windows
The simplest and most reliable method on Windows is using a browser-based AI tool in Chrome, Edge, or Firefox. No installation, no setup, works on Windows 10 and Windows 11 equally. This is the recommended approach for most users because it gives the best quality without any software overhead.
Using Paint 3D on Windows 10 and Windows 11
Windows includes Paint 3D, which has a Magic Select feature for background removal. It is free, works offline, and is built into the operating system — but the results are considerably rougher than AI-based tools.
- Open Paint 3D from the Start menu
- Click Open and load your image
- Click Magic Select in the top toolbar
- Drag the selection handles to frame your subject tightly
- Click Next — Paint 3D will attempt to isolate the subject
- Use the Add and Remove brushes to fix any errors in the selection
- Click Done, then delete the background layer
- Save as PNG to keep the transparency
Pros: Free, offline, built into Windows, no internet needed
Cons: Results are much rougher than AI tools, hair and detailed edges come out poorly, requires significant manual cleanup on most real-world images, time-consuming for complex subjects
Using Windows 11 Photos App
Microsoft added background removal to the Windows 11 Photos app in recent updates. It is more capable than Paint 3D’s Magic Select but still uses a simpler algorithm than dedicated AI tools.
- Open your image in the Photos app
- Click Edit at the top right
- Select Background from the editing panel
- Click Remove Background
- Save the result as PNG
Pros: Built into Windows 11, no extra software, cleaner results than Paint 3D for simple images
Cons: Only available on Windows 11 with the latest updates — not on Windows 10, works best only on images with clear contrast between subject and background
How to Remove Background from Image on Mac
Using Preview on Mac
Every Mac comes with Preview, which includes an Instant Alpha tool for background removal. It works well on simple solid-colour backgrounds but has significant limitations beyond that.
- Open the image in Preview
- Go to Tools > Instant Alpha
- Click on the background and slowly drag to expand the selection — the pink highlight shows what will be removed
- Press Delete to remove the selected background area
- Repeat as needed for any remaining background sections
- Export as PNG to preserve the transparent areas
Pros: Built into every Mac, no internet needed, free, works offline
Cons: Works by colour similarity — struggles when subject and background share similar colours, produces rough jagged edges on detailed subjects, requires multiple passes for anything beyond a simple solid background, very time-consuming compared to AI tools
Why AI Tools Beat Preview for Most Images
Preview’s Instant Alpha selects pixels purely based on colour similarity. If your subject touches or overlaps the background colour, it removes parts of the subject too. AI tools look at the full image contextually and understand what is the main subject regardless of colour overlap. For anything beyond removing a simple flat-colour background from a basic graphic, the AI approach saves significant time and produces far cleaner results.
How to Remove Background from Image in PowerPoint
Using PowerPoint’s Built-In Remove Background Tool
PowerPoint has a dedicated Remove Background feature that lets you process images directly inside your presentation without switching to another tool.
- Insert your image into the PowerPoint slide
- Click the image to select it
- Go to the Picture Format tab in the ribbon
- Click Remove Background
- PowerPoint highlights the detected background area in purple
- Use Mark Areas to Keep and Mark Areas to Remove to refine the selection manually
- Click Keep Changes when you are satisfied with the result
Pros: No need to leave PowerPoint, works offline, no additional software, good enough for basic images
Cons: Requires manual marking for anything beyond a simple background, results often have rough edges, very time-consuming for complex images, does not export as a standalone transparent PNG
The Smarter Approach for PowerPoint
For any image more complex than a simple object on a plain background, it is significantly faster and cleaner to remove the background using an AI tool before you insert the image into PowerPoint. Export the transparent PNG from the background remover, then insert that directly into your slide. You get better edges, spend less total time, and avoid the frustration of repeatedly adjusting the Mark Areas brushes.
How to Remove Background from Image in Word
Using Word’s Remove Background Feature
Word uses the same background removal engine as PowerPoint. The process is identical and has the same strengths and limitations.
- Insert the image into your Word document
- Click on the image to select it
- Go to Picture Format > Remove Background
- Refine the selection using Mark Areas to Keep and Mark Areas to Remove
- Click Keep Changes
Pros: Built into Word, no extra software, works offline
Cons: Same limitations as PowerPoint — works best only on simple backgrounds, complex images need heavy manual cleanup, not suitable for professional documents without significant time investment
When Pre-Processing Makes More Sense
For professional documents like proposals, reports, client presentations, or anything where visual quality reflects your credibility, always pre-process the image in an AI background remover first. Insert the clean transparent PNG directly into Word. This is especially important for signature images, product photos, and logos where precise edges matter.
How to Remove Background from Image in Google Slides
The Honest Truth About Google Slides
Google Slides does not have a proper Remove Background feature. The image editing options available — brightness, contrast, and recolouring — do not include any genuine background removal capability. The only transparency option available applies to the entire image uniformly, which is not background removal at all.
This means there is no way to remove an image background while working inside Google Slides itself. The correct approach is always to prepare the image before inserting it.
The Right Method for Google Slides
- Remove the background using an AI tool online and download the transparent PNG
- Open Google Slides and go to Insert > Image > Upload from computer
- Select your transparent PNG file
- Place it on your slide
The image sits perfectly on any slide background with clean edges and no white or coloured border around it. This takes a minute of extra preparation but is the only way to get a proper result. Given that Google Slides is often used for professional and client-facing presentations, taking this extra step is genuinely worth it.
How to Remove Background from Product Images
Why Product Image Quality Directly Affects Sales
Product images are one of the most significant factors in whether a customer decides to buy. Research consistently shows that image quality affects perceived product quality and seller trustworthiness. According to Google’s guidance on eCommerce best practices, clean, high-quality images are specifically recommended for better visibility and performance in search and shopping results.
Blurry photos, inconsistent backgrounds, and cluttered product surroundings all signal low quality to potential buyers. Clean product images on white or transparent backgrounds look professional, meet platform standards, and give your products the best possible chance to convert.
Best Practices for Product Background Removal
Getting the best results from product images is partly about how you shoot the photo and partly about how you process it afterwards.
- Photograph against a contrasting background where possible — a white product on a dark background is much easier to cut out cleanly than a white product on a white background
- Use consistent, even lighting to avoid harsh shadows that blend into the background and confuse the edge detection
- Shoot at the highest resolution your camera allows — more detail always means cleaner, more accurate edges after processing
- After removing the background, check the edges at 100% zoom before downloading — small imperfections are more visible on product images than on casual photos
- Save as PNG for transparent backgrounds, or as a high-quality JPG if a specific platform requires a white background
After removing backgrounds and preparing your product images, you may also want to compress them for faster loading on your website. Our image compressor reduces file size without any visible quality loss, which directly improves page loading speed. Faster pages mean better user experience and better search rankings — Google PageSpeed Insights consistently highlights image optimisation as one of the highest-impact improvements for web performance.
How to Remove Background from Signature Image
A scanned or photographed signature nearly always has a white or off-white background from the paper it was written on. Inserting that directly into a document or email without removing the background creates an obvious white rectangle around the signature, which looks unprofessional and out of place on any non-white surface.
Removing the background from a signature image gives you a clean transparent PNG where only the ink strokes remain. This sits naturally on any document background — white, coloured, or textured — without any visible box. It also means the same signature image works cleanly across all your different document templates without needing to be adjusted for each one.
For best results, scan your signature at 300 DPI or above and ensure the ink is dark and clearly visible against the paper. Run it through the background remover and download as PNG. Resize as needed and insert into your document, PDF, or email footer. If you later need the signature in a web-optimised format, our PNG to WebP converter can reduce the file size significantly while keeping the transparent background intact.
What to Do After Removing the Background
Choosing the Right File Format for Your Use Case
After removing the background from an image, the format you save it in depends entirely on what you plan to do with it next.
Save as PNG when:
- You need to keep the transparent background
- The image will be used in a presentation, document, or design project
- You plan to do more editing — PNG is lossless and does not degrade
- You need maximum compatibility across different applications and platforms
Convert to WebP when:
- The image is going on a website and loading speed matters
- You want the smallest possible file without visible quality loss
- The platform or CMS you use supports WebP files
Convert back to JPG when:
- The platform or service requires JPG specifically
- Transparency is no longer needed and you want a smaller file for sharing
- You are submitting to a print service that does not accept PNG
For web use, converting your processed PNG to WebP gives you significantly smaller file sizes with no visible quality difference. Our article on how to convert JPG to WebP explains the benefits and the conversion process in full.
Common Mistakes to Avoid
Most people who get poor results from background removal are making one of a small number of avoidable mistakes. Understanding these saves you time and frustration.
- Saving as JPG after removing the background — JPG does not support transparency and will fill every removed area with white, completely undoing your work. Always save as PNG when transparency matters.
- Starting with a low-resolution image — Small or blurry source images produce rough, jagged edges after processing. Always use the highest resolution version of the image available.
- Not checking edges before downloading — AI tools are excellent but not infallible. Always zoom to 100% and inspect the edges, especially around hair, fur, fine text, or intricate product details.
- Using colour-select tools when subject and background share colours — If the subject and background are similar in colour, colour-selection removes parts of the subject. Use AI tools which understand the whole image contextually.
- Converting to JPG mid-workflow — If you still need to edit or use the image in multiple contexts, keep it as PNG until the final step. Converting to JPG mid-workflow loses transparency permanently and applies lossy compression that cannot be undone.
Frequently Asked Questions
1. How do I remove a background from an image for free?
Use a free online AI-powered background remover. Upload your image, let the AI detect and remove the background, and download the result as a transparent PNG. The best free tools require no account, add no watermarks, and support multiple file uploads. Many popular tools like Canva charge for background removal on their paid plans — a dedicated free tool gives you the same AI quality without any subscription cost.
2. How do I remove a white background from an image?
Upload to an AI background remover. The AI identifies the subject as a whole object and removes the white background while preserving all white elements within the subject itself. Always download as PNG — saving as JPG will replace the transparent background with white and undo everything. Avoid colour-selection tools for white backgrounds if your subject contains white areas.
3. How do I remove a background from an image on iPhone?
For the best quality, open Safari, go to a free online background remover, upload your image from Photos, and download the transparent PNG to your Files app. If you have iOS 16 or later, you can also press and hold on the subject in Photos to use the built-in cutout — this is quicker but produces rougher results on complex images.
4. Can I remove a background from an image without any software?
Yes. Free online AI background removal tools work entirely in your browser with no installation needed. They work equally well on Windows, Mac, iPhone, Android, and Chromebook. Upload your image, process it, download the result — the whole thing takes under a minute.
5. Is it better to remove background in PowerPoint or before inserting the image?
For simple images, PowerPoint’s built-in tool works fine. For anything complex — detailed backgrounds, fine edges, hair, or product photos — it is faster and gives better results to pre-process in an AI background remover and insert the clean transparent PNG directly into PowerPoint.
6. How do I remove a background in Google Slides?
Google Slides does not have a proper background removal feature. The correct approach is to remove the background before inserting the image — use a free AI online tool, download the transparent PNG, and then insert it into your slide. This is the only way to get a clean result in Google Slides.
7. What format should I save in after removing a background?
Always PNG when you need to preserve transparency. PNG is lossless and fully supports transparent backgrounds. Saving as JPG after background removal will automatically fill the transparent areas with white because JPG does not support transparency at all.
8. How do I remove a background from a product image professionally?
Start with a high-resolution photo shot against a contrasting background. Upload to an AI background remover, check edges at 100% zoom before downloading, and save as PNG or white-background JPG depending on the platform. For web use, also run the final image through an image compressor to keep file sizes small without losing visible quality.
9. How do I remove the background from a signature image?
Scan your signature at 300 DPI or higher, upload to a background remover, and download as PNG. The white paper background will be removed, leaving only the ink strokes on transparency. Insert this clean PNG into any document, PDF, or email footer — it will sit naturally on any background without the white box that a regular scanned signature image creates.
10. Does removing a background reduce image quality?
It should not, if done correctly. Use an AI-powered tool, start with a high-resolution image, and always save as PNG — PNG is lossless so no quality is lost during the process. Quality problems in background-removed images almost always come from starting with a low-resolution source image, or from saving the result as JPG instead of PNG.
Conclusion
Removing a background from an image is one of the most commonly needed image editing tasks, and it no longer requires expensive software or design expertise. Whether you are cleaning up a product photo for an online store, preparing a transparent logo, fixing a signature image for a professional document, or getting an image ready for a presentation, the tools available today make the whole process fast and accessible.
For most everyday uses, a free online AI tool gives the best combination of quality, speed, and convenience. Built-in tools in PowerPoint, Word, and Windows are useful for simple images when you need an offline option, but they have real limitations on anything complex. Mobile options on iPhone and Android are convenient for quick casual jobs but are not reliable for professional-quality output.
The rules to always remember: save as PNG to preserve transparency, start with the highest resolution image you have, check the edges before downloading, and pre-process images before inserting them into tools like Google Slides and Word for the cleanest results.
Use our free Image Background Remover and get clean professional results in seconds — no subscription, no watermarks, no limits.