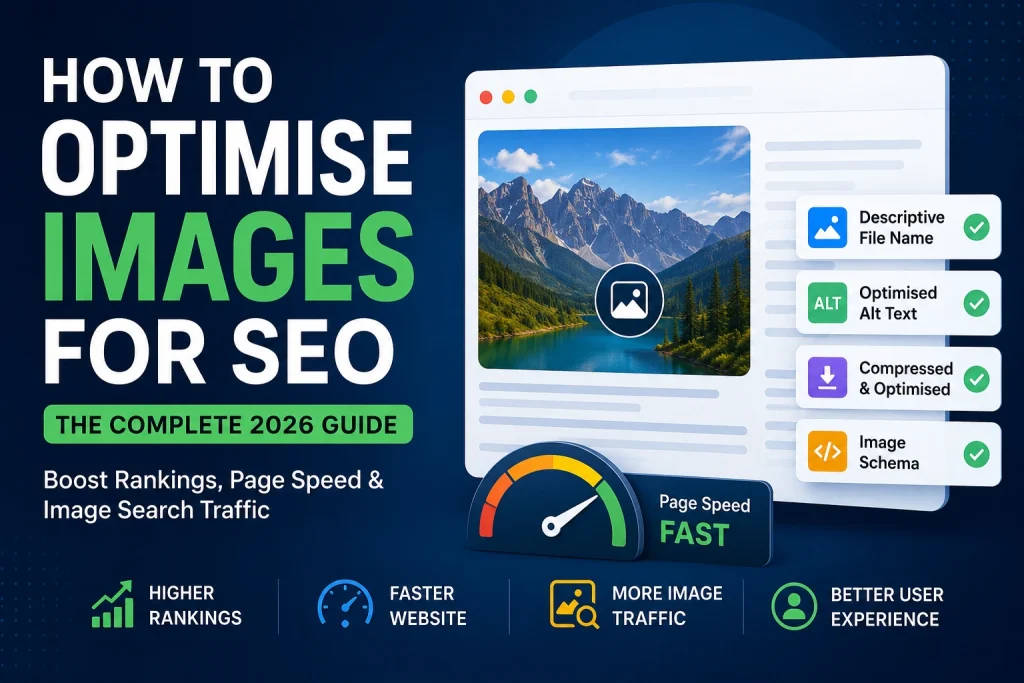
Images are one of the most ignored parts of SEO — and that’s exactly why getting them right gives you a real advantage over competitors. Every image on your website affects your page speed, your Google rankings, your image search traffic, and your user experience. Done right, image SEO brings you extra traffic, faster pages, and better rankings. Done wrong, it silently drags your whole website down.
This guide covers everything about image SEO in 2026. File names, alt text, format choices, compression, page speed, structured data, and Google Image Search — all explained in simple steps you can act on today.
Why Image SEO Matters More Than Ever in 2026
Google has been getting better at understanding images every year. In 2026, Google doesn’t just read the text around your images — it actually analyses the image content itself using machine learning. This means every image on your website is being evaluated, not just indexed.
Images affect your SEO in three direct ways. First, large unoptimised images slow your page down, which hurts your Core Web Vitals scores and your rankings. Second, images without proper alt text and file names miss keyword ranking opportunities in both regular search and Google Image Search. Third, images that are properly optimised and contextually relevant to your content signal to Google that your page is high quality and thorough.
Google Image Search is also a significant traffic source that most website owners completely ignore. Millions of people search for images every day. If your images are properly optimised, they show up in image search results and bring visitors to your website who would never have found you through regular text search.
Step 1 — Use Descriptive File Names
Why File Names Are an SEO Signal
You take a picture on your phone and post it on your website right away . The file name will be something like IMG_4829.jpg or DSC_0047.jpg . Google reads that file name and it has no idea what the picture is. That’s a lost opportunity every single time.
One of the signals Google uses to understand what an image is about is the name of the image file. A descriptive file name tells Google what the image is about before it even looks at the pixels. This helps your image rank in Google Image Search for relevant queries and reinforces the topic of your page for Google’s crawlers.
Rename all images prior to upload. Use words that accurately describe what is seen in the image. Separate words with hyphens, not underscores, and not spaces. Keep the name short and accurate — two to five words is usually enough.
File Name Examples
Here is the difference between bad and good file names:
| Bad File Name | Good File Name |
|---|---|
| IMG_4829.jpg | red-running-shoes-white-background.webp |
| screenshot001.png | google-pagespeed-insights-score-100.webp |
| image_final_v3.jpg | chocolate-cake-recipe-ingredients.webp |
| photo.jpg | office-desk-setup-monitor-keyboard.webp |
| DSC_0047.jpg | golden-retriever-puppy-grass.webp |
Include one or two relevant keywords in the file name naturally. Don’t stuff five keywords in there — red-running-shoes-buy-cheap-online-discount.jpg looks spammy and Google ignores it. Just describe what’s actually in the image accurately and naturally.
Rename Images Before Uploading — Not After
Rename your images on your computer before you upload them to your website. Renaming after upload can break existing links to the image and cause 404 errors. Build renaming into your workflow as the very first step — before resizing, before compressing, before uploading.
Step 2 — Write Proper Alt Text for Every Image
What Alt Text Actually Is
Alt text — short for alternative text — is a written description you add to every image in your HTML or CMS. It serves three purposes. It tells Google what the image shows. It displays as text if the image fails to load. And it’s read aloud by screen readers for visually impaired users.
Most website owners either skip alt text entirely or write vague filler like “image” or “photo”. Both approaches waste a real SEO opportunity and make your website less accessible. Every image needs thoughtful alt text — it takes 10 seconds and makes a genuine difference.
How to Write Alt Text That Helps SEO
Good alt text describes what is actually in the image — specifically and accurately. It reads naturally, like a sentence a human would write. It includes a relevant keyword if that keyword genuinely describes what the image shows — not forced in just for SEO.
Here are real examples of bad vs good alt text:
Bad alt text:
alt="image"alt="photo of shoes"alt="SEO image optimisation website speed keywords rankings Google"
Good alt text:
alt="Red Nike running shoes on white background"alt="Google PageSpeed Insights score showing 98 out of 100"alt="Chocolate cake with chocolate frosting on wooden table"
Keep alt text under 125 characters. Screen readers typically cut off at around that length. Be specific — “Golden Retriever puppy playing in green grass” is better than “dog outside”. Include your target keyword naturally where it fits — but only where it genuinely describes the image.
When to Leave Alt Text Empty
Decorative images that don’t add information to the page should have empty alt text — written as alt="". This tells screen readers to skip the image and tells Google it’s purely decorative. Examples include background patterns, divider lines, and purely aesthetic design elements.
Never leave out the alt attribute entirely. An image with no alt attribute at all is treated differently by screen readers than an image with alt="". Always include the attribute — leave it empty for decorative images, fill it in accurately for all content images.
Alt Text in WordPress
In WordPress, click any image in your Media Library and look for the Alt Text field in the right panel. Fill it in before inserting the image into your content. If you’re using the Block Editor, click on an image block and find the Alt text field in the settings panel on the right side of the screen.
Step 3 — Choose the Right Image Format for SEO
How Format Choice Affects SEO
The format you save your image in directly affects how fast it loads — and page speed is a confirmed Google ranking factor. Choosing a format that produces unnecessarily large files slows your pages down and hurts your rankings. Choosing the right format for each image type gives you the best quality at the smallest file size.
In 2026, the right format for almost every web image is WebP. WebP files are 25 to 35 percent smaller than PNG and JPG at the same visual quality. Smaller files load faster. Faster pages rank better. The connection is direct and measurable.
Which Format to Use for Different Image Types
Use this as your format decision guide for every image you add to your website:
- Photographs and complex images — Use WebP lossy. Smaller than JPG, looks identical at quality 80 to 85 percent
- Logos and icons — Use SVG where possible. SVG is tiny, scales perfectly, and never gets blurry
- Graphics with transparency — Use WebP with transparency. Smaller than PNG with the same quality
- Screenshots — Use WebP. Much smaller than PNG with no visible quality difference
- Animated images — Use WebP animation. Far smaller than GIF with better color support
- Print files — Use PNG or high-quality JPG. WebP is not accepted by print services
For a deep dive into why WebP is the best format for web images and how it compares to JPG and PNG, our guide on what is WebP format covers everything in detail.
Step 4 — Resize Images to the Right Dimensions
Why Oversized Images Hurt Your SEO
Uploading images that are larger than they need to be is one of the most common and damaging image SEO mistakes. A photo straight from a modern camera is typically 4000 to 6000 pixels wide. Your website content column might be 1200 pixels wide. When you upload that 6000-pixel image, the browser downloads all 6000 pixels and then shrinks it to 1200 pixels to display it. All those extra pixels are pure waste — they slow down your page with no visual benefit.
Oversized images increase page weight, slow loading times, hurt Core Web Vitals scores, and push your Google rankings down. Resizing to the correct display dimensions before uploading is one of the simplest and most impactful things you can do for image SEO.
Right Dimensions for Common Website Images
Here are the correct dimensions for the most common website image types:
| Image Type | Correct Dimensions |
|---|---|
| Hero/Banner | 1920 × 1080px |
| Blog Featured Image | 1200 × 628px |
| Blog Inline Image | 800 × 600px |
| Product Image | 800 × 800px |
| Thumbnail | 400 × 300px |
| Open Graph Image | 1200 × 630px |
| Logo | SVG or max 400px wide |
Always resize before uploading — not after. Our article on how to resize an image covers the correct dimensions for every platform and the fastest ways to resize on any device.
Step 5 — Compress Images Without Losing Quality
How Compression Directly Affects Rankings
Even after resizing to the correct dimensions, images can still be much larger than they need to be if they haven’t been compressed. A 1200 × 628px image saved at maximum quality can easily be 1 to 2MB. The same image properly compressed sits under 100KB — with no visible difference on screen at normal viewing sizes.
Page speed is a direct Google ranking factor. Image compression is the fastest way to improve page speed for most websites. Google PageSpeed Insights consistently flags oversized images as one of the highest-priority improvements for slow websites. Fixing this one thing alone can move your PageSpeed score significantly.
Target File Sizes for Web Images
These are the file sizes to aim for:
| Image Type | Target Size |
|---|---|
| Hero image | Under 200KB |
| Blog featured image | Under 150KB |
| Blog inline image | Under 100KB |
| Product image | Under 150KB |
| Thumbnail | Under 30KB |
| Logo/Icon | Under 20KB |
How to Compress Images for SEO
The fastest way to compress any image on any device is using a free online tool. Our Image Compressor reduces image file sizes by up to 80 percent without any visible quality loss. Upload your images — single or batch — and download the compressed versions. No software, no sign-up, completely free.
For a full guide on how compression works, the difference between lossy and lossless compression, and common compression mistakes to avoid, read our complete guide on how to compress an image.
Step 6 — Add Structured Data for Images
What Image Structured Data Is
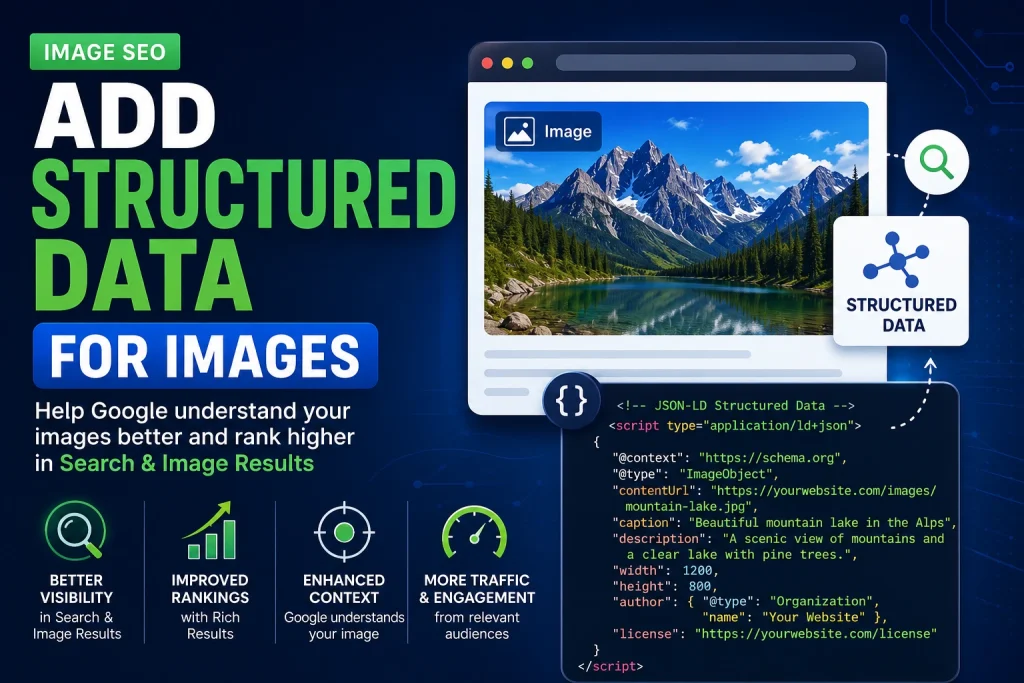
Structured data is code you add to your webpage that gives Google extra information about your content in a format it can easily understand. For images, structured data can tell Google details like the image caption, author, license information, and what the image depicts — information that Google can’t always figure out from the image itself.
Adding image structured data helps your images appear in Google’s rich results — enhanced search results that stand out from regular listings and typically get higher click-through rates. For recipe pages, product pages, and article pages, image structured data can unlock image-rich results that display your image directly in the search results.
How to Add Image Structured Data
For most websites, the easiest way to add image structured data is through your CMS. WordPress SEO plugins like Yoast SEO and Rank Math automatically add structured data for images on posts and pages when you fill in the image details correctly.
For manual implementation, use JSON-LD structured data in your page’s <head> section. Here is a simple example for an article image:
json
{
  "@context": "https://schema.org",
  "@type": "ImageObject",
  "url": "https://yoursite.com/images/product-photo.webp",
  "width": 800,
  "height": 800,
  "name": "Blue running shoes on white background",
  "description": "Close-up product photo of blue Nike running shoes"
}
This tells Google exactly what the image shows, its dimensions, and where it lives. Google uses this information to better understand and rank your images in search results.
Step 7 — Improve Your Page Speed Score
How Page Speed and Image SEO Connect
For Google, page speed and image SEO are basically the same thing. Images are the biggest factor in slow page loading on most websites. Fix your images – right format, right size, proper compression – fix your page speed. Improve your rankings by fixing your page speed.
Google uses Core Web Vitals to measure how fast a page loads. The most image-relevant metric is Largest Contentful Paint (LCP) – how long it takes for the largest visible element on the page to load. The biggest piece is a hero or featured image on most pages. LCP fails when the image is large and unoptimised. LCP often skips itself, if it’s a properly sized, compressed WebP image.
How to Test Your Page Speed
Go to PageSpeed Insights and enter your URL. Run the test and look at the Opportunities section. This lists specific image problems on your page — images that are too large, images in inefficient formats, images without lazy loading, and images causing layout shifts. Each issue links to documentation explaining exactly how to fix it.
Fix each image issue that PageSpeed Insights flags. Re-run the test after fixing. Repeat until you hit a mobile score above 80 and a desktop score above 90. Most websites can reach these targets by fixing image issues alone.
Step 8 — Use Lazy Loading for Below-Fold Images
What Lazy Loading Does for SEO
Lazy loading is the practice of loading images only when the user scrolls down to where they are on the page. Lazy loading loads images only when they are about to enter the viewport, rather than loading all of the images on the page when someone first arrives, including those images way down that they may never actually see.
This improves your LCP score, cuts initial page load time and saves bandwidth for your server and your visitors. Google supports and recommends lazy loading for off-screen images. It’s a native browser feature in 2026 — you don’t need any JavaScript to use it.
How to Add Lazy Loading
Add the loading="lazy" attribute to any image that appears below the fold:
html
<img src="blog-inline-image.webp" alt="Description of image" width="800" height="500" loading="lazy">Never add lazy loading to your hero image, logo, or any image visible without scrolling. Those images need to load immediately. Adding lazy loading to above-fold images actually hurts your LCP score and your rankings. Only apply it to images below the fold.
Step 9 — Use Open Graph Images
What Open Graph Images Are
Open Graph images are the images you see when someone shares your webpage on social media. When someone shares a link on Facebook, LinkedIn, Twitter, or WhatsApp, the platforms pull the Open Graph image from your page and show it with the link. A good Open Graph image will make your shared link look professional and get many more clicks than a link without an image.
Open Graph images have an indirect impact on SEO as well. More clicks on shared links equals more traffic to your website. More signals to Google that your content is valuable. This improves your overall domain authority and helps your pages rank better over time.
How to Set Open Graph Images
The recommended size for Open Graph images is 1200 × 630px. Add the image to your page using these meta tags in your HTML <head> section:
html
<meta property="og:image" content="https://yoursite.com/images/page-og-image.webp">
<meta property="og:image:width" content="1200">
<meta property="og:image:height" content="630">
<meta property="og:image:alt" content="Description of the image">
In WordPress, SEO plugins like Yoast SEO let you set Open Graph images directly in the post editor without touching any code. Always set a custom Open Graph image for every important page on your website — don’t leave it to the platform to pick one automatically.
Step 10 — Optimise Images for Google Image Search
How Google Image Search Works in 2026
Google Image Search is a massive traffic source that most website owners don’t even consider. Google relies on a range of signals to rank images in image search results, including the image file name, the alt text, the surrounding page content, the overall authority of the page and, increasingly, the image content itself as analyzed by machine learning (in 2026).
Getting your images ranking in image search is all about the same fundamentals as regular SEO – relevant content, good signals, and technical correctness – but applied to your images.
Tips for Ranking in Google Image Search
These practical steps give your images the best chance of appearing in Google Image Search results:
- Use descriptive, keyword-relevant file names as covered in Step 1
- Write accurate, specific alt text as covered in Step 2
- Make sure the image is relevant to the page content — don’t use random stock photos on pages where a specific, relevant image would work better
- Use high-quality original images where possible — Google appears to favour original photography over stock photos that appear on hundreds of other websites
- Add image captions where appropriate — Google reads captions as additional context for understanding image content
- Make sure the page the image lives on is indexed by Google — images on noindexed pages don’t appear in image search
- Use structured data as covered in Step 6 to give Google extra context about your images
Image SEO Checklist for 2026
Run through this checklist for every image you add to your website:
- ✅ Descriptive file name with relevant keywords and hyphens
- ✅ Resized to correct display dimensions
- ✅ Converted to WebP format
- ✅ Compressed to target file size
- ✅ Accurate alt text under 125 characters
- ✅ Width and height attributes in the HTML tag
- ✅ Lazy loading added for below-fold images
- ✅ Open Graph image set for the page
- ✅ PageSpeed Insights checked after upload
Frequently Asked Questions
1. Does image SEO really affect Google rankings?
Yes, directly. Page speed is a confirmed Google ranking factor and images are the biggest cause of slow pages on most websites. Properly optimised images improve page speed, Core Web Vitals scores, and Google rankings. Images also rank independently in Google Image Search, bringing additional organic traffic.
2. What is the most important part of image SEO?
Alt text and file names are the most direct SEO signals for individual images. But page speed — which comes from using the right format and proper compression — has the biggest overall impact on your rankings because it affects every page on your website, not just individual images.
3. How long should alt text be?
Keep alt text under 125 characters. Describe the image specifically and naturally. Include a relevant keyword if it genuinely describes what the image shows. Don’t stuff keywords — Google can tell the difference and it hurts more than it helps.
4. Should I use keywords in image file names?
Yes, but naturally. Use one or two keywords that accurately describe what the image shows. Don’t stuff five keywords into a file name — it looks spammy and Google ignores it. The file name should read like a description, not a keyword list.
5. Does image format affect SEO?
Yes. Image format directly affects file size, which affects page loading speed, which affects Core Web Vitals scores and Google rankings. WebP is the best format for web images in 2026 — it produces smaller files than JPG and PNG at the same visual quality, which means faster pages and better rankings.
6. How do I find images on my website that need optimising?
Run your website through Google PageSpeed Insights at pagespeed.web.dev. It lists specific images that are too large, in inefficient formats, or missing other optimisations. Also check Google Search Console under Experience > Core Web Vitals for pages that are failing performance thresholds.
7. Do decorative images need alt text?
Decorative images should have empty alt text — written as alt="". This tells Google the image is decorative and tells screen readers to skip it. Never leave out the alt attribute entirely — always include it, just leave it empty for purely decorative images that don’t add information to the page.
8. How does lazy loading help SEO?
Lazy loading reduces the amount of data loaded when someone first visits your page. This improves page loading speed and Largest Contentful Paint scores, which are Core Web Vitals metrics that Google uses in rankings. Only use lazy loading on images below the fold — never on your hero image or logo.
9. What is an Open Graph image and do I need one?
An Open Graph image is the image that appears when someone shares your page on social media. It makes shared links look more professional and significantly increases click-through rates. While not a direct ranking factor, the extra traffic from better social sharing indirectly strengthens your domain authority over time.
10. How do I optimise images for Google Image Search?
Use descriptive file names, write accurate alt text, add image captions where relevant, use original images where possible, add structured data for important images, and make sure the pages your images live on are indexed by Google. Also make sure images are high quality and directly relevant to the page content they appear on.
Conclusion
Image SEO is not difficult—but most sites make a mess of it by completely ignoring it. Each image you have on your website is either helping your rankings or hurting them. Getting the basics right — descriptive file names, accurate alt text, the right format, the right dimensions, proper compression, lazy loading, and structured data — sets you apart from competitors who view images as an afterthought.
The biggest payoffs are in speed gains. Switching to WebP, resizing correctly and compressing properly is almost certainly the fastest way to improve your Core Web Vitals scores. And better Core Web Vitals scores means better rankings.
Begin with your most important pages. Check them on Page Speed Insights. Fix every image issue it flags. Then build the image SEO checklist into your workflow so every new image you add is properly optimised from day one.