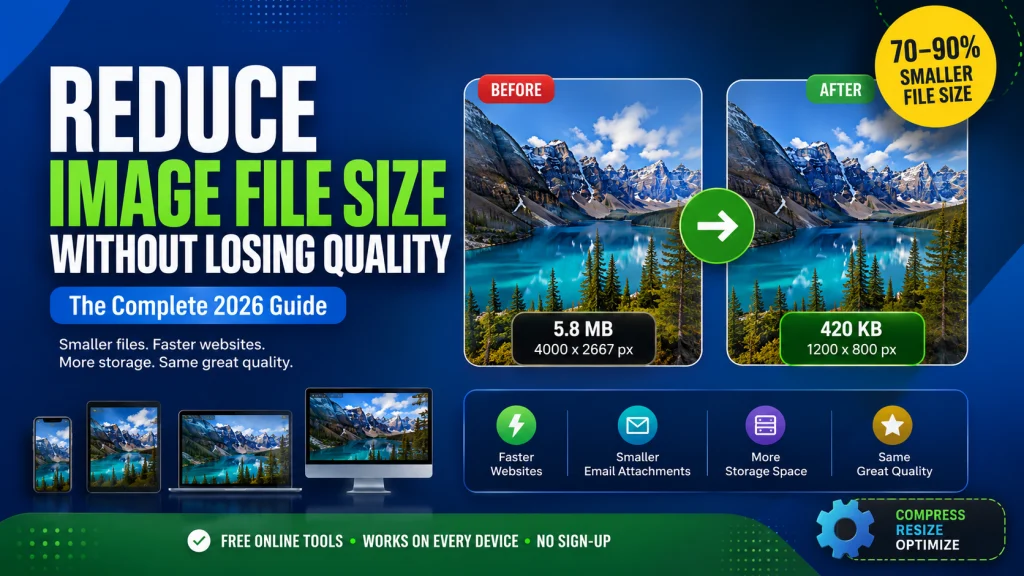
A single uncompressed smartphone photo can be 5 to 8MB. Put ten of those on one webpage and you’ve got a 50 to 80MB page that takes forever to load. Reducing image file size by 70 to 80 percent is possible without any visible quality difference — and this guide shows you exactly how to do it on every device, free, in minutes.
Whether you’re a website owner trying to speed up your pages, someone trying to send photos by email, or just trying to free up storage on your phone, this guide covers every method — online tools, Windows, Mac, iPhone, Android, and more. No technical knowledge needed.
Why Large Image Files Are a Real Problem
Most people don’t realise how big their image files actually are until something goes wrong. A photo from a modern smartphone is typically between 3 and 8MB. A screenshot from a high-resolution monitor can be 2 to 4MB. A raw photo from a DSLR camera can be 20 to 40MB. These numbers matter a lot depending on what you’re doing with the image.
For websites, large images are the number one cause of slow page loading. Google uses page speed as a ranking signal — slow pages rank lower. Visitors leave slow pages fast. An eCommerce store with slow product images loses sales every single day because of it. Our guide on how to optimise images for SEO explains exactly how image file size connects to your search rankings.
For email, most providers have attachment size limits between 10 and 25MB. Even within those limits, large attachments are annoying to recipients with limited storage or slow connections. For storage, a phone full of 5MB photos fills up twice as fast as a phone full of 2MB photos. Reducing file size solves all of these problems at once.
How Much Can You Reduce Image File Size?
Before getting into methods, it helps to know what’s actually possible. These are realistic numbers based on typical real-world images:
| Image Type | Original Size | After Reduction | Saving |
|---|---|---|---|
| Smartphone photo (JPG) | 5 MB | 400 – 700 KB | 85 – 92% |
| DSLR photo (JPG) | 8 MB | 600 KB – 1 MB | 87 – 92% |
| Screenshot (PNG) | 1.5 MB | 200 – 400 KB | 73 – 87% |
| Product photo (JPG) | 3 MB | 150 – 300 KB | 90 – 95% |
| Logo (PNG) | 500 KB | 50 – 100 KB | 80 – 90% |
| Hero image (JPG) | 4 MB | 200 – 400 KB | 90 – 95% |
| Infographic (PNG) | 2 MB | 300 – 600 KB | 70 – 85% |
These reductions are achievable without any visible quality difference at normal screen sizes. The key is combining the right format, correct dimensions, and good compression — which this guide covers step by step.
The Three Things That Make Image Files Large
Wrong Format
Saving a photograph as PNG instead of WebP or JPG is the most common reason images are unnecessarily large. PNG is lossless — it keeps every pixel — which is great for logos and graphics but terrible for photos. A photograph saved as PNG can be 5 to 10 times larger than the same photo saved as WebP.
Format choice alone can reduce file size by 60 to 80 percent before you touch any compression setting. Getting the format right first is the single most impactful step you can take. For web images, WebP is almost always the right choice. It’s smaller than both JPG and PNG at the same visual quality and works in every modern browser.
Wrong Dimensions
Uploading a 4000px wide photo to display at 800px wide means you’re loading 25 times more pixels than the browser actually needs. The browser downloads the whole 4000px image and then shrinks it to fit the 800px column. All that extra data is wasted. Resizing to the correct display dimensions before uploading can cut file size by 60 to 80 percent on its own.
This is one of the most overlooked file size problems. People focus on compression but ignore that the image is 5 times wider than it needs to be. Fix the dimensions first, then compress. You’ll get much better results than compressing an oversized image.
Not Enough Compression
Even at the right format and right dimensions, images can still be too large if they haven’t been compressed properly. Most cameras and design tools save images at maximum quality by default. Maximum quality means maximum file size. Compressing to 80 to 85 percent quality reduces file size dramatically with no visible difference on screen.
Step 1 — Change the Format First
Switch From PNG to WebP for Photographs
If you have photographs saved as PNG, changing to WebP is the fastest single improvement you can make. A photograph that’s 3MB as PNG might be 250KB as WebP at the same visual quality. That’s a 90 percent reduction in file size from changing format alone — before any compression.
Use our free PNG to WebP converter to convert any PNG photograph to WebP. Upload your file, download the WebP version. You can process multiple files at once. The whole process takes under 30 seconds.
Switch From JPG to WebP for Web Images
JPG is already reasonably efficient but WebP beats it consistently. A JPG file is typically 25 to 34 percent larger than an equivalent WebP file at the same visual quality. For a website with 100 images, switching from JPG to WebP reduces total image weight by roughly a third — with no visible change to how the images look.
Use our free JPG to WebP converter to switch any JPG to WebP. Same process — upload, convert, download. Supports multiple files at once for batch conversion.
Keep PNG for Logos and Graphics
Not every image should switch to WebP. PNG is still the right choice for logos, icons, and graphics with transparent backgrounds that need to go to print or open in design software. For web logos, WebP lossless is actually slightly smaller than PNG with the same perfect quality. But if you need the logo to work in print and design tools too, keep it as PNG for those uses.
Step 2 — Resize to the Correct Dimensions
How to Find the Right Dimensions
Before resizing, you need to know the right target dimensions for your specific use case. Here’s a quick reference for the most common situations:
| Use Case | Target Dimensions |
|---|---|
| Website hero image | 1920 × 1080px |
| Blog featured image | 1200 × 628px |
| Blog inline image | 800 – 1200px wide |
| Product image | 800 × 800px |
| Email image | Max 600px wide |
| Instagram post | 1080 × 1080px |
| Thumbnail | 400 × 300px |
| Profile picture | 400 × 400px |
If you’re not sure what size your website displays images at, right-click an image on your page and select Inspect Element. Look for the displayed width in the browser developer tools. That number is your target width.
How to Resize on Any Device
On Mac, open the image in Preview, go to Tools > Adjust Size, enter your target width in pixels, make sure the chain link is locked to maintain the aspect ratio, and save. On Windows, open in Paint, click Resize, select Pixels, enter your target width, and save.
For the most accurate results on any device, use our free Image Resizer — enter exact pixel dimensions, upload your image, and download the correctly sized version. It works on phone, tablet, and desktop equally well with no software needed.
Our full guide on how to resize an image covers correct dimensions for every platform and device in detail — including social media, websites, email, and print.
Always Resize Before Compressing
This order matters. Resize first, then compress. If you compress a 4000px wide image and then resize it down to 800px, you’ve done extra work for no benefit. Resize to the target dimensions first. Then compress the smaller image. You’ll get much better final file sizes this way.
Step 3 — Compress the Image
What Compression Does
Compression reduces the file size by removing image data that the human eye is unlikely to notice. At quality settings of 75 to 85 percent, the removed data is genuinely invisible on screen at normal viewing sizes. You get a dramatically smaller file that looks identical to the original.
There are two types of compression. Lossy compression permanently removes some data — used for JPG and lossy WebP. It’s the most effective at reducing file size and is ideal for photographs. Lossless compression reorganises data more efficiently without removing anything — used for PNG and lossless WebP. It’s less dramatic in file size reduction but keeps the image pixel-perfect.
For most web images, lossy compression at 80 to 85 percent quality is the right choice. Our article on how to compress an image covers the full technical details of both compression types and what happens at different quality settings.
How to Reduce Image File Size Free Online
The fastest way to compress any image on any device is using a free online tool. No software installation, no account, works on phone or computer.
- Go to imageconvertertools.com/image-compressor
- Click upload or drag your image into the box
- The tool compresses automatically using smart settings
- Preview the result — you can see the file size reduction before downloading
- Click Download to save the compressed image
You can upload multiple images at once and compress them all together. This is especially useful when you have a batch of website images or product photos to process. Files are deleted from the server automatically after download to keep your images private.
Pros:
- Works on any device — phone, tablet, computer
- Supports multiple files at once
- Shows before and after file size so you know exactly what you’re getting
- Free with no watermarks and no sign-up
- Results in under 10 seconds for most images
Cons:
- Needs internet connection
- Less fine-grained control over compression percentage compared to desktop software
- Not ideal for sensitive or private images since files upload to a server
Target File Sizes to Aim For
Here’s what to aim for after compressing your images:
| Image Type | Target File Size |
|---|---|
| Hero / Banner image | Under 200KB |
| Blog featured image | Under 150KB |
| Blog inline image | Under 100KB |
| Product image | Under 150KB |
| Thumbnail | Under 30KB |
| Logo / Icon (web) | Under 20KB |
| Email image | Under 100KB |
How to Reduce Image File Size on Windows
Using Paint on Windows
Paint is built into every Windows computer and works for basic file size reduction — mainly through format conversion from PNG to JPG.
- Open your image in Paint — right-click the file and select Open with > Paint
- Go to File > Save As
- Choose JPEG Picture to convert PNG to JPG and reduce file size
- Click Save
This works but gives you no control over the compression quality level. Paint saves JPG at a fixed quality setting that may over-compress some images. For better control, use the online compressor.
Using Windows 11 Photos App
The Windows 11 Photos app has basic image export options but limited compression control. For simple file size reduction on Windows, the online tool gives better results with more control over the output quality.
Reducing File Size in Bulk on Windows
Windows doesn’t have a strong built-in batch compression tool. For processing multiple images at once on Windows, the online compressor is the most practical option — upload all your images at the same time, compress them together, download everything at once.
How to Reduce Image File Size on Mac
Using Preview on Mac
Preview is one of the best free tools for reducing image file size on any operating system. It gives you a quality slider when exporting as JPG, which gives you direct control over the compression level.
- Open your image in Preview
- Go to File > Export
- Select JPEG as the format
- Use the Quality slider — move it to around 75 to 85 percent
- Watch the estimated file size change as you adjust the slider
- Click Save when you reach the target size
The quality slider in Preview is one of the most useful features for file size reduction. You can see the estimated file size update in real time as you adjust the slider, so you know exactly what you’ll get before saving.
Batch Reducing File Size on Mac
Preview handles batch processing on Mac better than most people realise. Open all your images in Preview at the same time, select all in the sidebar using Command + A, go to File > Export Selected Images, choose JPEG, set the quality level, and click Choose. All selected images export simultaneously with the same quality setting. This saves significant time when processing large sets of images.
How to Reduce Image File Size on iPhone
Does iPhone Compress Images Automatically?
iPhones save photos at full resolution by default. When you share photos through certain apps, those apps apply their own compression. iMessage compresses over mobile data. WhatsApp always compresses. Instagram compresses on upload. But the original photo in your Photos app stays at full size.
If you want to reduce the file size of a photo on your iPhone before sending or uploading it, the Photos app doesn’t give you direct file size control. The best option on iPhone is a browser-based tool.
Using an Online Tool on iPhone
- Open Safari on your iPhone
- Go to imageconvertertools.com/image-compressor
- Tap upload and select your image from Photos
- The tool compresses automatically
- Download the compressed image to your Files app
This works on all iPhone models without any app installation. The compressed image saves to your Files app and can be shared from there to any app or service.
Using iPhone’s Built-In Mail Options
When you share an image from the Photos app through the Mail app, iOS gives you size options before sending — Small, Medium, Large, and Actual Size. Choosing Small or Medium compresses the image to reduce the email attachment size. This is convenient for quick email sharing but gives you no control over quality settings.
Changing iPhone Camera Settings to Save Smaller Photos
If you want your iPhone to take smaller photos from the start, go to Settings > Camera > Formats and select Most Compatible. This saves photos as JPG instead of HEIC. JPG files are slightly larger than HEIC but smaller than the full-quality HEIC files in some workflows. You can also reduce video resolution in Settings > Camera to save significant storage space.
How to Reduce Image File Size on Android
Android doesn’t have a built-in image compression tool with quality control across all devices. Some manufacturer apps like Samsung Gallery have basic resize options, but they don’t give you fine-grained file size control.
The browser method works perfectly on Android for reducing image file size:
- Open Chrome on your Android phone
- Go to imageconvertertools.com/image-compressor
- Tap upload and select your image from the gallery
- The tool compresses automatically
- Download the compressed version to your Downloads folder
This works on every Android phone regardless of brand or Android version. The compressed file goes to your Downloads folder and can be shared or moved from there.
How to Reduce Image File Size for Email
Why Email Image Size Matters
Email providers have attachment size limits — typically 10 to 25MB depending on the service. But even within those limits, large email attachments cause real problems. They’re slow to send, slow to receive, fill up recipients’ inboxes, and are more likely to trigger spam filters. Keeping email images small is basic email etiquette — especially for business emails.
For images embedded in email newsletters and marketing emails, large images also make the email slow to load on mobile — and most people check email on their phones. A slow-loading email newsletter gets closed before the reader sees your content.
Target Sizes for Email Images
- Inline email images: under 100KB each
- Email header banner: under 150KB
- Email attachments: under 1MB per image when possible
- Total email image weight: under 600KB for newsletters
To hit these targets, resize email images to a maximum of 600px wide — the standard email content width — and compress to 80 to 85 percent quality. This combination consistently produces email-ready images under 100KB.
How to Reduce Image File Size for Websites
The Two-Step Website Image Workflow
Getting website images to the right file size requires two steps done in the right order. First, resize to the correct display dimensions. Second, compress to the target file size. Skipping either step leaves file sizes larger than they need to be.
Most website performance problems come from images that are either the wrong dimensions, the wrong format, or not compressed — and often all three at once. A 5MB smartphone photo uploaded directly to a WordPress blog post fails all three tests simultaneously.
Format Conversion Is Often the Biggest Win
For websites already using JPG and PNG images, converting to WebP often gives a bigger file size reduction than additional compression alone. If a JPG image is already reasonably compressed but still 400KB, switching to WebP might bring it to 250KB without any further compression — a 37 percent reduction from format change alone.
The combination of WebP format plus good compression is the most effective approach for website images. Convert to WebP first, then compress. Use our Image Compressor to handle the compression step after converting format.
Check Your Results With PageSpeed Insights
After optimising your images, run your website through Google PageSpeed Insights at pagespeed.web.dev. It identifies any remaining images that are still too large, in the wrong format, or causing performance issues. Fix each flagged image and re-run to confirm improvement. Most websites see significant performance score improvements after properly reducing their image file sizes.
Common Mistakes When Reducing Image File Size
These are the mistakes people make most often. Each one either reduces quality more than necessary or doesn’t reduce file size as much as it could.
Compressing without resizing first. Compressing a 4000px wide image saves some space but nowhere near as much as resizing to the correct dimensions first. Always resize to the display size before compressing.
Using too low a quality setting. Going below 70 percent quality to save extra space causes visible compression artefacts — blurry edges, colour banding, and block-like patterns. The file size difference between 70 percent and 80 percent quality is small. The quality difference is noticeable. Stay between 75 and 85 percent.
Compressing the same image multiple times. Every time you apply lossy compression and re-save, you lose more data. Compress once from the original file and stop. Keep the original untouched and save the compressed version as a new file.
Saving as PNG when JPG or WebP would be smaller. PNG is lossless and large for photographs. If you’re compressing a photograph that’s saved as PNG, switching to WebP first gives you a much bigger file size reduction than compressing the PNG directly.
Thinking smaller file size always means worse quality. At quality settings of 75 to 85 percent, the quality difference between a compressed and uncompressed image is invisible on screen at normal viewing sizes. You’re not sacrificing quality — you’re removing data the eye can’t perceive anyway.
Frequently Asked Questions
1. How do I reduce image file size without losing quality?
Use lossy compression at 75 to 85 percent quality. At these settings, the quality reduction is invisible at normal screen sizes. Also switch to WebP format — it stores the same visual quality in a smaller file than JPG or PNG. Resize to the correct display dimensions before compressing. These three steps together can reduce file size by 80 to 90 percent with no visible quality difference.
2. How much can I reduce image file size?
Typically 70 to 90 percent depending on the starting format and dimensions. A 5MB smartphone photo can realistically become 400 to 600KB without any visible quality difference. A 3MB PNG photograph can become 200 to 300KB as a compressed WebP. The exact reduction depends on the image content, starting format, and compression settings.
3. What is the best free tool to reduce image file size?
A free online image compressor is the most accessible option — it works on any device without installing anything. Our Image Compressor reduces file sizes by up to 80 percent with no watermarks, no sign-up, and support for multiple files at once.
4. How do I reduce image file size on iPhone?
Open Safari, go to our free Image Compressor, upload your image from Photos, and download the compressed version. The Photos app itself doesn’t have a compression tool with quality control. When sharing via the Mail app, iOS offers Small, Medium, and Large size options which apply basic compression for email sharing.
5. How do I reduce image file size on Windows?
Open the image in Paint, go to File > Save As, and choose JPEG Picture — this converts PNG to JPG and reduces file size. For more control over quality settings and better results, use the online compressor in Chrome or Edge. For multiple files, the online tool handles batch compression better than any built-in Windows option.
6. Does reducing image file size affect print quality?
For screen use, file size reduction at 80 to 85 percent quality is invisible. For print, compression affects quality more noticeably because prints are examined much more closely. For print images, keep quality at 90 percent or higher. For web images going to print later, always keep the original full-quality file and only use compressed versions for web.
7. What’s the difference between reducing file size and reducing image dimensions?
Reducing dimensions changes the pixel size of the image — fewer pixels, smaller file. Reducing file size through compression keeps the same pixel dimensions but stores the data more efficiently. Both reduce file size. For the best results, do both — resize to the correct display dimensions first, then compress. This combination gives you the smallest possible file size.
8. How do I reduce image file size for a website?
Resize to the correct display dimensions for your website layout. Convert to WebP format. Compress to the target file size — under 150KB for most web images. Upload the optimised version. Run PageSpeed Insights to check results and fix any remaining issues it flags.
9. Can I reduce the file size of a PNG without converting to JPG?
Yes. PNG lossless compression can reduce PNG file sizes by removing metadata and optimising the file structure without removing any pixel data or converting to a different format. The reduction is less dramatic than converting to JPG or WebP — typically 20 to 40 percent. For the biggest reduction on a PNG photograph, converting to WebP gives much better results.
10. How do I reduce the file size of multiple images at once?
Use a batch compression tool. Our Image Compressor supports multiple file uploads — select all your images at once, upload them together, and download all the compressed versions. On Mac, Preview’s Export Selected Images feature also handles batch compression — open all images, select all in the sidebar, and export with your chosen quality setting.
Conclusion
Reducing image file size is one of the highest-impact things you can do for your website, your email, and your storage — and it’s free and fast when you know the right steps. The combination of right format, correct dimensions, and good compression consistently achieves 70 to 90 percent file size reduction with no visible quality loss.
The order matters. Switch to WebP format first — that alone cuts 25 to 35 percent off the file size. Then resize to the correct dimensions for your use case. Then compress to the target file size. Do these three steps consistently and your images will be small, fast, and sharp every time.
Use our free Image Compressor to reduce any image file size in seconds — no software, no sign-up, supports multiple files at once, completely free on every device.