If you run a website, manage a blog, or work with images for any kind of online use, you have probably heard that WebP is better for the web than PNG. And it is — but most guides stop at just telling you that without explaining why, when it actually matters, what you lose in the process, and how to do it properly on every device and platform.
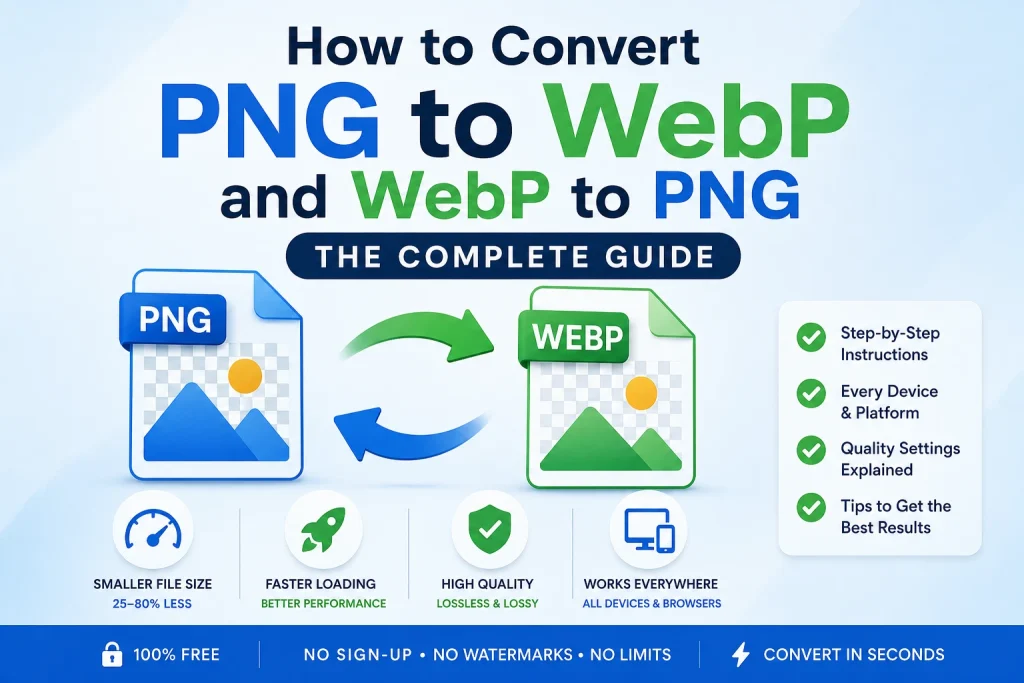
This guide covers everything honestly. What WebP actually is, how it compares to PNG in real-world use, when converting makes sense and when it does not, how to convert PNG to WebP on every device, how to convert WebP back to PNG when you need to, and practical tips that make a genuine difference to your results. By the end you will have a complete understanding of both formats and exactly how to work with them.
What Is WebP and Why Does It Exist?
The Problem WebP Was Designed to Solve
When Google engineers looked at how images were being served on the web in the late 2000s, they saw a clear problem. The two dominant formats — JPG for photographs and PNG for graphics — were both ageing standards designed in the 1990s. Neither was built with modern web performance in mind. Both produced larger files than necessary for the visual quality they delivered, and neither handled all use cases well. JPG could not do transparency. PNG could not compress photographs efficiently. There was no single modern format that handled everything well.
Google developed WebP as a direct solution to this problem. It was first announced in 2010 and has been steadily gaining adoption ever since. WebP uses a compression method derived from the VP8 video codec — the same technology used in Google’s WebM video format — which is fundamentally more efficient than the compression algorithms behind JPG and PNG.
According to Google’s official WebP documentation, WebP lossless images are on average 26 percent smaller than PNG files, and WebP lossy images are 25 to 34 percent smaller than comparable JPG files at equivalent visual quality. For a website with hundreds of images, that difference translates directly into faster page loading, lower bandwidth costs, and better scores in performance tools.
What Makes WebP Technically Different
WebP supports four distinct modes that make it more versatile than either JPG or PNG individually. Lossy WebP uses predictive coding to compress image data more efficiently than JPG. Lossless WebP uses a different algorithm to compress images without any data loss, producing smaller files than PNG. Transparent WebP supports alpha channel transparency like PNG but with a smaller file size. Animated WebP supports animation like GIF but with far better compression and quality.
This means WebP can genuinely replace all four of those older formats in a single, more efficient package — which is exactly why web performance experts and search engines strongly favour it for web use.
PNG vs WebP — A Honest Comparison
Where WebP Wins Over PNG
For web use specifically, WebP has clear and measurable advantages over PNG. File sizes are consistently smaller — typically 25 to 35 percent smaller for equivalent lossless quality, and sometimes much more than that depending on the image content. Smaller files mean pages load faster, use less bandwidth, and score better in tools like Google PageSpeed Insights and Core Web Vitals assessments. For websites where page speed affects search rankings and user experience, this difference is genuinely meaningful.
WebP also handles photographs and complex images better than PNG in lossless mode. PNG’s lossless compression works by finding repetitive patterns in pixel data — it is very efficient for simple graphics with flat colours and hard edges, but much less efficient for photographs with complex colour variations. WebP’s lossless mode handles both types of images more efficiently.
Where PNG Wins Over WebP
PNG wins on universal compatibility. Every device, every operating system, every application, and every platform on earth supports PNG without any special handling. PNG has been a web standard since 1996 and that level of universal support is extremely valuable when you need images to work everywhere without any conversion or special handling.
PNG also wins for print use. Print services, design applications, and professional production workflows universally accept PNG. WebP is a web format and is not accepted by most print services or professional design tools. If you are working on images destined for print, PNG is the correct format.
PNG wins for images you plan to edit repeatedly. PNG is lossless and stays completely sharp through unlimited save cycles. WebP in lossy mode degrades slightly with each save. For working files that go through multiple rounds of editing, PNG is the safer archive format.
The Practical Summary
| Feature | PNG | WebP |
|---|---|---|
| File Size | Larger | 25-35% smaller |
| Transparency | Supported | Supported |
| Lossless Option | Yes | Yes |
| Lossy Option | No | Yes |
| Animation | Not supported | Supported |
| Browser Support | Universal | All modern browsers |
| Print Use | Widely accepted | Not accepted |
| Software Support | Universal | Limited in older software |
| Best For | Design files, print, editing | Web images, performance |
| Colour Depth | Up to 48-bit | Up to 10-bit per channel |
When Should You Convert PNG to WebP?
You Are Optimising a Website for Speed
This is the most common and most valid reason to convert PNG to WebP. If you have a website with PNG images — logos, icons, product graphics, screenshots, or illustrations — converting them to WebP reduces their file size without any visible quality difference on screen. Smaller images mean faster page loading, which directly affects both user experience and search engine rankings.
Page loading speed is a confirmed Google ranking factor. Google’s own Core Web Vitals documentation identifies image optimisation as one of the primary factors affecting Largest Contentful Paint — one of the three Core Web Vitals metrics that Google uses to assess page experience. Converting large PNG files to WebP is one of the most impactful single changes you can make to improve these scores.
If you run a WordPress website or any CMS-based site, most modern performance plugins can automatically serve WebP versions of your images to browsers that support it. But for the cleanest and most controlled approach, converting your images to WebP before uploading gives you full control over the output quality and file size.
You Have PNG Images with Transparency That Need to Be Web-Optimised
PNG is the standard choice for transparent images — logos, icons, cutout product photos, and interface graphics all commonly use PNG for its transparency support. The problem is that PNG files with transparency can be quite large. WebP supports transparency just as well as PNG but produces significantly smaller files. Converting your transparent PNGs to WebP for web use gives you the same clean transparent image at a much smaller file size.
This is particularly relevant for logos and interface elements that appear on every page of a website. A logo PNG that is 200KB becomes a WebP that is perhaps 80KB — and since that logo loads on every single page view, the cumulative bandwidth saving across all your visitors is substantial.
You Are Building or Optimising an eCommerce Store
Product image quality and page loading speed are both critical for eCommerce conversion rates. PNG product images on white or transparent backgrounds are common in online stores — and they tend to be large files. Converting them to WebP reduces file sizes dramatically while maintaining the visual quality that convinces shoppers to buy. For stores with large catalogues, the performance improvement from converting all product images to WebP can be very significant.
When Should You Convert WebP to PNG?
You Need to Edit the Image in Desktop Software
Most professional design applications — older versions of Adobe Photoshop, Illustrator, CorelDRAW, and many others — do not support WebP. If you download a WebP image from the web and need to edit it in desktop software, converting it to PNG first gives you a file that opens in everything. PNG is lossless so the conversion does not reduce quality, and you can work on the PNG file freely before exporting back to WebP for web use if needed.
You Need to Print the Image
Print services do not accept WebP files. If you have a WebP graphic or logo that needs to go to a print shop or be included in a print-ready document, converting it to PNG first is the necessary step. PNG is universally accepted in print workflows and preserves full quality. Our guide on how to convert JPG to PNG also covers the PNG format in detail including its advantages for print use.
You Are Sharing the Image Across Different Platforms
Despite strong browser support, WebP is still not universally accepted in every context. Some email clients do not display WebP images correctly. Some older applications, content management systems, and image handling libraries do not support WebP. If you need an image to work reliably everywhere without any compatibility risk, converting WebP to PNG gives you that universal compatibility.
You Are Working on a Design That Requires Multiple Editing Rounds
WebP in lossy mode loses a small amount of quality each time it is saved. For images that go through multiple editing and saving cycles, PNG is a safer working format because it is completely lossless. Convert WebP to PNG for your working files, do all your editing in PNG, and then export to WebP only at the final step when the image is ready for web use.
How to Convert PNG to WebP Online — Step by Step
The Fastest Method for Any Device
Using a free online converter is the most accessible and fastest way to convert PNG to WebP. No software installation, no account, and it works equally well on Windows, Mac, iPhone, Android, and Chromebook.
- Go to imageconvertertools.com/png-to-webp
- Click the upload button or drag and drop your PNG file into the upload area
- The tool automatically processes the file and converts it to WebP
- Preview the result to check that quality meets your needs
- Click Download to save your WebP file
You can upload multiple PNG files at once and convert them all in a single batch — particularly useful when preparing a set of website images or product photos. Files are deleted from the server automatically after conversion to protect your privacy.
Pros:
- Works on any device with a browser — no installation needed
- Supports multiple file uploads for batch conversion
- Fast processing — most images convert in under 10 seconds
- Free with no watermarks, no limits, and no sign-up required
- Ideal for both single files and batches
Cons:
- Requires an internet connection
- Less granular quality control compared to desktop software
- Not ideal for very sensitive images since files are uploaded to a server
How to Convert WebP to PNG Online
Converting in the other direction is just as straightforward. When you have a WebP file that you need as a PNG — for editing, printing, or compatibility reasons — the process takes only a few seconds.
- Go to imageconvertertools.com/webp-to-png
- Upload your WebP file — single file or multiple files at once
- Make sure PNG is selected as the output format
- Click Convert
- Download your PNG file
Since WebP to PNG is a lossless conversion — you are converting from a compressed format to a lossless one — no quality is lost in this direction. The resulting PNG will be a full-quality representation of the WebP image.
How to Convert PNG to WebP on Windows
Using an Online Tool on Windows
The simplest and most reliable method on Windows is using the online converter in Chrome or Edge. Go to the PNG to WebP converter, upload your file, and download the result. No installation, no configuration, works on Windows 10 and Windows 11 equally well.
Using Paint on Windows 11
Windows 11’s updated version of Paint added WebP support in a 2023 update, making it possible to save images as WebP directly from Paint for the first time.
- Open your PNG file in Paint
- Go to File > Save As
- Look for WebP in the format dropdown — if your Windows 11 is fully updated this option will be available
- Click Save
Important tip: This feature is only available in the updated version of Paint on fully updated Windows 11 installations. If you do not see WebP as a save option in Paint, your Windows 11 may need updating, or you may be on Windows 10 which does not have this feature. In that case, the online converter is the reliable alternative.
Using Windows Photos App
The Windows 11 Photos app also added basic WebP support in recent updates. You can open a PNG file and use Save As to export as WebP, though the quality control options are limited compared to dedicated tools.
Batch Converting PNG to WebP on Windows
For converting multiple PNG files to WebP on Windows, the online converter is the most practical batch solution. Select all your PNG files when uploading, set the output to WebP, and download all converted files together. For very large batches of hundreds of files, consider processing them in groups for the most efficient workflow.
How to Convert PNG to WebP on Mac
Using Preview on Mac
Preview on Mac added WebP export support in macOS Ventura (macOS 13) and later. If you are running a recent version of macOS, Preview can handle PNG to WebP conversion natively.
- Open your PNG file in Preview
- Go to File > Export
- Click the Format dropdown
- Look for WebP in the format list
- Adjust the quality slider if available
- Click Save
Important tip: WebP export in Preview is only available on macOS Ventura (13) and later. If you are on macOS Monterey (12) or earlier, Preview will not show WebP as an export option. In that case, use the online converter which works on all macOS versions in any browser.
Batch Converting PNG to WebP on Mac
For batch conversion on Mac using Preview:
- Open all your PNG files in Preview simultaneously
- Select all thumbnails in the sidebar using Command + A
- Go to File > Export Selected Images
- Click Options to expand format settings
- Select WebP from the format dropdown (macOS Ventura and later only)
- Choose your destination folder
- Click Choose
All selected PNG files convert to WebP simultaneously. This is the fastest free batch method on Mac without any additional software.
Using the Online Tool on Mac
For Mac users on older macOS versions, or for anyone who wants more control over the conversion quality, the online converter works perfectly in Safari or Chrome on any Mac. It handles both single files and batches and does not require any specific macOS version.
How to Convert PNG to WebP on iPhone
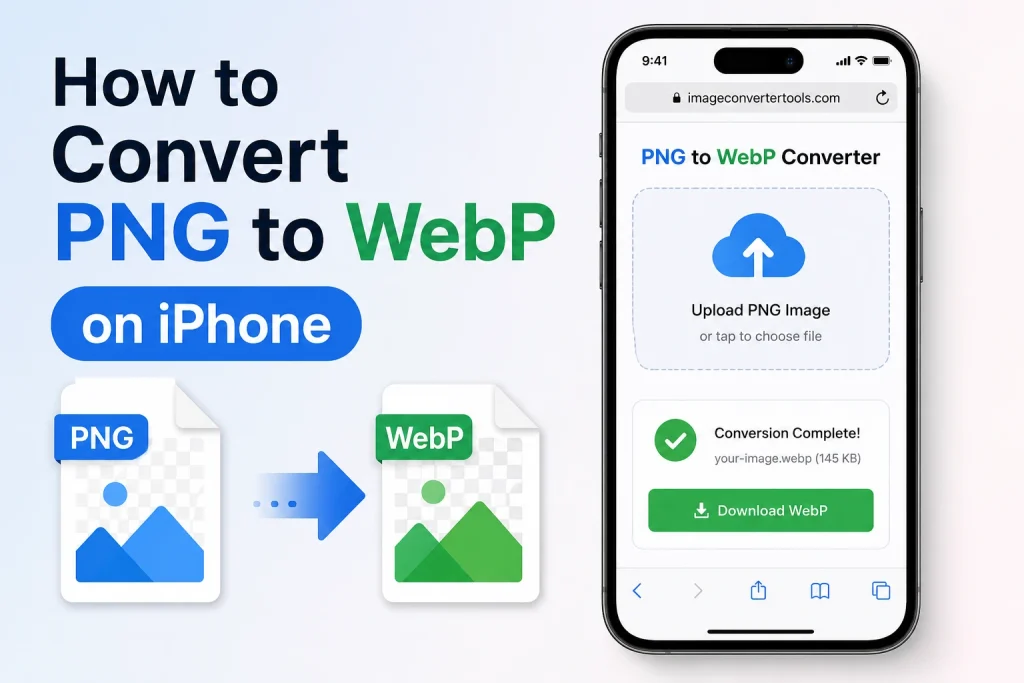
iPhones do not have native WebP export tools in the Photos app or any built-in application. The browser-based approach is the most practical solution on iPhone.
- Open Safari on your iPhone
- Go to imageconvertertools.com/png-to-webp
- Tap the upload area and select your PNG from Photos or Files
- Wait for the conversion to complete
- Tap Download — the WebP file saves to your Files app
Practical tip for iPhone users: Most of the situations where you need WebP conversion are web-related tasks — optimising images for a website, preparing graphics for a CMS upload. These tasks are usually done on a desktop computer rather than on an iPhone. The iPhone method is useful when you specifically need to convert a PNG you have on your phone for immediate web use.
How to Convert PNG to WebP on Android
Android has had native WebP support for viewing since Android 4.0, but converting TO WebP from the gallery or any built-in app is not natively supported across all devices.
- Open Chrome on your Android device
- Go to imageconvertertools.com/png-to-webp
- Tap the upload area and select your PNG from your gallery or files
- Tap Convert
- Download the WebP file to your Downloads folder
The converted WebP file can be used directly in any web-related workflow from your Android device.
How to Convert PNG to WebP in Photoshop
Adobe Photoshop added native WebP support in version 23.2, released in early 2022. If you have a recent Creative Cloud subscription with an up-to-date Photoshop installation, converting PNG to WebP is built directly into the save workflow.
Saving as WebP in Photoshop
- Open your PNG file in Photoshop
- Go to File > Export > Export As
- In the File Settings section, click the Format dropdown
- Select WebP
- Adjust the quality setting — for lossless WebP conversion tick the Lossless checkbox; for lossy WebP set quality between 80 and 90 for the best balance
- Click Export All
- Choose your save location and click Export
WebP Lossless vs Lossy in Photoshop
When converting PNG to WebP in Photoshop, you have the choice between lossless and lossy output. For PNG images that contain transparency, text, logos, or sharp graphical elements, choose lossless — this gives you a WebP file that matches the PNG quality exactly with no compression artefacts. For photographs and complex photographic content, lossy at 80 to 90 percent quality gives you a dramatically smaller file with no visible quality difference at normal screen sizes.
Important tip: If your version of Photoshop is older than version 23.2 and does not show WebP in the export format list, you need to update Photoshop through the Creative Cloud app. Photoshop updates are included with your Creative Cloud subscription at no extra cost. Alternatively, the online converter gives you the same result without needing to update anything.
How to Convert PNG to WebP for WordPress
WordPress is one of the most common contexts where PNG to WebP conversion makes a practical difference. WordPress websites with unoptimised PNG images frequently score poorly on PageSpeed and Core Web Vitals assessments, and converting to WebP is one of the most effective single improvements.
Method 1 — Convert Before Uploading
The most controlled approach is converting your PNG images to WebP before uploading them to WordPress. Use the online converter, download the WebP files, and upload those directly to your WordPress media library. This gives you full control over output quality and means your media library contains properly optimised files from the start.
Method 2 — Use a WordPress Performance Plugin
Several WordPress plugins automatically convert uploaded images to WebP and serve them to compatible browsers. Popular options include Smush, ShortPixel, and Imagify. These plugins typically convert existing images in your media library and automatically handle new uploads.
Important consideration: Many of these plugins charge monthly fees for WebP conversion beyond a free tier limit. If you have a large media library or upload many images regularly, the subscription costs can add up. Converting images to WebP before uploading — using a free tool — avoids these ongoing costs entirely while giving you the same result.
Method 3 — Use .htaccess to Serve WebP Automatically
For technically comfortable users, adding rules to your .htaccess file can serve WebP versions of images automatically to browsers that support it, while falling back to PNG for browsers that do not. This requires both a WebP and a PNG version of each image to be present on the server, and the .htaccess rule handles serving the right version to each visitor transparently.
This is the most technically involved method but gives you the most flexibility — original PNG files for compatibility and WebP files for performance, with automatic serving of the right format.
PNG to WebP Conversion — Quality Settings Explained
Lossless WebP — When to Use It
Lossless WebP conversion preserves every single pixel of the original PNG exactly. No data is removed, no quality is reduced. The resulting WebP file is simply a more efficiently compressed version of the same image data. Use lossless WebP for:
- Logos and brand graphics where precise colour accuracy matters
- Icons and interface elements with sharp edges and flat colours
- Images that contain text
- Graphics that will be edited again later
- Any image where quality must be absolutely identical to the original
Lossless WebP files are larger than lossy WebP files but smaller than equivalent PNG files — typically 25 to 35 percent smaller. This makes lossless WebP a straightforward upgrade over PNG for web use with zero quality tradeoff.
Lossy WebP — When to Use It
Lossy WebP applies compression that removes some image data to achieve smaller file sizes. The removed data is chosen to minimise visible impact, and at quality settings of 75 to 90 percent the difference from the original is invisible at normal screen sizes. Use lossy WebP for:
- Photographs and photographic content
- Complex images with gradients and soft colour transitions
- Images where file size is critical and some quality reduction is acceptable
- Background images and decorative graphics that do not require pixel-perfect accuracy
Lossy WebP at 80 percent quality produces files that are typically 60 to 80 percent smaller than the equivalent PNG, making it one of the most effective compression choices available for photographic web content.
Choosing the Right Quality Setting
For most web use cases, a quality setting of 80 to 85 percent for lossy WebP hits the ideal balance — file sizes are dramatically smaller than PNG while the image looks identical to the original at normal viewing sizes. Going below 75 percent starts to produce visible artefacts, particularly around sharp edges and in areas with subtle colour gradients. Going above 90 percent gives diminishing file size returns for no visible quality improvement.
WebP Browser Support — What You Need to Know
Current Browser Support
WebP is supported by all major modern browsers. Chrome has supported WebP since 2014. Firefox added full WebP support in version 65 in 2019. Safari added WebP support in version 14 in 2020, which also brought WebP support to all iPhones running iOS 14 and later. Edge supports WebP natively. Opera supports WebP.
According to Mozilla’s browser compatibility data, WebP currently has over 96 percent global browser support — meaning the vast majority of your website visitors can view WebP images without any issues.
What About the Remaining Percentage?
The browsers that do not support WebP are primarily very old versions of Safari on older iPhones and Macs (pre-iOS 14 and pre-macOS Big Sur), Internet Explorer, and some older mobile browsers. For most modern websites, this represents a very small fraction of visitors.
The standard approach for handling non-WebP browsers is using the HTML <picture> element with a WebP source and a PNG or JPG fallback. This serves WebP to browsers that support it and automatically falls back to PNG or JPG for those that do not — giving every visitor the best image their browser can handle.
Common PNG to WebP Conversion Mistakes and How to Avoid Them
Using Lossy Compression for Logos and Text Images
This is the most common mistake. Applying lossy WebP compression to a logo, icon, or image containing text introduces compression artefacts around the sharp edges. Text becomes slightly blurry, logo edges get a faint halo, and flat colour areas develop subtle noise. Always use lossless WebP for these image types — the file size saving is smaller than lossy but the quality is perfectly preserved.
Not Keeping the Original PNG Files
Always keep your original PNG files in a safe backup location after converting to WebP. If you later need to edit the image, print it, use it in a design application that does not support WebP, or convert it to another format, you will need the original. WebP files — especially lossy ones — are not ideal as master files for ongoing work.
Converting PNG Files That Are Already Compressed
If your PNG file has already been heavily compressed and has visible quality issues, converting to WebP will not improve those issues — it will just preserve them in a smaller file. Always convert from the highest quality version of the image available. Start with the cleanest original PNG you have for the best WebP output.
Forgetting to Test WebP on Your Actual Website
After converting images and uploading WebP files to your website, always check that they display correctly in multiple browsers. While WebP support is now very widespread, testing in Chrome, Safari, Firefox, and on mobile devices confirms everything is working as expected before your visitors encounter any issues.
Expecting WebP to Fix Poorly Optimised Images
Converting to WebP reduces file size, but it does not fix images that are too large in pixel dimensions for their display context. A 4000px wide image converted to WebP is still far larger than necessary for a 1200px wide content column. Always resize images to the correct display dimensions before converting to WebP. Our article on how to resize an image covers the correct dimensions for every platform and use case in detail.
PNG to WebP — Real World File Size Examples
To give you a clear sense of what to expect from PNG to WebP conversion in practice, here are realistic file size comparisons based on common image types:
| Image Type | PNG Size | WebP Lossless | WebP Lossy (85%) | Saving |
|---|---|---|---|---|
| Logo with transparency | 180 KB | 95 KB | 45 KB | 47–75% |
| Icon set (simple) | 80 KB | 45 KB | 25 KB | 44–69% |
| Screenshot | 850 KB | 480 KB | 220 KB | 44–74% |
| Product photo on white | 1.2 MB | 700 KB | 280 KB | 42–77% |
| Website hero graphic | 2.4 MB | 1.3 MB | 520 KB | 46–78% |
| Profile picture | 320 KB | 180 KB | 85 KB | 44–73% |
These numbers represent typical real-world results. Actual savings vary depending on image complexity, colour count, and content — simple graphics with flat colours compress more efficiently than complex photographs with many colour variations.
After Converting — What to Do Next
Compress Your WebP Files Further if Needed
Converting to WebP already reduces file sizes significantly, but for website use where every kilobyte matters, running the converted WebP files through a compression tool can squeeze out additional savings. After converting, check whether the file sizes meet your target — for most web images, under 200KB is a good target, and under 100KB is ideal for smaller page elements like icons and thumbnails. Our Image Compressor handles WebP files and can reduce their size further without any visible quality loss.
Check Your Images After Conversion
Always view your converted WebP files at 100 percent zoom before deploying them to your website. Check that transparency is preserved correctly if the original PNG had a transparent background. Check that colours look accurate. Check that any text in the image remains sharp. A quick manual review takes two minutes and catches any conversion issues before they affect your live website.
Consider Converting Other Image Formats Too
If you are optimising website images, PNG is likely not the only format you are working with. JPG images on your website benefit from WebP conversion just as much as PNG images. Our JPG to WebP converter handles JPG to WebP conversion with the same speed and quality, and our article on how to convert JPG to WebP covers the JPG side of web image optimisation in complete detail.
Frequently Asked Questions
1. Is WebP better than PNG for websites?
For web use specifically, yes. WebP produces files that are 25 to 35 percent smaller than equivalent PNG files at the same lossless quality, and even smaller with lossy compression. Smaller files mean faster page loading, better Core Web Vitals scores, and lower bandwidth usage. For print use, offline use, or professional design work, PNG remains the better choice due to its universal compatibility.
2. Does converting PNG to WebP lose quality?
With lossless WebP conversion, no quality is lost at all — every pixel is preserved exactly. With lossy WebP conversion, some data is removed, but at quality settings of 80 percent and above the difference is invisible at normal screen viewing sizes. For logos, icons, and images with text, always use lossless WebP to avoid any artefacts around sharp edges.
3. Can all browsers display WebP images?
All major modern browsers support WebP — Chrome, Firefox, Safari (version 14+), Edge, and Opera. Global WebP browser support is currently over 96 percent. For the small percentage of users on very old browsers, implement the HTML picture element with a PNG or JPG fallback to ensure all visitors see the correct image regardless of their browser version.
4. How do I convert PNG to WebP on Windows?
Use a free online converter in Chrome or Edge — go to imageconvertertools.com/png-to-webp, upload your PNG, and download the WebP. On Windows 11 with full updates, the updated version of Paint also supports saving as WebP directly. For batch converting multiple files, the online converter is the most practical option on Windows.
5. How do I convert WebP back to PNG?
Go to our free WebP to PNG converter, upload your WebP file, and download the PNG. Since WebP to PNG is a lossless conversion, no quality is lost. The resulting PNG is a full-quality version of the WebP image, suitable for editing, printing, or use in any application that does not support WebP.
6. Can I convert PNG to WebP without losing transparency?
Yes. WebP fully supports alpha channel transparency, just like PNG. When you convert a PNG with a transparent background to WebP, the transparency is preserved in the WebP file. Always use lossless WebP when transparency accuracy is important — lossy WebP can introduce very slight variations in semi-transparent edge pixels.
7. Should I replace all PNG images on my website with WebP?
For images displayed on web pages, yes — converting PNG images to WebP improves performance without any visible quality cost. Keep the original PNG files as backups. Use the HTML picture element to serve WebP with PNG fallback if you need to support older browsers. For images used in print, downloads, or offline contexts, keep them as PNG.
8. How much smaller will my images be after converting PNG to WebP?
Typically 25 to 35 percent smaller with lossless WebP, and 50 to 80 percent smaller with lossy WebP at high quality settings. Simple graphics with flat colours and few colour variations compress more efficiently than complex photographs. The exact saving depends on the specific image content.
9. Is WebP supported in WordPress?
WordPress added native WebP support in version 5.8, released in July 2021. You can upload WebP files directly to the WordPress media library and use them in your content. For automatically converting existing images to WebP, performance plugins handle this — or you can convert images to WebP before uploading using a free online tool, which avoids ongoing plugin subscription costs.
10. What is the difference between PNG to WebP and JPG to WebP conversion?
The process is the same but the starting points differ. PNG is a lossless format, so converting PNG to WebP lossless preserves 100 percent of the original quality. JPG is already a lossy format, so converting JPG to WebP starts from a file that has already lost some data — the WebP conversion cannot recover that lost detail. For the highest quality WebP output, always start from a PNG or original uncompressed source rather than from a JPG. If you need to understand JPG to WebP conversion in detail, our article on how to convert JPG to WebP covers it fully.
Conclusion
PNG to WebP conversion is one of the most straightforward and high-impact improvements you can make to any website’s image performance. The process takes minutes, the results are immediately measurable in smaller file sizes and faster loading times, and the quality difference is invisible to your visitors.
The rules that matter most: use lossless WebP for logos, icons, and images with text — use lossy WebP at 80 to 85 percent quality for photographs and complex graphics. Always keep your original PNG files. Resize images to the correct dimensions before converting. Test your converted images on your actual website before deploying across your entire image library.
Use our free PNG to WebP Converter to convert any PNG file to WebP in seconds — single files or batches, no sign-up, no watermarks, and completely free on every device.