Every time you upload a photo to a website, send an image by email, or share something on a messaging app, file size matters more than most people realise. A 5MB photo of a product looks identical to a 200KB compressed version on most screens — but one loads in half a second and the other takes several seconds on a average mobile connection. That difference directly affects whether visitors stay on your page or leave, whether your email gets delivered cleanly, and how much storage you burn through over time.
Image compression is the process of reducing an image’s file size while keeping it looking as good as possible. It is one of the most practical image skills you can have, whether you are running a website, managing social media, sending photos by email, or just trying to free up space on your phone. This guide covers everything — what compression actually does, the different types, when to use each one, how much quality you actually lose, and how to compress images on every device and platform without making them look terrible.
What Is Image Compression?
Image compression is the process of reducing the amount of data stored in an image file. The goal is to make the file smaller so it takes up less storage space, loads faster, and transfers more quickly — while keeping the image looking as close to the original as possible.
To understand how this works, think about what an image file actually contains. Every pixel in a photograph has a colour value stored as data. A typical uncompressed 12-megapixel photo contains 12 million pixels, each storing red, green, and blue values. That raw data can easily be 36MB or more. Compression algorithms analyse the image and find ways to represent the same visual information using less data — either by finding patterns and repetitions in the pixel data, or by removing detail that the human eye is unlikely to notice at normal viewing sizes.
According to the Mozilla MDN documentation on image file types, compression is one of the defining characteristics of every major image format, and understanding the type of compression a format uses is essential for making good decisions about which format to use in different situations.
Lossy vs Lossless Compression — What Is the Difference?
Lossy Compression
Lossy compression permanently removes some image data to achieve smaller file sizes. The data that gets removed is chosen carefully — the algorithm prioritises removing information that the human eye is least likely to notice, such as subtle colour variations in large flat areas, fine texture detail in backgrounds, or slight colour differences in shadow areas.
The result is a smaller file that looks almost identical to the original at normal viewing sizes, but which has genuinely lost some data permanently. You cannot recover that data once it is gone. Every time you open a lossy file, edit it, and save it again, it loses a little more data. This is known as generation loss, and it is why you should always keep your original file untouched and export compressed versions separately.
JPG is the most well-known lossy format. It is excellent for photographs where the subtle loss of fine detail is essentially invisible at normal viewing sizes. WebP in its lossy mode is even more efficient — it achieves smaller file sizes than JPG at equivalent visual quality levels.
Lossless Compression
Lossless compression reduces file size without permanently removing any image data. The algorithm finds more efficient ways to represent the same data — for example, instead of storing the colour value of 500 identical blue sky pixels individually, it stores the instruction “500 pixels of this exact blue” once. The original image can be perfectly reconstructed from the compressed file because nothing has been thrown away.
PNG uses lossless compression. This is why PNG files are larger than JPGs of the same image — they are storing every single piece of data. But it also means saving a PNG file repeatedly never degrades it. WebP also supports a lossless mode that produces smaller files than PNG while maintaining full data integrity.
Which Type Should You Use?
The right compression type depends entirely on what the image is and how you are using it. For photographs shared on websites and social media, lossy compression at a high quality setting gives you dramatically smaller files with no visible quality difference. For logos, icons, text-heavy graphics, and anything you plan to edit multiple times, lossless compression preserves sharpness and prevents the fuzzy edges that lossy compression creates around hard lines.
What Actually Happens to Image Quality When You Compress?
This is the question everyone wants answered honestly. The reality is more nuanced than most guides admit.
At high quality settings — typically 80 to 90 percent on most tools — lossy compression is genuinely invisible to the human eye on a normal screen at normal viewing distances. A photograph compressed to 85 percent quality looks identical to the original when viewed on a phone, tablet, or monitor. You would only notice a difference if you zoomed in to 200 or 300 percent and specifically looked for compression artefacts.
At lower quality settings — below 60 percent — you start to see visible block-like artefacts, especially around sharp edges, text, and fine detail. Faces in photographs develop a slightly waxy, smeared look. Hard edges on text or logos become blurry and slightly halo-ed. These artefacts are the direct result of the compression algorithm discarding too much data.
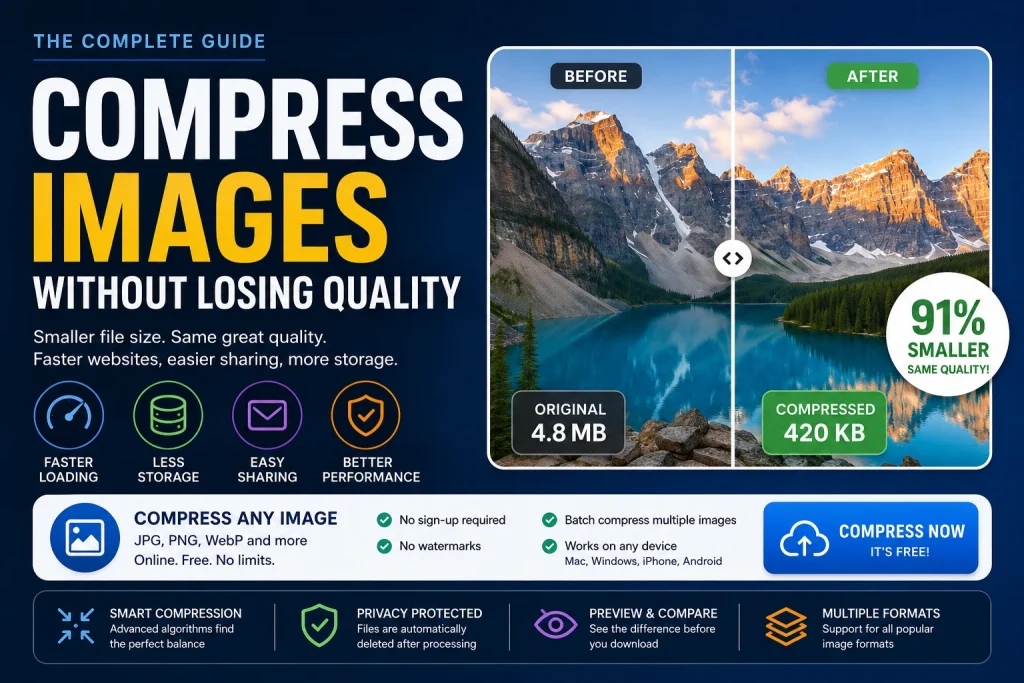
The practical sweet spot for most web and social media use is 75 to 85 percent quality. This gives file sizes that are typically 60 to 80 percent smaller than the original while looking indistinguishable from the original at normal viewing sizes. Our Image Compressor uses smart compression settings by default that target this sweet spot automatically — you get maximum size reduction with no visible quality change.
How Much Does Image Compression Actually Reduce File Size?
The size reduction you get from compression varies depending on the image type, the original format, and the compression level applied. Here are realistic numbers based on typical real-world images:
| Image Type | Original Size | After Compression | Reduction |
|---|---|---|---|
| DSLR photograph (JPG) | 6 MB | 400–800 KB | 85–93% |
| Smartphone photo (JPG) | 3–4 MB | 200–500 KB | 85–93% |
| Screenshot (PNG) | 1–2 MB | 300–600 KB | 60–75% |
| Product photo (JPG) | 2–3 MB | 150–400 KB | 80–93% |
| Logo graphic (PNG) | 500 KB | 100–200 KB | 60–80% |
| Website hero image | 1.5–3 MB | 100–300 KB | 80–93% |
These reductions are achievable at quality settings where the difference is invisible on screen. The numbers are not theoretical — they represent what you can realistically expect from good compression at high-quality settings.
How to Compress an Image Free Online
The Fastest Method for Any Device
Using a free online compression tool is the quickest and most accessible way to compress any image without installing software. It works on Windows, Mac, iPhone, Android, and Chromebook equally well.
Here is how to compress an image using our free tool:
- Go to imageconvertertools.com/image-compressor
- Click the upload button or drag and drop your image into the area
- The tool automatically analyses the image and applies smart compression
- Preview the result alongside the original to compare quality and file size
- Download the compressed image
You can upload multiple images at once and compress them all in a single batch. This is particularly useful for website owners who need to process a large number of images before uploading them to their site. Files are automatically removed from the server after processing to protect your privacy.
Pros of online compression:
- No software installation — works in any browser on any device
- Supports batch uploads for multiple files at once
- Side-by-side quality preview before downloading
- Free with no limits, no watermarks, no sign-up required
- Processes most images in under 10 seconds
Cons of online compression:
- Requires an internet connection
- Less control over individual compression parameters compared to professional desktop software
- Not ideal for very sensitive or confidential images since files are uploaded to a server
How to Compress an Image on Mac
Using Preview on Mac
Every Mac comes with Preview, which has a built-in export quality control that effectively compresses images when saving. It is not labelled as a compression tool but adjusting the quality slider when exporting as JPG does exactly that.
- Open the image in Preview
- Go to File > Export
- Select JPEG as the format
- Use the Quality slider — move it left to reduce file size, right to increase quality
- Watch the estimated file size change as you move the slider
- Click Save when you reach the right balance
Pros: Already installed on every Mac, free, works offline, gives direct quality control
Cons: Only works for JPG export — cannot compress PNG files effectively this way, no batch processing without additional steps, no side-by-side before/after comparison
Batch Compressing Images on Mac with Preview
Preview can process multiple images at once using the same export method. Open all the images in Preview, select them all in the sidebar, go to File > Export Selected Images, choose JPEG, and set the quality level. All images export simultaneously with the same compression settings. This is a fast and free solution for Mac users who need to compress a set of images without any additional software.
Does AirDrop Compress Images?
This is a question many iPhone and Mac users have. AirDrop does not compress images — it transfers the original file at its full resolution and quality. If you send a 10MB photo via AirDrop, the recipient gets a 10MB photo. This is one of AirDrop’s genuine advantages over messaging apps that compress everything automatically. If your AirDropped images look compressed, the issue is elsewhere in your workflow — not in the AirDrop transfer itself.
How to Compress Images on iPhone
Does iPhone Automatically Compress Images?
iPhones capture photos at high resolution, typically between 12 and 48 megapixels depending on the model. The Photos app stores these at full quality by default. However, when you share photos through certain apps and services, those platforms apply their own compression.
iMessage compresses images when sent over mobile data but transfers at full quality over Wi-Fi. WhatsApp compresses all shared images regardless of connection. Email apps typically send images at reduced quality to keep attachment sizes manageable. Instagram, Facebook, and Twitter all apply their own compression on upload.
If you want to control compression yourself — for example, to reduce a photo before sending it as an email attachment or uploading to a website — the built-in iOS options are limited. The Photos app does not have a dedicated compress function with quality control.
Compressing Images on iPhone Using a Browser
The most reliable way to compress images on iPhone with quality control is using a browser-based tool.
- Open Safari on your iPhone
- Go to imageconvertertools.com/image-compressor
- Tap the upload area and select your image from Photos
- The tool compresses the image automatically
- Download the compressed version to your Files app
This gives you a properly compressed image that is ready for email, website upload, or any other use — with no app installation and no cost. The downloaded file saves to your Files app and can be shared from there to any app or service.
Using iPhone’s Built-In Low Quality Option for Email
When you share an image directly from the Photos app via the Mail app, iOS offers size options before sending — Small, Medium, Large, and Actual Size. Choosing Small or Medium applies basic compression to reduce the attachment size. This is convenient for quick email sharing but gives you no control over quality settings and is not suitable for any professional use where image quality matters.
How to Compress an Image on Windows
Using Paint on Windows
Paint on Windows does not have a dedicated compression control, but saving a PNG as a JPG in Paint effectively applies JPG compression and reduces the file size significantly.
- Open the image in Paint
- Go to File > Save As
- Select JPEG Picture
- Click Save
This is a blunt instrument — you get no control over the compression level, and Paint typically saves at a fixed quality setting that may over-compress some images. For any situation where quality control matters, the online tool gives noticeably better results.
Using the Online Tool on Windows
Opening our free Image Compressor in Chrome or Edge on Windows gives you proper quality-controlled compression with before/after comparison. This is the recommended approach on Windows for any image where the output quality matters — product photos, website images, professional photographs, and anything client-facing.
How to Compress Images for a Website
Why Website Image Compression Is Critical
Website performance is one of the most measurable areas where image compression makes a direct difference. Large uncompressed images are consistently one of the top causes of slow page loading. A page that takes more than three seconds to load loses a significant portion of its visitors before they even see the content.
According to the W3C Web Performance Working Group guidelines, image optimisation — including both correct sizing and compression — is one of the most impactful and easiest to implement improvements for web page loading speed. Search engines also factor page loading speed into rankings, meaning that uncompressed images can indirectly hurt your visibility in search results.
The Right Workflow for Website Images
Getting website images properly prepared involves two steps that most people only do one of. First, resize the image to the correct pixel dimensions for where it will be displayed — there is no benefit to uploading a 4000px wide image for a 1200px wide blog column. Second, compress the resized image to reduce file size before uploading.
Doing both steps together — resizing and then compressing — gives you images that are dimensionally correct and as small as possible without any visible quality loss. Our guide on how to resize an image covers the correct dimensions for every platform and use case, and complements this compression guide perfectly for a complete website image workflow.
What Format to Use for Website Images
Format choice affects file size as much as compression level does. JPG at 80–85 percent quality is the standard for photographs on websites. PNG is appropriate for logos, icons, and images with transparent backgrounds. WebP is the most efficient format for web use overall — it achieves smaller file sizes than both JPG and PNG at equivalent quality levels and is supported by all modern browsers.
Converting your website images to WebP after resizing and compressing gives you the best possible combination of quality and loading speed. Our article on how to convert JPG to WebP explains the format in detail and walks through the conversion process for anyone who wants to take their website image optimisation to the next level.
How to Compress Images for Email
Why Email Images Need to Be Compressed
Email clients have attachment size limits — typically between 10MB and 25MB depending on the provider. More practically, large image attachments slow down delivery, cause problems for recipients with limited inbox storage, and often get flagged by spam filters. For business emails where presentation matters, keeping images small and clean is important.
The target for email images is generally under 1MB per image for inline images and under 500KB for images that are part of the email design itself. Email header banners should be around 100–200KB. Anything larger starts to affect delivery and display performance across different email clients and devices.
Best Practice for Emailing Images
Before attaching an image to an email or embedding it in an email design, resize it to the correct dimensions first — typically a maximum of 600px wide for email layouts — then compress it to bring the file size into the right range. This two-step approach takes two minutes and prevents the common problem of emails getting delayed, blocked, or looking broken in the recipient’s inbox.
How to Compress Images for PowerPoint Presentations
Why Presentation Files Get So Large
PowerPoint presentations can grow to enormous file sizes when images are inserted without compression. A presentation with twenty high-resolution photos can easily reach 50–100MB, which makes it slow to open, difficult to share by email, and sometimes too large for email attachments altogether.
PowerPoint has a built-in image compression feature that addresses this directly.
Compressing Images Inside PowerPoint
- Click on any image in your presentation
- Go to the Picture Format tab in the ribbon
- Click Compress Pictures
- Choose a target resolution — Email (96 PPI) for smallest size, Web (150 PPI) for a good balance, Print (220 PPI) for presentations that will be printed
- Check Delete cropped areas of pictures to remove any hidden cropped data
- Choose whether to apply to this picture only or all pictures in the presentation
- Click OK
This can reduce presentation file sizes dramatically. A 60MB presentation with high-resolution photos can often be brought under 10MB with no visible difference when projected on a screen.
Pre-Compressing Images Before Inserting into PowerPoint
An even better approach is to compress images before inserting them into PowerPoint. This gives you more control over quality settings and means the presentation file stays small from the start rather than needing cleanup later. Compress your images using a free online tool, then insert the compressed versions into your slides. Combined with PowerPoint’s built-in compression as a final pass, this gives you the smallest possible file size with the best quality.
Does Google Photos Compress Images?
This is a question many people have about their photo storage, and the answer depends on which storage option you choose in Google Photos settings.
Google Photos offers two storage modes.
Storage Saver (previously called High Quality) compresses photos to reduce their size — photos above 16 megapixels are resized down, and compression is applied to all photos in this mode. The compression is generally well done and most people cannot see a difference at normal viewing sizes.
Original Quality stores photos exactly as captured with no compression or resizing applied, but these count fully against your Google storage quota.
If your Google Photos is set to Storage Saver, your photos are being compressed. If you need the originals for professional use, print orders, or any situation where full resolution matters, make sure you are either storing at Original Quality or keeping a separate backup of the uncompressed originals.
Does Google Drive Compress Images?
Google Drive does not compress images when you upload them as standalone files. A JPG or PNG uploaded to Google Drive is stored at exactly the file size you uploaded. Google Drive is a file storage service — it does not apply any processing to files you upload. The file you download is identical to the file you uploaded.
This is different from Google Photos, which actively manages and can compress your images as part of its photo management service.
Does Discord Compress Images?
Yes, Discord compresses images that are shared in chat. When you upload an image in a Discord server or direct message, Discord automatically recompresses it — especially if the file is large. Images above a certain file size threshold get compressed more aggressively, which is why screenshots and photos shared in Discord sometimes look noticeably softer than the originals.
To minimise quality loss when sharing images on Discord, compress the image yourself first using a dedicated tool before uploading. This gives Discord a smaller starting file that requires less recompression on their end, and the result is a noticeably sharper final image in the chat.
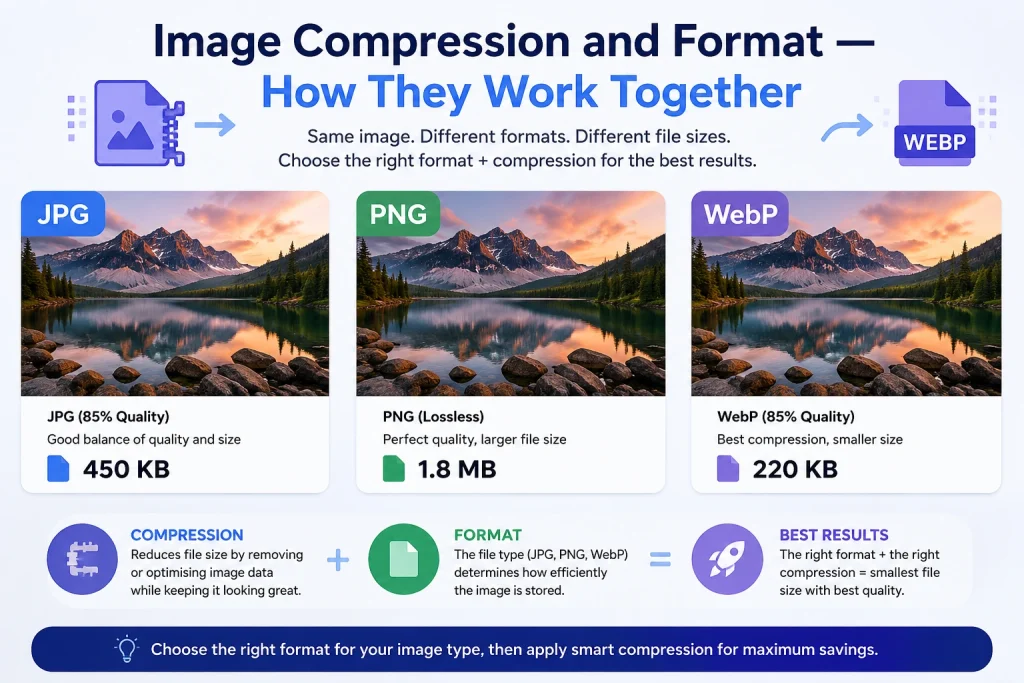
Image Compression and Format — How They Work Together
Compression settings and format choice are not separate decisions — they work together to determine the final file size and quality. Choosing the right format can have as large an effect on file size as compression level alone.
A photograph saved as a high-quality PNG might be 3–4MB. The same photograph saved as a JPG at 85 percent quality might be 300–500KB. Saved as WebP at equivalent quality, it might be 150–250KB. The visual difference between all three versions at normal screen size is essentially zero — the only difference is file size.
This is why format conversion is often as important as compression when optimising images. Converting your PNG photographs to JPG, or your JPG images to WebP for web use, can reduce file sizes far more dramatically than compression alone. Our article on how to convert JPG to PNG explains when each format is the right choice and what to expect when converting between them.
Common Image Compression Mistakes to Avoid
Even people who know about compression regularly make a small set of mistakes that undermine the results. Here is what to watch out for.
Compressing the original file and overwriting it — Always keep your original image untouched. Export the compressed version as a separate file. Once lossy compression removes data, it is permanently gone. If you later need a higher quality version, you need the original.
Compressing already-compressed images repeatedly — Every time you apply lossy compression, you lose more data. If you compress a JPG, then open it and compress it again, quality degrades cumulatively. Compress once from the original and stop.
Using too low a quality setting to save space — The difference in file size between 85 percent and 60 percent quality is not as large as most people expect, but the quality difference is very noticeable. The sweet spot of 75 to 85 percent gives you most of the file size benefit with none of the visible quality loss.
Compressing images without resizing them first — Compressing a 4000px wide image for use in an 800px wide column saves some space but nowhere near as much as resizing to 800px first and then compressing. Always resize to the correct dimensions before compressing.
Forgetting to compress PNG files — Many people assume that because PNG is lossless it cannot be compressed. PNG files can be significantly reduced in size through lossless PNG compression, which removes metadata and optimises the file structure without touching any pixel data. This is different from converting to JPG — the file stays as PNG and stays lossless.
Frequently Asked Questions
1. What is image compression?
Image compression is the process of reducing the file size of an image while keeping it looking as good as possible. Lossy compression removes some image data permanently to achieve smaller sizes. Lossless compression reorganises the data more efficiently without removing anything. Both types have different uses depending on the image type and how it will be used.
2. How do I compress an image without losing quality?
Use lossy compression at a high quality setting — between 75 and 90 percent on most tools. At these settings, the file size reduction is dramatic but the quality difference is invisible at normal viewing sizes. For images that absolutely cannot lose any data — logos, graphics with sharp text, images you plan to edit again — use lossless PNG compression or keep as PNG.
3. How much can I compress an image without it looking bad?
For photographs, 75 to 85 percent quality gives file sizes 60 to 85 percent smaller than the original with no visible quality difference on screen. Below 60 percent quality, compression artefacts start to become visible, particularly around sharp edges and in smooth colour areas. The exact threshold varies by image — complex photographs with lots of detail tolerate more compression than simple graphics.
4. Does compressing an image reduce its dimensions?
No. Compression only affects the file size, not the pixel dimensions. A 1200 × 800 image stays 1200 × 800 pixels after compression — it is just stored using less data. If you also need to change the pixel dimensions, that is resizing, which is a separate step. For the best results on web images, resize to the correct dimensions first, then compress.
5. How do I compress images for a website?
Resize to the correct display dimensions first, then compress to reduce file size. For photographs, JPG at 80 to 85 percent quality or WebP conversion gives the best results. For logos and graphics, use lossless PNG compression or convert to WebP with lossless settings. Aim for under 200KB per image for most web use cases.
6. Does Google Photos compress my images?
Yes, if your Google Photos storage is set to Storage Saver mode. In this mode, photos above 16 megapixels are resized and all photos are compressed. If you need originals preserved, switch to Original Quality in Google Photos settings, or maintain a separate backup of your uncompressed photos.
7. Does Discord compress images?
Yes. Discord automatically recompresses images uploaded in chat, particularly larger files. To minimise quality loss, compress the image yourself before uploading to Discord. Starting from a smaller, already-optimised file means Discord’s recompression has less impact on the final visible quality.
8. How do I compress images in PowerPoint?
Click any image in the presentation, go to Picture Format > Compress Pictures, choose your target resolution, and apply. For presentations that will only be shown on screen, the Web setting (150 PPI) gives a good balance of quality and file size. For the smallest file size, choose Email (96 PPI). Pre-compressing images before inserting them into PowerPoint gives even better results.
9. How do I compress images on iPhone?
Use a browser-based compression tool in Safari. Go to our free Image Compressor, upload your image from Photos, and download the compressed version. The iPhone Photos app does not have a dedicated compression feature with quality control — the browser method gives you proper control over the result.
10. What is the best format for compressed web images?
WebP gives the best compression efficiency for web use — smaller file sizes than both JPG and PNG at equivalent visual quality, with support from all modern browsers. JPG at 80 to 85 percent quality is the most universally compatible choice. PNG lossless compression works best for logos, icons, and graphics with transparency. For the smallest possible web images, convert to WebP after compressing.
Conclusion
Image compression is not a technical luxury — it is a basic part of working with images professionally in any context. Whether you are running a website, preparing images for email, managing social media content, or simply trying to keep your phone storage under control, compressing images correctly saves time, space, and bandwidth while keeping everything looking sharp.
The key principles are straightforward. Use lossy compression at high quality settings for photographs — 75 to 85 percent gives you most of the benefit with none of the visible cost. Use lossless compression for graphics, logos, and anything with sharp edges or text. Always keep your original files. Resize before you compress. And choose your format thoughtfully — sometimes converting format gives you more size reduction than compression alone.
Use our free Image Compressor to compress any image in seconds — no software, no sign-up, no limits on file count, and no watermarks on your output.