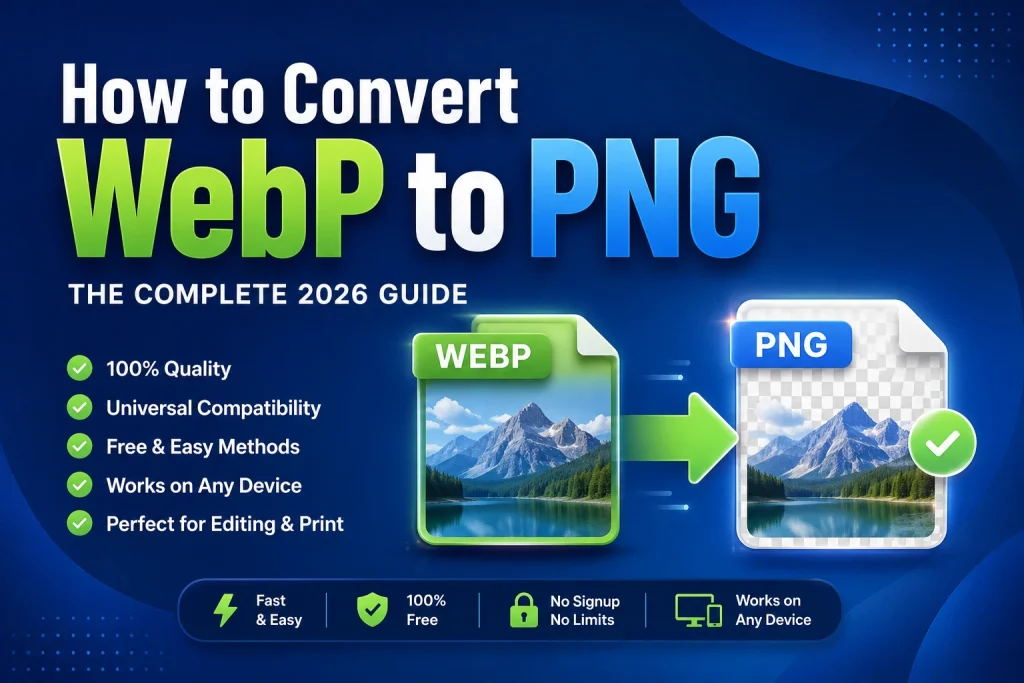
WebP is the fastest image format for websites – but it fails right away if you need to use it in your design app, send it to a printing service, or edit in an app that does not support WebP images. If you turn your WebP image into a PNG image, you get a lossless, universally compatible image file that opens in any software and preserves 100% of the original image quality.
This guide talks about all ways to convert WebP to PNG in 2026 – free online, on Windows, Mac, iPhone, Android, and in design apps. We will also talk about when WebP to PNG conversion makes sense, when it does not make sense, and how to do it properly every single time.
Why Convert WebP to PNG?
WebP is a wonderful file type for use on the web because of its fast loading speed, high-quality appearance, and efficient bandwidth utilization. However, leave a browser, and WebP fails to do its job.
Most professional graphics design software programs do not recognize WebP fully. Print shops will not work with WebP files. Some old programs cannot even open them. Download a WebP file from the internet to work on, and most likely, you will get an error message that says “File format not supported.”
PNG solves these problems by providing lossless quality images that have transparent backgrounds. They are recognized everywhere — by every design software, print shop, operating system, or program in the world.
Here are the most common reasons to convert WebP to PNG:
- You need to edit the image in a design tool that doesn’t support WebP
- A print service requires PNG or JPG and won’t accept WebP
- You need to keep the transparent background — PNG preserves transparency perfectly
- You’re sharing the image with someone whose software can’t open WebP
- You need a lossless working copy for editing without any quality loss
- The platform you’re uploading to doesn’t accept WebP files
WebP vs PNG — What Changes When You Convert?
Before converting, it’s worth understanding exactly what happens to the image during this conversion.
| Feature | WebP | PNG |
|---|---|---|
| Compression | Lossy or Lossless | Lossless only |
| File Size | Smaller | Larger |
| Transparency | Supported | Supported |
| Quality After Conversion | Same | Same or better |
| Software Support | Limited | Universal |
| Print Support | Rarely accepted | Widely accepted |
| Browser Support | 96%+ modern browsers | Universal |
| Best For | Web images | Editing, print, design |
Most importantly, one should be aware of the following – the conversion from WebP to PNG is a lossless conversion. Nothing is lost in terms of quality. The PNG file is comprised of the same pixel information as the source WebP file. In case the WebP file was a lossless WebP, then the PNG file is absolutely the same as the source image before conversion to WebP format.
The only disadvantage is that PNG files are bigger in size than WebP files since PNG stores all the pixels in the file without WebP compression.
When Should You Convert WebP to PNG?
You Need to Edit the Image
Most professional design workflows use PNG as a working format. Adobe Photoshop, Illustrator, Affinity Designer, GIMP, and most other design tools handle PNG natively and reliably. If you download a WebP image and need to edit it, convert to PNG first. PNG is lossless so you can edit and re-save it as many times as you want without any quality degradation.
You Need to Keep Transparency
Both WebP and PNG support transparent backgrounds — but not all WebP to JPG conversions do. If your WebP image has a transparent background and you need to keep that transparency in the converted file, PNG is the right format to convert to. PNG preserves full alpha channel transparency perfectly. Our guide on how to remove background from image explains how transparency works and when to use PNG for transparent images.
You Need to Send It to Print
Print services don’t accept WebP. If you have a WebP logo, graphic, or image that needs to go to a printer, convert to PNG first. PNG is universally accepted by print services and keeps lossless quality which is exactly what you need for professional print output.
You’re Working With Older Software
If your design software, photo editor, or image viewer can’t open WebP files, PNG is the most compatible alternative. Every version of every image application ever made supports PNG.
When Should You Stay With WebP?
Converting to PNG isn’t always the right move. Keep the WebP file when:
- The image is staying on a website — WebP is better for web performance
- You’re using the image in a modern app that supports WebP
- File size matters and the image doesn’t need print or design compatibility
- You’ll need the web-optimised version again later
If you’re converting specifically to edit the image and then re-use it on the web, convert to PNG for editing, make your changes, and then convert back to WebP using our PNG to WebP converter before uploading to your website.
How to Convert WebP to PNG Free Online
The Fastest Method — Any Device, No Software
Using a free online tool is the quickest way to convert any WebP file to PNG. Works on Windows, Mac, iPhone, Android, and Chromebook. No account, no software, no cost.
- Go to imageconvertertools.com/webp-to-png
- Click upload or drag your WebP file into the box
- The tool converts automatically
- Click Download to save your PNG file
You can upload multiple WebP files at once and convert them all in a single batch. All files are deleted from the server automatically after you download your results.
Pros:
- Works on any device with a browser
- Converts multiple files at once
- Preserves transparency in the converted PNG
- Free — no watermarks, no sign-up, no limits
- Results in under 10 seconds
Cons:
- Needs an internet connection
- Not ideal for confidential or sensitive images
How to Convert WebP to PNG on Windows
The WebP Problem on Windows
WebP files cannot be opened natively on Windows 10 and older versions of Windows 11 because there is no codec available. When you try to open a WebP file by double-clicking it, either nothing happens, or you receive an error message that you need to install the Web Media Extensions from the Microsoft Store.
You have two choices – to convert WebP using the online service without making any changes to your computer, or to install the codec.
Method 1 — Use the Online Converter
The simplest method with no system changes needed.
- Open Chrome or Edge
- Go to imageconvertertools.com/webp-to-png
- Upload your WebP file
- Convert and download the PNG
Takes under a minute and works on all Windows versions immediately.
Method 2 — Install Web Media Extensions
If you regularly work with WebP files and want to open them natively on Windows:
- Open the Microsoft Store
- Search for Web Media Extensions
- Install the free extension — it’s from Microsoft
- Restart your PC
After installing, WebP files open in Windows Photos. To save as PNG from Photos:
- Open the WebP file in Windows Photos
- Click the three-dot menu
- Select Save As
- Change the format to PNG
- Click Save
Using Paint on Windows 11
If you have the Web Media Extensions installed, you can open WebP files in Paint and save as PNG.
- Open the WebP file in Paint — right-click > Open with > Paint
- Go to File > Save As
- Choose PNG Picture
- Click Save
Batch Converting WebP to PNG on Windows
Windows has no built-in batch converter for WebP to PNG. The online converter handles batch conversion well — upload all your WebP files at once and download all the PNG files together. Much faster than converting one by one.
How to Convert WebP to PNG on Mac
Using Preview on Mac
Mac handles WebP natively — Preview opens WebP files without any extra software or codec. This makes Mac the easiest desktop platform for WebP conversion.
- Open your WebP file in Preview — just double-click it
- Go to File > Export
- Click the Format dropdown
- Select PNG
- Click Save
That’s all there is to it. Preview creates a lossless PNG from the WebP source. The original WebP file stays untouched — Preview always creates a new export file.
One thing to note about transparency: If your WebP image has a transparent background, Preview preserves that transparency in the PNG output. You’ll see the checkerboard transparency pattern in the preview — that’s correct. The transparency is there and will work perfectly in any design application.
Batch Converting WebP to PNG on Mac
Preview handles batch conversion natively — one of its most useful and underused features.
- Select all your WebP files in Finder
- Right-click and choose Open With > Preview
- In Preview, press Command + A to select all images in the sidebar
- Go to File > Export Selected Images
- Click Options and select PNG as the format
- Choose your destination folder
- Click Choose
All selected WebP files convert to PNG simultaneously. Works equally fast for 5 files or 500 files. This is the fastest free batch WebP to PNG method on Mac — no plugins, no subscriptions, no extra software.
Tips for Mac Users
- PNG export from Preview is always lossless — you don’t need a quality slider like you do with JPEG export
- Preview keeps the original WebP untouched and creates a separate PNG file
- For transparent WebP images, check the exported PNG in your design tool to confirm transparency is preserved correctly
- If you need to edit the PNG and then re-optimise it for the web, run it through our Image Compressor after editing to reduce the file size
How to Convert WebP to PNG on iPhone
iPhones running iOS 14 and later can display WebP images. But the Photos app doesn’t offer format conversion — you need a browser-based tool to convert WebP to PNG on iPhone.
Using Safari on iPhone
- Open Safari on your iPhone
- Go to imageconvertertools.com/webp-to-png
- Tap the upload area
- Select your WebP file from Photos or Files
- Tap Convert
- Download the PNG — it saves to your Files app
Works on all iPhone models running iOS 14 and later. No app download needed.
Transparency on iPhone
If your WebP image has a transparent background, the converted PNG preserves that transparency. When you open the PNG in Files on iPhone, you’ll see the checkerboard pattern indicating a transparent background — that’s correct and will work in any app that supports transparent images.
Tips for iPhone Users
- The converted PNG saves to your Files app — tap Share > Save Image to move it to your Photos library
- For multiple WebP files, tap and select all of them when uploading to convert them in one batch
- Bookmark the converter in Safari for quick one-tap access next time
How to Convert WebP to PNG on Android
Android supports viewing WebP images natively. But converting WebP to PNG requires a browser-based tool since most Android gallery apps don’t offer format conversion.
Using Chrome on Android
- Open Chrome on your Android phone
- Go to imageconvertertools.com/webp-to-png
- Tap upload and select your WebP file from your gallery or Files
- Tap Convert
- Download the PNG to your Downloads folder
Works on every Android device regardless of brand or Android version. The PNG saves to your Downloads folder — use your file manager to move it to your gallery if needed.
Tips for Android Users
- Select multiple WebP files at once in the upload picker to batch convert them all together
- If your WebP is in Google Drive, you can select it directly from the file picker
- Downloads go to the Downloads folder — Samsung Gallery and Google Photos can be set to also show files from Downloads
How to Convert WebP to PNG on Chromebook
ChromeOS handles WebP viewing natively in the Chrome browser and the Files app. But the Files app doesn’t convert formats — use the browser method.
- Open Chrome on your Chromebook
- Go to imageconvertertools.com/webp-to-png
- Upload your WebP from Downloads or Google Drive
- Convert and download the PNG
The PNG downloads to your Downloads folder and can be opened directly in the Chrome image viewer or any ChromeOS-compatible app.
How to Convert WebP to PNG in Photoshop
Adobe Photoshop supports WebP natively in version 23.2 and later (released early 2022). If you’re on a current Creative Cloud subscription, you can open and convert WebP files directly in Photoshop.
Opening WebP and Saving as PNG
- Go to File > Open and select your WebP file
- Photoshop opens the WebP image
- Go to File > Save As
- Select PNG from the format list
- Click Save
- Choose your PNG settings — Compression level 6 is a good balance of file size and speed
- Click OK
Using Export As
- Go to File > Export > Export As
- Select PNG as the format
- Check Transparency if your image has a transparent background and you want to keep it
- Click Export All
- Choose your save location
What If Your Photoshop Can’t Open WebP?
If you’re on an older version of Photoshop (before 23.2), WebP files won’t open. Two options — update Photoshop through Creative Cloud (included in your subscription), or use the online converter to get a PNG first, then open that PNG in Photoshop.
How to Convert WebP to PNG for Print
Print services need high-quality, lossless files. PNG is perfect for this because it’s completely lossless — no pixel data is removed, no quality is compromised. When converting WebP to PNG for print:
- Use the best WebP source that you have because the final PNG quality depends on the quality of the WebP image that you will convert to PNG.
- Conversion can be done either using Preview on Mac or the online converter; both give lossless PNGs.
- Verify the DPI value of the resulting PNG. If your PNG is meant for print, you should have a value of 300 DPI because most web WebP images have 72 DPI which is OK for screen but not for print.
- If you have the opportunity, use the source PNG or raw photo that was converted into WebP instead of the WebP.
How to check and change DPI on Mac:
- Open the PNG in Preview
- Go to Tools > Adjust Size
- Make sure the Resolution field shows 300 pixels/inch
- Uncheck Resample Image before changing — this changes the DPI without affecting pixel count
How to Convert Multiple WebP Files to PNG at Once
Batch Conversion Online
Upload all your WebP files in a single go with our online tool. You can choose several files while uploading; use Ctrl on Windows or Command on Mac. Download all your PNG files in one go at the end of conversion.
It works well on any device and converts multiple files as easily as one file. This is the fastest way to do batch conversion without using any software.
Batch Conversion on Mac
Use Preview as described above — open all WebP files together, select all in the sidebar, Export Selected Images as PNG. Processes all files simultaneously with no limit on batch size.
Batch Conversion on Windows
The online converter is the best batch option on Windows. Windows has no built-in batch converter for WebP to PNG without third-party software.
Does Converting WebP to PNG Lose Quality?
No — this is one of the best things about WebP to PNG conversion. PNG is a lossless format, which means it stores every pixel exactly. Converting WebP to PNG doesn’t remove any image data.
Here’s what actually happens:
- Lossless WebP to PNG: Pixel-perfect conversion — the PNG is identical to the original image
- Lossy WebP to PNG: The PNG preserves the WebP image exactly as it is — any quality loss that happened when the image was first compressed to lossy WebP is already done, but no further quality loss occurs during the WebP to PNG conversion
The PNG file will be larger than the WebP — that’s expected. PNG needs more bytes to store the same image because it doesn’t use WebP’s efficient compression. But the visual quality is identical.
This is why WebP to PNG is the right direction for editing and working files — you’re not losing anything by converting to PNG, just getting a universally compatible format for your workflow.
WebP to PNG vs WebP to JPG — Which Should You Choose?
Both are common conversions but they serve different purposes. Here’s how to decide:
| Situation | Convert to PNG | Convert to JPG |
|---|---|---|
| Need to keep transparency | ✅ Yes | ❌ No — JPG fills transparency with white |
| Editing in design software | ✅ Yes | ⚠️ OK but PNG is better for re-editing |
| Sending by email | ⚠️ OK but larger file | ✅ Better — smaller file, universal |
| Sending to print | ✅ Yes | ✅ OK at high quality |
| Uploading to platform | Depends on platform | ✅ More universally accepted |
| Keeping file size small | ❌ PNG is large | ✅ JPG is smaller |
| Maximum quality working copy | ✅ Yes | ⚠️ Loses a little quality |
The short version — use PNG when transparency or lossless quality matters. Use JPG when you need a small file and compatibility is the only goal.
Common WebP to PNG Mistakes to Avoid
Not keeping the original WebP. Always keep the original WebP file as a backup. The PNG is larger and you may want the compact WebP version for web use later. Storage is cheap — don’t delete originals.
Converting WebP to PNG and then compressing the PNG heavily. PNG compression is always lossless — no matter how much you compress a PNG, it stays lossless. But if you then convert that compressed PNG to JPG, quality is lost. Keep your workflow clean — WebP to PNG for editing, PNG to WebP for web publishing.
Ignoring DPI for print use. Web images are typically saved at 72 DPI. Print needs 300 DPI. Converting WebP to PNG doesn’t automatically fix the DPI. Check and adjust it if the PNG is going to print.
Expecting PNG to be smaller than WebP. PNG will always be larger than an equivalent WebP. This is normal — PNG is not designed to be small, it’s designed to be lossless. If file size is your priority, convert to JPG instead or keep the WebP.
Using PNG for photographs that go back on a website. PNG is the wrong format for photographs on websites — the file sizes are unnecessarily large. If you’re editing a photo and need to put it back on your website, edit as PNG and then convert to WebP before uploading. Our article on how to convert PNG to WebP covers the full conversion process.
Frequently Asked Questions
1. How do I convert WebP to PNG for free?
Go to imageconvertertools.com/webp-to-png, upload your WebP file, and download the PNG. Completely free — no sign-up, no watermarks, no file count limits. Works on any device with a browser.
2. Does converting WebP to PNG lose quality?
No. PNG is lossless — it stores every pixel exactly as it was. Converting WebP to PNG doesn’t remove any image data. The PNG file will be larger than the WebP but the visual quality is identical. This is why PNG is the right format for editing and working files.
3. How do I convert WebP to PNG on Mac?
Open the WebP file in Preview — double-click it. Go to File > Export, select PNG from the Format dropdown, and click Save. For multiple files, select all in Preview, go to File > Export Selected Images, and choose PNG.
4. How do I convert WebP to PNG on Windows?
Use the online converter in Chrome or Edge — go to imageconvertertools.com/webp-to-png, upload your file, and download the PNG. Alternatively, install Web Media Extensions from the Microsoft Store to open WebP files in Windows Photos, then save as PNG.
5. Does WebP to PNG keep the transparent background?
Yes. Both WebP and PNG support transparency. When you convert a WebP image with a transparent background to PNG, the transparency is preserved perfectly. The PNG will display the transparent areas as transparent — shown as a checkerboard pattern in most image viewers.
6. Why is the PNG larger than the original WebP?
Because PNG is a lossless format that stores every pixel without compression. WebP uses more efficient compression so it stores the same image in less space. A larger PNG file after conversion is completely normal and expected — it doesn’t mean something went wrong.
7. How do I convert multiple WebP files to PNG at once?
Select all your WebP files when uploading to the online converter — they all convert together. On Mac, open all WebP files in Preview, select all in the sidebar, and use File > Export Selected Images with PNG selected. Both methods handle large batches efficiently.
8. Can I convert WebP to PNG on iPhone?
Yes. Open Safari, go to imageconvertertools.com/webp-to-png, tap upload, select your WebP from Files or Photos, and download the PNG to your Files app. Works on all iPhones running iOS 14 and later.
9. What’s better for print — WebP or PNG?
PNG is better for print. Print services don’t accept WebP files and PNG’s lossless quality is exactly what professional print workflows need. Convert WebP to PNG before sending to any print service. Check the DPI is set to 300 after converting — web images are typically 72 DPI.
10. Should I convert WebP to PNG or JPG?
It depends on what you need. Convert to PNG when you need to keep transparency, edit the image without quality loss, or send to a print service. Convert to JPG when you just need a small, compatible file for email or a platform that requires JPG. Our article on best image format for websites explains the differences between all formats in detail.
Conclusion
PNG is the correct format to use for WebP to PNG conversion when editing images, printing the images, using the images for design programs or when the image needs a transparent background. The PNG format is lossless, meaning that there will be no reduction in quality during the conversion process, and it is supported by all applications and printers.
The online converter is the quickest way to convert on any device, where uploading the WebP file and downloading the PNG file takes less than one minute. The Mac Preview program is able to handle one file or multiple files at once without additional software. The Web Media Extensions on Windows enable WebP support.
Use our free WebP to PNG Converter to convert any WebP file to PNG right now — no sign-up, no watermarks, transparent backgrounds preserved, multiple files at once, completely free on every device.