PNG files are high-quality lossless format pictures, but they are huge compared to their JPG equivalents. In fact, the same image when saved in PNG format would be about 3-5 times larger than the same picture in JPG format. Converting PNG into JPG not only reduces the size of your picture, but also allows you to share your images easily, since many services do not support PNG. Find out how to convert your PNG to JPG quickly and effortlessly.
Why Convert PNG to JPG?
While PNG and JPG are two very common picture formats, there are distinct differences between the two. PNG maintains all the pixels from the original picture with no information being thrown away. It makes the format perfect for logos and other graphics but unnecessary for photos.
On the other hand, JPG uses an intelligent compression technique which allows getting rid of information that can be not noticed by human eyes.Here’s when converting PNG to JPG actually makes sense:
- Your PNG file is too large to email or upload
- A platform or app only accepts JPG files
- You want faster loading images on your website
- You’re sharing photos and don’t need a transparent background
- You need to save storage space on your device
One important thing to know before converting — JPG does not support transparent backgrounds. If your PNG has a transparent background, converting to JPG will fill that transparency with white. If you need to keep transparency, stay with PNG or switch to WebP instead.
PNG vs JPG — Key Differences
Before you convert, it helps to understand what actually changes between these two formats.
| Feature | PNG | JPG |
|---|---|---|
| Compression | Lossless | Lossy |
| Transparency | Supported | Not supported |
| File Size | Larger | Smaller |
| Quality Loss | None | Slight (at high compression) |
| Best For | Logos, graphics, editing | Photos, web images, email |
| Print Support | Yes | Yes |
| Browser Support | Universal | Universal |
| Editing Repeatedly | Safe — no quality loss | Degrades slightly each save |
The bottom line is simple. Use PNG when you need perfect quality and transparency. Use JPG when you need a smaller file and compatibility is more important than pixel-perfect quality.
How to Convert PNG to JPG Free Online
The Fastest Method — Works on Any Device
Using a free online converter is the quickest way to convert PNG to JPG. It works on Windows, Mac, iPhone, Android, and Chromebook — no software needed, no account required.
Here’s how to do it using our free tool:
- Go to imageconvertertools.com/png-to-jpg
- Click the upload button or drag your PNG file into the box
- The tool converts automatically
- Click Download to save your JPG file
You can upload multiple PNG files at once and convert them all together. The tool processes everything in seconds and lets you download all your JPG files in one go. Your files are deleted from the server automatically after conversion.
Pros:
- Works on every device with a browser
- No software installation needed
- Converts multiple files at once
- Free with no watermarks and no sign-up
- Results in under 10 seconds
Cons:
- Needs internet connection
- Less quality control compared to desktop software
- Not ideal for very sensitive or private images
How to Convert PNG to JPG on Windows
Using Paint — Built Into Every Windows PC
Paint comes pre-installed on every Windows computer and it handles PNG to JPG conversion in just a few clicks. You don’t need to download anything.
- Right-click your PNG file
- Select Open with > Paint
- Go to File > Save As
- Choose JPEG Picture from the list
- Name your file and click Save
That’s it. Paint saves a JPG version of your PNG. The original PNG stays untouched.
One thing to know: Paint saves JPG at a fixed quality level with no slider to adjust it. For most everyday images this works fine. But if you need precise control over output quality — especially for product photos or professional images — use the online tool instead.
Using Windows Photos App on Windows 10 and 11
The Photos app on Windows gives you a slightly smoother experience than Paint.
- Open your PNG in the Photos app — double-click the file
- Click the three-dot menu at the top right
- Select Save As
- Change the file type to JPEG in the dropdown
- Click Save
This works the same way as Paint in terms of quality — no quality slider, fixed output. For single files it’s quick and convenient.
Batch Converting PNG to JPG on Windows
Windows doesn’t have a built-in batch converter for PNG to JPG. If you have multiple PNG files to convert at once, the online converter is your best option on Windows. Upload all your PNG files at once, convert them together, and download all the JPG files in one batch. Much faster than doing them one by one in Paint.
How to Convert PNG to JPG on Mac
Using Preview — The Best Built-In Option
Preview is built into every Mac and it’s one of the best free image conversion tools available on any operating system. Unlike Paint on Windows, Preview gives you a quality slider so you can control exactly how much the JPG gets compressed.
- Open your PNG file in Preview — double-click it or right-click and choose Open With > Preview
- Go to File > Export
- Click the Format dropdown
- Select JPEG
- Use the Quality slider — set it to around 80 to 85 for a good balance of quality and file size
- Click Save
The quality slider is what makes Preview genuinely useful here. At 85 percent quality, the JPG looks identical to the original PNG on screen but the file is dramatically smaller. At 50 percent, you start to see visible compression issues. Stay between 75 and 90 for the best results.
Batch Converting PNG to JPG on Mac
Preview handles batch conversion natively — a feature most Mac users never discover.
- Select all your PNG files in Finder
- Right-click and choose Open With > Preview
- In Preview, press Command + A to select all images in the sidebar
- Go to File > Export Selected Images
- Click Options and select JPEG as the format
- Set the quality level
- Choose your destination folder
- Click Choose
All selected PNG files convert to JPG simultaneously. This works just as fast for 50 files as it does for 2. It’s the fastest free batch PNG to JPG method on Mac.
Tips for Converting PNG to JPG on Mac
- Also check the quality level as the default level in the preview mode is quite low.
- Note the estimated size while using the slider so as to find a suitable balance.
- You should keep your PNG files as the moment you exit without undoing any changes the conversion process is complete.
- In case of graphics that have sharp outlines like logos, you should use a quality level of 90 or above otherwise the outlines will appear blurred.
How to Convert PNG to JPG on iPhone
iPhones don’t have a built-in PNG to JPG converter in the Photos app. The Photos app can display PNG files but it doesn’t let you export them as JPG directly.
The easiest method on iPhone is using a browser-based tool.
Using a Browser on iPhone
- Open Safari on your iPhone
- Go to imageconvertertools.com/png-to-jpg
- Tap the upload area
- Select your PNG from Photos or Files
- Tap Convert
- Download the JPG — it saves to your Files app
This works on all iPhone models without any app download. The converted JPG saves to your Files app and you can share it from there to any app, message, or email.
Using iPhone’s Share Feature for Quick Conversion
If you just want a simple conversion once without using the browser tool, there are occasions where you can directly convert PNG files into JPG files by way of the Share function when sharing your images through some of those apps. For example, when you share your PNG image file from the Mail app, iOS will occasionally give you size choices which actually become JPG files.
Tips for iPhone Users
- iPhone screenshots will automatically save in PNG format — if you have to share a screenshot in JPG format, use the browser tool to do so
- The JPG file will be saved in Files, but not directly into the Photos app — you can save the JPG file in Photos using the “Share > Save Image” function
- In case you have to do this often for your iPhone, bookmarking the tool in Safari means just one click for access next time
How to Convert PNG to JPG on Android
Android handles this similarly to iPhone — there’s no universal built-in PNG to JPG converter across all devices, though some manufacturer gallery apps have basic format options.
Using a Browser on Android
- Open Chrome on your Android phone
- Go to imageconvertertools.com/png-to-jpg
- Tap the upload area and select your PNG from your gallery or Files
- Tap Convert
- Download the JPG to your Downloads folder
The converted file goes to your Downloads folder. From there you can share it, move it to your gallery, or upload it anywhere.
Samsung Gallery App
Some Samsung phones include a Save As feature in the Gallery app that lets you save images in different formats. If you’re on a Samsung device:
- Open the PNG in Samsung Gallery
- Tap the three-dot menu
- Look for Save as or Details
- Some versions allow format selection here
This varies by Samsung model and One UI version. If you don’t see a format option, the browser method works on every Android device regardless of brand or version.
How to Convert PNG to JPG on Chromebook
Chromebooks run ChromeOS which doesn’t have a native PNG to JPG conversion tool. The browser method works perfectly on Chromebook since Chrome is the default browser.
- Open Chrome on your Chromebook
- Go to the PNG to JPG converter
- Upload your PNG file from Downloads or Google Drive
- Convert and download the JPG
The JPG downloads to your Downloads folder. If your PNG is stored in Google Drive, you can select it directly from the file picker when uploading to the converter.
How to Convert PNG to JPG in Photoshop
If you use Adobe Photoshop, converting PNG to JPG gives you the most control over output quality of any method.
Using Save As in Photoshop
- Open the PNG file in Photoshop
- Go to File > Save As (or File > Save a Copy in newer versions)
- Change the format to JPEG
- Click Save
- A quality dialog appears — set quality between 8 and 10 out of 12 (equivalent to about 80 to 90 percent)
- Click OK
Using Export As in Photoshop
Export As gives you more preview control than Save As.
- Go to File > Export > Export As
- Select JPG from the format dropdown
- Adjust the quality slider
- Watch the estimated file size update in real time
- Click Export All and choose your save location
Tips for Photoshop PNG to JPG Conversion
- Photoshop Quality 8/12 equals about 80% quality, which is an excellent point of reference for most pictures
- Quality 10-12 is for those who need the highest quality of their images; for instance, product photos or professional works
- Export As should be chosen instead of Save As if the estimated file size is required prior to the saving process
- In case the PNG picture has a transparent background, Photoshop saves it as white when converted into JPG; thus, the image should be flattened first
How to Convert PNG to JPG in Google Drive
You can convert PNG to JPG through Google Drive using Google Slides as an intermediary — though this method is less precise than dedicated tools.
- Upload your PNG to Google Drive
- Right-click the PNG and select Open with > Google Slides
- The image opens as a slide
- Go to File > Download > JPEG image
- Google downloads the slide as a JPG
This method works but has limitations — it adds white borders around the image matching the slide dimensions and you have no control over JPG quality. For clean conversions, the online tool or Preview on Mac are better options.
How to Convert Multiple PNG Files to JPG at Once
Batch Conversion Online
Our online conversion tool allows you to upload more than one file. When you upload your PNG files, make sure that you select all the files at once by pressing and holding Ctrl key (Windows) or Command key (Mac) for batch selection. You will be able to download all the converted files at once.
This is the quickest way to convert PNG images into JPG format in batches and it works across all devices and operating systems.
Batch Conversion on Mac
Use Preview’s Export Selected Images feature as described in the Mac section above. Open all PNG files in Preview together, select all in the sidebar, export as JPEG. All files convert simultaneously with no limit on how many you can process at once.
Batch Conversion on Windows
Windows doesn’t have a strong built-in batch option. The online converter is the most practical choice for batch converting on Windows — upload all files at once and download all JPGs together.
Does Converting PNG to JPG Reduce Quality?
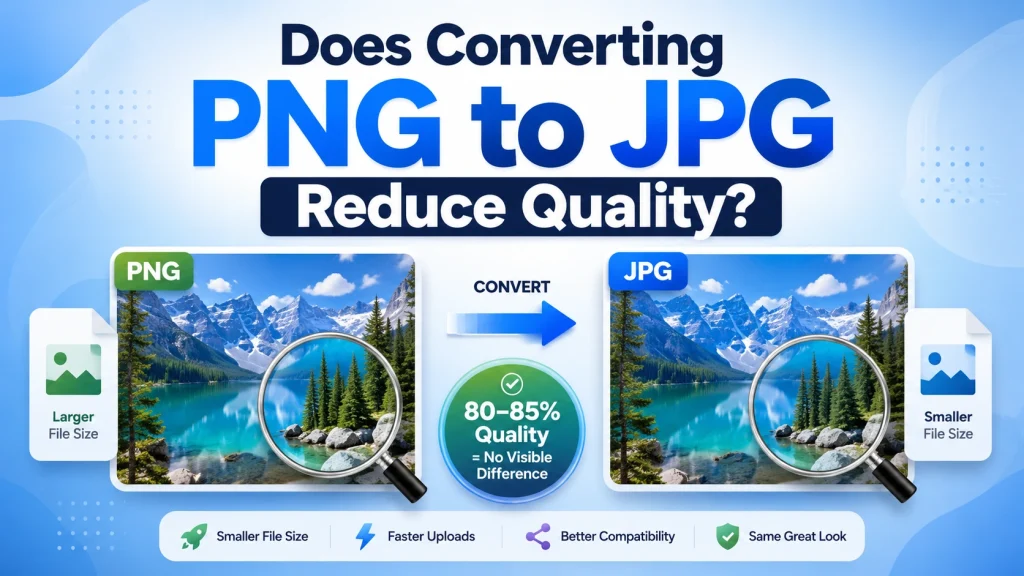
This is the most common question people ask about this conversion — and the honest answer is yes, slightly, because JPG uses lossy compression. But at the right quality settings, the difference is invisible at normal viewing sizes.
Here’s what actually happens at different quality levels:
| Quality Setting | Visible Quality | File Size Reduction |
|---|---|---|
| 90 – 95% | Visually identical to original | 60 – 70% smaller than PNG |
| 80 – 85% | Invisible difference on screen | 70 – 80% smaller than PNG |
| 70 – 75% | Very minor, barely visible | 80 – 85% smaller |
| 60% and below | Visible artefacts appear | 85 – 90% smaller |
For most everyday uses — website images, social media, email — 80 to 85 percent quality is the sweet spot. The file is dramatically smaller than the original PNG and looks identical on screen.
The quality difference only becomes visible if you zoom into the image to 200 percent or above and specifically look for it. At normal viewing sizes on a screen, 85 percent JPG quality looks the same as the original PNG.
When Should You NOT Convert PNG to JPG?
Converting PNG to JPG is not always the right move. Here are the situations where you should keep the PNG.
The image has a transparent background. JPG doesn’t support transparency. Converting will fill the transparent areas with white. If you need to keep transparency, stay with PNG or convert to WebP instead.
The image contains text or sharp graphics. JPG compression creates visible blurring around sharp edges and text at most quality settings. Logos, screenshots with text, and diagrams look noticeably worse as JPG compared to PNG. Keep these as PNG.
You plan to edit the image again. Every time you save a JPG, it loses a little more quality. If this image is a working file you’ll edit and re-save multiple times, keep it as PNG until you’re completely done editing. Convert to JPG only at the final step.
The image is for print. Both PNG and JPG work for print, but PNG’s lossless quality is better for professional print work. If the image is going to a print service, keep it as PNG or high-quality JPG at 90 percent and above.
PNG to JPG — Which Method Is Best for You?
Here’s a quick decision guide based on your situation:
| Your Situation | Best Method |
|---|---|
| Quick one-off conversion, any device | Online converter |
| Multiple files at once, any device | Online converter (batch upload) |
| On Mac, want quality control | Preview — Export as JPEG |
| On Mac, multiple files | Preview — Export Selected Images |
| On Windows, single file | Paint or Photos app |
| On iPhone, no app install | Safari + online converter |
| On Android | Chrome + online converter |
| Professional work, full control | Photoshop |
| Already using Google tools | Google Drive + Slides method |
Tips for Getting the Best PNG to JPG Conversion Results
These tips make a real difference to your conversion results — most guides skip over them entirely.
Always convert from the original PNG. If you have the original high-quality PNG, convert from that. Don’t convert from a PNG that was already a converted or compressed version of something else. The quality of the JPG can only be as good as the PNG you start with.
Set quality between 80 and 85 percent. This is the sweet spot for most images. You get file sizes that are 70 to 80 percent smaller than the original PNG with no visible quality difference on screen. Going lower saves a little more space but introduces visible issues. Going higher saves more quality but reduces the file size benefit.
Check the result at 100 percent zoom. Before using the converted JPG, view it at full 100 percent zoom and check for compression artefacts — especially around any text, sharp lines, or detailed areas. If you see blurring or colour fringing, re-convert at a higher quality setting.
Don’t re-convert JPG to JPG. If you need to adjust the JPG after converting, always go back to the original PNG and convert again with the new settings. Re-compressing an already-compressed JPG compounds the quality loss.
Keep the original PNG as a backup. Always keep the original PNG file somewhere safe. You might need it for print, for editing again later, or for use in a design tool. Storage is cheap — don’t delete originals.
Frequently Asked Questions
1. How do I convert PNG to JPG for free?
Use a free online converter — go to imageconvertertools.com/png-to-jpg, upload your PNG, and download the JPG. It’s completely free with no watermarks, no sign-up, and no limits on file count. Works on any device with a browser.
2. Does converting PNG to JPG lose quality?
Yes, slightly — JPG uses lossy compression. But at quality settings of 80 to 85 percent, the quality difference is invisible at normal screen sizes. The file will be 70 to 80 percent smaller than the original PNG with no visible change on screen. Only below 70 percent quality do visible artefacts start to appear.
3. How do I convert PNG to JPG on iPhone?
Open Safari, go to imageconvertertools.com/png-to-jpg, tap upload, select your PNG from Photos or Files, tap Convert, and download the JPG. It saves to your Files app. No app installation needed — works on all iPhone models.
4. How do I convert PNG to JPG on Windows 10 and 11?
Right-click the PNG file, select Open with > Paint, go to File > Save As, choose JPEG Picture, and click Save. For multiple files, the online converter is faster — upload all PNGs at once and download all JPGs together.
5. How do I convert PNG to JPG on Mac?
Open the PNG in Preview, go to File > Export, select JPEG as the format, set quality to 80 to 85 percent, and click Save. For multiple files, open all PNGs in Preview, select all in the sidebar, go to File > Export Selected Images, and choose JPEG.
6. Will converting PNG to JPG remove the transparent background?
Yes. JPG doesn’t support transparency. Any transparent areas in your PNG will become white in the JPG. If you need to keep transparency, use PNG or WebP instead. If you want a different background colour than white, fill the transparent area with your chosen colour before converting.
7. What is the best quality setting for PNG to JPG conversion?
80 to 85 percent quality is the sweet spot for most images. This gives you a file that’s 70 to 80 percent smaller than the original PNG with no visible quality difference on screen. Use 90 percent or above for professional product photos or print-quality images where quality is critical.
8. How do I convert multiple PNG files to JPG at once?
Use the online converter — upload all your PNG files at once and download all the converted JPGs together. On Mac, use Preview’s Export Selected Images feature — select all PNG files, open in Preview, select all in the sidebar, and export as JPEG simultaneously.
9. Can I convert PNG to JPG on Android?
Yes. Open Chrome, go to the PNG to JPG converter, tap upload, select your PNG from your gallery, tap Convert, and download the JPG to your Downloads folder. Works on all Android devices regardless of brand or Android version.
10. Is PNG or JPG better for websites?
For most website images — photographs, blog images, product photos — JPG or WebP is better because of smaller file sizes and faster loading. PNG is better for logos, icons, screenshots with text, and any image with a transparent background. For the best web performance in 2026, WebP beats both — it’s smaller than JPG and PNG at the same quality. Our article on best image format for websites covers exactly when to use each format.
Conclusion
Converting PNG to JPG is one of the most common image tasks — and it’s quick and easy once you know the right method for your device. The online converter works on everything with a browser. Preview on Mac gives you the most control with its quality slider. Paint on Windows handles quick single-file conversions. And the browser method works perfectly on iPhone and Android.
Remember the key rules. Set quality between 80 and 85 percent for the best balance. Don’t convert if the image has transparency — use WebP instead. Keep the original PNG as a backup. Check the result at 100 percent zoom before using it.
Use our free PNG to JPG Converter to convert any PNG to JPG in seconds — no sign-up, no watermarks, supports multiple files, completely free on every device.